4.
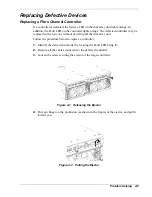
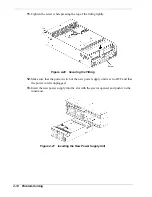
Loosen the screw of the ejector on the defective power supply.
Figure 4-13 Releasing the Ejector
5.
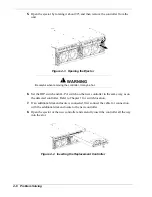
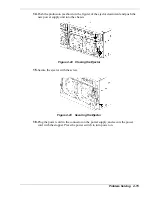
Put your finger on the protrusion (as shown in the figure) of the ejector, and lift it
up.
Figure 4-14 Pulling the Ejector
6.
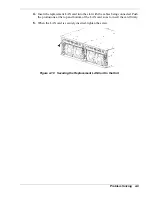
When the ejector is rotated about 90
o
, remove the defective power supply unit.
Figure 4-15 Removing the Defective Power Supply Unit
Problem Solving 4-11
Summary of Contents for VERSA S1300 Series
Page 1: ... U s e r s G u i d e NEC Storage S1300 ...
Page 2: ......
Page 4: ......
Page 8: ...vi Contents ...
Page 18: ...xvi Using This Guide ...
Page 19: ...1 System Overview Overview System Chassis System Features ...
Page 54: ...A B Figure 2 3 Installing the Rack Mounting Kit 2 6 Setting Up the System ...
Page 73: ...3 Upgrading the System Overview Adding Hard Disk Drives Adding Disk Enclosures ...
Page 86: ...3 14 Upgrading the System ...
Page 114: ...A 8 Appendix ...
Page 117: ...xx ...
Page 118: ... ...


