System Configuration and Setup 2-21
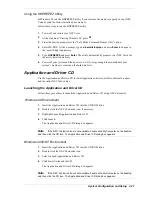
Using the HDPREPEZ Utility
In Windows 98, run the HDPREPEZ utility if you increase the memory capacity in your NEC
Versa beyond the factory installed base memory.
Follow these steps to run the HDPREPEZ utility.
1.
Power off and restart your NEC Versa.
2.
At the statement “Starting Windows 98” press
F8
.
3.
From the Startup menu, select the “Safe Mode Command Prompt Only” option.
4.
Enter MS-DOS. At the c: prompt, type
cd \necutils\hdprep
and press
Enter
to change to
the \necutils\hdprep directory.
5.
Type
HDPREPEZ
and press
Enter
. The utility automatically prepares your NEC Versa for
the newly installed memory.
6.
Power off your system and then power on. A file, large enough to accommodate your
system’s memory is created on the hard disk drive.
Application and Driver CD
Use the Application and Driver CD to install applications, drivers, utilities, Internet browsers,
and the online NEC Info Center.
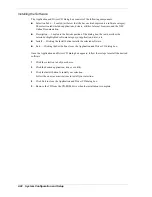
Launching the Application and Driver CD
Follow these procedures to launch the Application and Driver CD using NEC Customize.
Windows 98 Environment
1.
Insert the Application and Driver CD into the CD-ROM drive.
2.
Double click the NEC Customize icon, if necessary.
3.
Highlight Launch Application and Driver CD.
4.
Click launch.
The Application and Driver CD dialog box appears.
Note
If the NEC Customize icon is not available, double click My Computer on the desktop
and then click the CD icon. The Application and Driver CD dialog box appears.
Windows 2000/NT Environment
1.
Insert the Application and Driver CD into the CD-ROM drive.
2.
Double click the NEC Customize icon.
3.
Select Launch Application and Driver CD.
4.
Click Install to launch the CD.
The Application and Driver CD dialog box appears.
Note
If the NEC Customize icon is not available, double click My Computer on the desktop
and then click the CD icon. The Application and Driver CD dialog box appears.
Summary of Contents for VXI Series
Page 43: ...3 Disassembly and Reassembly Required Tools and Equipment Disassembly Reassembly...
Page 67: ...4 System Board Layout Audio Board DC DC Board I O Board Main Board...
Page 70: ...5 Illustrated Parts Breakdown Illustrated Parts Breakdown Parts List...
Page 71: ...5 2 Illustrated Parts Breakdown Illustrated Parts Breakdown...
Page 77: ...7 Troubleshooting Quick Troubleshooting Helpful Questions...
Page 86: ...9 Specifications System Components Connector Locations Memory Map Interrupt Controllers...


