Wall/Floor Mount the Battery Box
6
XN120 Battery Box Guide
2- Wall/Floor Mount the Battery Box
The battery box can be mounted on the floor or a suitable shelf and secured to the wall or mounted directly
onto the wall.
!
If you are wall mounting the battery box you must ensure the screws and wall fixings used are suitable for the
weight of the battery box (5.2Kg when the batteries are installed). The screws supplied are suitable for wall
mounting the battery box onto a wooden board only. If you are mounting the battery box directly onto a
brick/block or plaster board wall you must provide suitable wall fixings and screws.
1
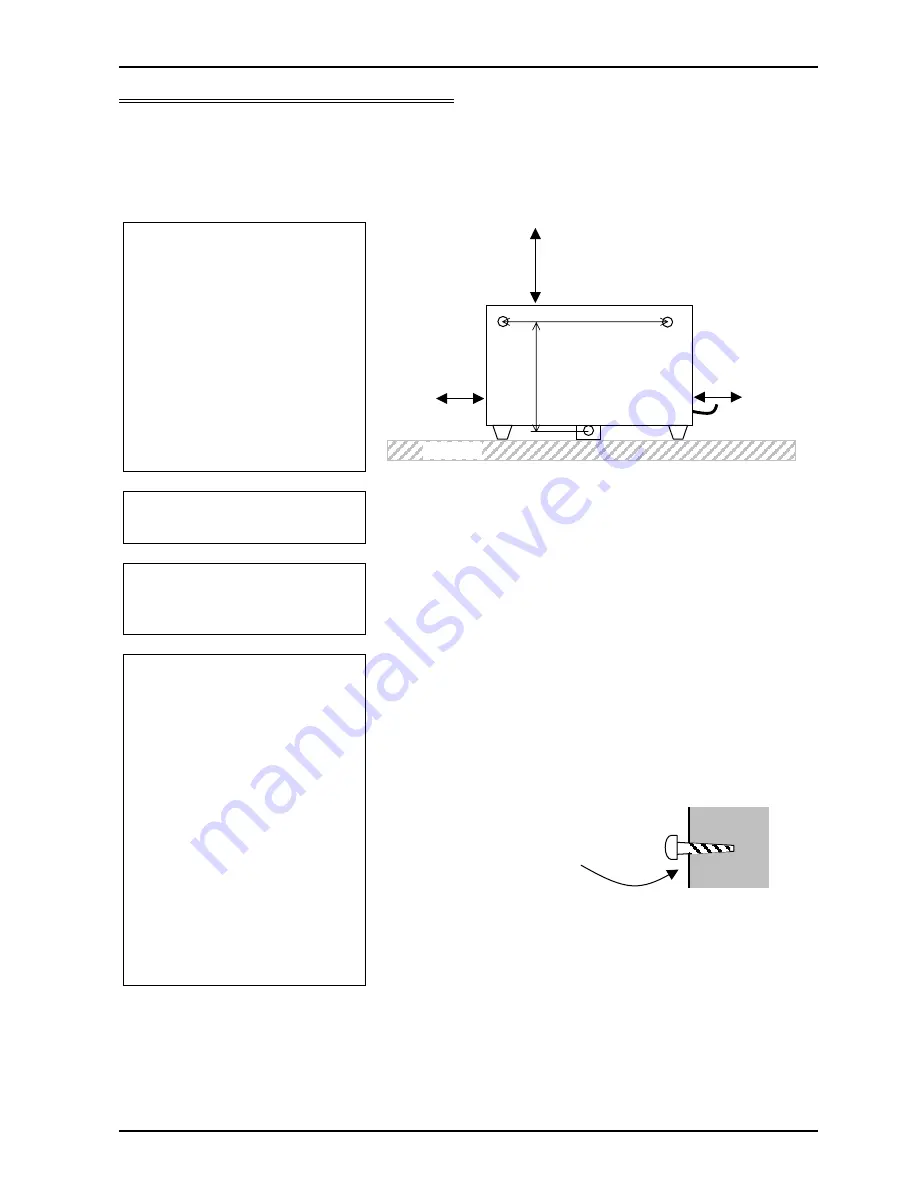
You will need a minimum of
424mm x 149mm (W x H) wall
space for each battery box.
The battery box is 384mm x
99mm (W x H).
Ensure the battery box is
within 2 metres of the XN120
unit; the connecting cable is
2.5 metres long.
2
Loosen the 4 screws on the
front of the battery box and
remove the front cover.
3a Floor/Shelf mounting
Position the battery box on the floor/shelf.
Secure to the wall using two screws through holes marked A in the
diagram above.
Fit suitable wall plugs if necessary.
OR
3b Wall mounting
Loosen the two screws and the back of the battery box and lower the
metal bracket to reveal hole B. Re-tighten the two screws.
Mark the three holes (A and B), you may need to use the battery box
as the hole template.
Fit suitable wall plugs if necessary.
Fit two screws into holes A, use suitable length/type of screws.
Leave approximately 3~5mm of the screw
protruding from the wall.
Hook the battery box onto the two screws.
Tighten the two screws and secure the battery box by fitting a third
screw into hole B.
Have 20mm on
the right side for
the connecting
cable.
Have a nominal
20mm to the left
Have 50 mm above the
box to remove the lid
280mm
155mm
Floor/Shelf
A
A
B


