background image

14. Never place anything on the pedal.

15. Never use the machine if the air vents are blocked, keep the air vents of the 

machine and the foot pedal free from dust, fusel and leftovers.

16. The machine must only be used with designated foot controller, in order 

to avoid a hazard. If the foot controller is damaged or broken, it must be 

UHSODFHGE\WKHPDQXIDFWXUHURULWVVHUYLFHDJHQWRUDVLPLODUO\TXDOL¿HG

person.

17. The power cord of the foot controller can not be replaced. If the power cord is 

damaged the foot controller must be disposed of.

18. The sound pressure level at normal operation is smaller than 75dB(A).

19. Do not dispose of electrical appliances as unsorted municipal waste, use 

separate collection facilities.

20. Contact your local government for information regarding the collection 

systems available.

,IHOHFWULFDODSSOLDQFHVDUHGLVSRVHGRILQODQG¿OOVRUGXPSVKD]DUGRXV

substances can leak into the groundwater and get into the food chain, 
damaging your health and well-being.

22. When replacing old appliances with new ones, the retailer is legally obligated 

to take back your old appliance for disposal at least for free of charge.

23. The appliance is not to be used by persons (including children) with reduced 

physical, sensory or mental capabilities, or lack of experience and knowledge, 
unless they have been given supervision or instruction. (For outside Europe)

24. Children being supervised not to play with the appliance. (For outside 

Europe)

SAVE THESE INSTRUCTIONS 

This sewing machine is intended for household use only. 

Be sure to use the sewing machine in the temperature range from 5ºC to 40ºC. 
If the temperature is excessively low, the machine can fail to operate normally.

IV

Summary of Contents for Q421A

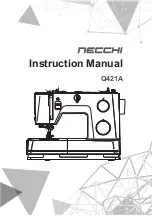
Page 1: ...Instruction Manual Q421A...

Page 2: ......

Page 3: ...dren aged from 8 years and above and persons with reduced physical sensory or mental capabilities or lack of experience and knowledge if they have been given supervision or instruction concerning use...

Page 4: ...nment for information regarding the collection systems available I HOHFWULFDO DSSOLDQFHV DUH GLVSRVHG RI LQ ODQG OOV RU GXPSV KD DUGRXV substances can leak into the groundwater and get into the food c...

Page 5: ...g needle fabric thread 15 Changing the presser foot 16 Remove the presser foot 16 Attach the presser foot 16 Remove and insert the presser foot holder 16 Insert the edge quilting guide 16 To raise or...

Page 6: ...Gathering 38 Smocking 39 Free motion darning embroidery and monogramming 40 Preparation for embroidering and monogramming 40 Darning 41 Embroidery 41 Monogramming 41 Quilting 42 Using the edge quiltin...

Page 7: ...Machine Introduction...

Page 8: ...Needle plate page 48 13 Needle clamp screw page 14 14 Presser foot page 16 15 Horizontal spool pin page 11 16 Bobbin winder spindle page 8 17 Second spool pin hole page 46 18 Handwheel 19 Buttonhole...

Page 9: ...dle 3x single needles 80 11 90 14 100 16 8 Spool holder 9 Bobbin 4x 1x already installed 10 L screwdriver 11 Spool pin felt 12 Second spool pin 13 Twin needle 14 Non stick foot 15 Extension table 16 S...

Page 10: ...ce has a polarized plug one blade is wider than the other to reduce the ULVN RI HOHFWULFDO VKRFN WKLV SOXJ ZLOO W LQ D polarized outlet only one way If the plug does QRW W IXOO LQ WKH RXWOHW UHYHUVH W...

Page 11: ...Machine Setup...

Page 12: ...sed as an accessory box v Free arm Free arm sewing is convenient for sewing tubular areas such as pant hems and cuffs Two step presser foot lifter The presser foot lifter is to raise or lower your pre...

Page 13: ...ust presser foot pressure The presser foot pressure of the machine has been pre set and requires no particular readjustment according to the type of fabric light or heavy weight However if you need to...

Page 14: ...ool and place the thread in between the upper thread guide 3 Wind the thread clockwise around the tension discs 4 Place the thread end through one of the inner holes as illustrated and place the empty...

Page 15: ...he foot control to stop the machine then push the bobbin winder spindle to the left 9 Cut the thread and then remove the bobbin Note When the bobbin winder spindle is pushed to the right position it s...

Page 16: ...sert the bobbin in the bobbin case with the thread running in a counter clockwise direction arrow Pull the thread through the slit A LWK D QJHU KROG JHQWO RQ WRS RI WKH EREELQ please follow the arrow...

Page 17: ...pool holder onto the spool pin For better sewing quality choose a proper size of the spool holder for the thread and attach it next to to the thread 1 Large spool holder 2 Small spool holder 1 2 Pleas...

Page 18: ...ilver discs to keep the thread in proper tension 7 Pass the thread under the take up spring then pull it upwards as arrow marks illustrated 8 Pull the thread to the top then pass the thread through th...

Page 19: ...it goes The needle threader turns automatically to the threading position and the hook pin passes through the needle eye 1 Hook pin 2 Needle Take the thread in front of the needle and make sure it is...

Page 20: ...crew Needles must be in perfect condition KHQ LQVHUWLQJ D QHZ QHHGOH NHHS WKH DW side of the shaft to the back Push the needle into the clamp until it touches the pin and stops Then secure it by tight...

Page 21: ...ts terrycloth denims 100 16 Heavyweight fabrics canvas woolens outdoor tent and quilted fabrics denims upholstery material light to medium Note 1 Q JHQHUDO QH WKUHDGV DQG QHHGOHV DUH XVHG IRU VHZLQJ Q...

Page 22: ...ill attach to the presser foot holder automatically 1 Cut out 2 Pin v Remove and insert the presser foot holder Raise the presser foot lifter Align the presser foot holder with the lower left side of...

Page 23: ...ower or raise the feed dogs When lever is in raised position the feed dog will arise automatically when you are sewing 1 Drop feed lever 2 Lowered position 3 Raised position Note KHQ RX QLVK WKH ZRUN...

Page 24: ...ad 3 Surface 4 Wrong side Thread tension is too loose for straight stitch sewing Turn the dial to the higher number Thread tension is too tight for straight stitch sewing Turn the dial to the lower nu...

Page 25: ...Sewing Basics...

Page 26: ...elector dial For zigzag stitch select pattern with the pattern selector dial Adjust the stitch length and stitch width according to the fabric being used To obtain the other patterns turn the stitch l...

Page 27: ...e as the dial approaches 4 Generally speaking the thicker the fabric thread and needle the longer the stitch should be Three needle position dial 1 2 The needle position can be altered with the three...

Page 28: ...se as the setting of stitch length approaches 0 Neat zig zag stitches are usually achieved at 2 5 or below Closed up zigzag stitches close together are referred to as a satin stitch v Adjusting the st...

Page 29: ...foot pass the thread under the presser foot and then pull out about 10cm of thread toward the rear of the machine 1 10cm 5 Turn the handwheel toward you counter clockwise to lower the needle into the...

Page 30: ...g seams by pressing the reverse sewing lever Please refer to Useful skills chapter Page 25 for more information 8 Turn the handwheel toward you counter clockwise to raise the needle Raise the presser...

Page 31: ...stitch length and width Since the results differ depending on types of stitching and layers of fabric sewn perform the trial sewing under the same conditions that will be used with your project v Rev...

Page 32: ...the stitches may become misaligned or the fabric may not feed correctly If this occurs place thin paper or stabilizer material under the fabric and sew it together with the fabric KHQ RX KDYH QLVKHG V...

Page 33: ...ams when hemming jeans 1 When you reach the point of an increased thickness lower the needle and raise the presser foot Press the toe of the foot to the horizontal line and push in the black button th...

Page 34: ...Utility Stitches...

Page 35: ...1 Use this stitch with knitted tricot or other stretchy fabrics The stitch enables your seam to stretch without breaking the thread v Straight stretch stitch Straight stretch stitch is used to add tr...

Page 36: ...w points to make sure that the tape is uniformly positioned on the fabric 1 Pin 2 Elastic tape 3 Wrong side Sew the elastic tape to the fabric while stretching the tape so that it is the same length a...

Page 37: ...stitches along the edge of fabric to prevent it from fraying Sewing the overcasting along the edge of the fabric so that the needle drops over the edge of the fabric on the right side 1 Needle drop po...

Page 38: ...of the project and do a sewing test in advance Place the fabric under the foot Turn the handwheel forwards until the needle swings fully to the left It should just pierce the fold of the fabric 1 Need...

Page 39: ...ing marking on fabric Lower the foot so that the buttonhole center line marked on the fabric aligns with the center of the buttonhole foot 1 Buttonhole size 2 Buttonhole foot center 3 3mm Follow the 4...

Page 40: ...ck Cross the gimp in front of the needle and thread gimp ends into a large needle pull to the wrong side and knot ends before cutting excess 1 Wrong side Note It is suggested that you sew with a stabi...

Page 41: ...out width dial Select the zig zag stitch width according to the distance between the two holes of the button Machine model with width dial Select the zig zag stitch and adjust the stitch width accordi...

Page 42: ...zipper Place the right sides of the fabric together Sew a bottom seam 2cm from the right edge of the zipper bottom stop position Sew few UHYHUVH VWLWFKHV IRU HG QFUHDVH WKH VWLWFK length to maximum s...

Page 43: ...e seam allowance to form a 3mm fold 1 Wrong side 2 2cm 3 5mm 4 Basting 5 Reverse stitches 6 3mm Attach the zipper foot Attach the right pin for sewing the left side of the zipper Sew the zipper to the...

Page 44: ...he top of the zipper Remove the basting and open the zipper Stitch the remaining of the seam Using the all purpose foot Before sewing please check the upper and bobbin threads are already pulled out a...

Page 45: ...crease the stitch length to maximum set the tension below 2 and basting lines 1cm across the area to be smocked 1 1cm 2 Basting 1 1 Knot the threads along one edge Pull the bobbin threads and distribu...

Page 46: ...DV UPO DV SRVVLEOH Place the fabric under the needle Make sure the presser foot bar is down to its lowest position Turn the handwheel towards you to bring up the bobbin thread through the fabric Sew...

Page 47: ...perator It is necessary to coordinate sewing speed and movement of fabric v Embroidery Stitch along the outline of the design by moving the embroidery hoop When sewing make sure to maintain a constant...

Page 48: ...ls joined together 6HZ WKH UVW URZ DQG PRYH RYHU WKH IDEULF to sew successive rows with the guide riding along the previous row of stitching Using the all purpose foot with edge quilting guide v Joini...

Page 49: ...vinyl Using the non stick foot 1 1 v Patchwork stitching Place the two fabrics right sides together and sew using a straight stitch 2SHQ WKH VHDP DOORZDQFH DQG SUHVV LW DW 1 Wrong side Working on the...

Page 50: ...r 3 Basting Align the center of the presser foot with the center of the two pieces of fabric and begin sewing After sewing remove the stabilizer and basting Applique Cut out the applique design and ba...

Page 51: ...ing sure not to sew directly on the edge of the fabric For better results apply spray starch onto the fabric and press with a hot iron before it is sewn Trim the fabric close to the stitching taking c...

Page 52: ...he twin needle are of the same weight You can use one or two colors Twin needle Using the all purpose foot n Attention If the machine have no stitch width dial only can use the straight stitch of the...

Page 53: ...Maintenance and Trouble shooting...

Page 54: ...soft and dry cloth to clean them v Clean the hook If lint and bits of thread accumulate in the hook this will interfere with the smooth operation of the machine Check regularly and clean the stitching...

Page 55: ...HGOH DW VLGH WRZDUGV WKH back 14 2 The needle is damaged 2 Insert a new needle 14 3 The wrong size needle has been used 3 Choose a needle to suit the thread 15 4 The presser foot is not attached corre...

Page 56: ...titch length shorter 22 5 Sewing on thin fabric 5 Sew with a stabilizer material under the fabric 26 Patterns are distorted 1 The presser foot is not suited for the pattern 1 Select the correct foot 2...

Page 57: ...ewing machine doesn t operate 1 The machine is not turned on 1 Turn on the machine 4 2 The presser foot lifter is raised 2 Lower the presser foot lifter 6 3 The machine is not plugged in 3 Connect the...

Page 58: ......

Page 59: ......

Page 60: ...rding the collection systems available I HOHFWULFDO DSSOLDQFHV DUH GLVSRVHG RI LQ ODQG OOV RU GXPSV KD DUGRXV VXEVWDQFHV FDQ OHDN into the groundwater and get into the food chain damaging your health...

Reviews: