background image


- 4 -


UK ONLY       IMPORTANT        PLEASE READ CAREFULLY 


2. How to change the power plug 
 

WARNING


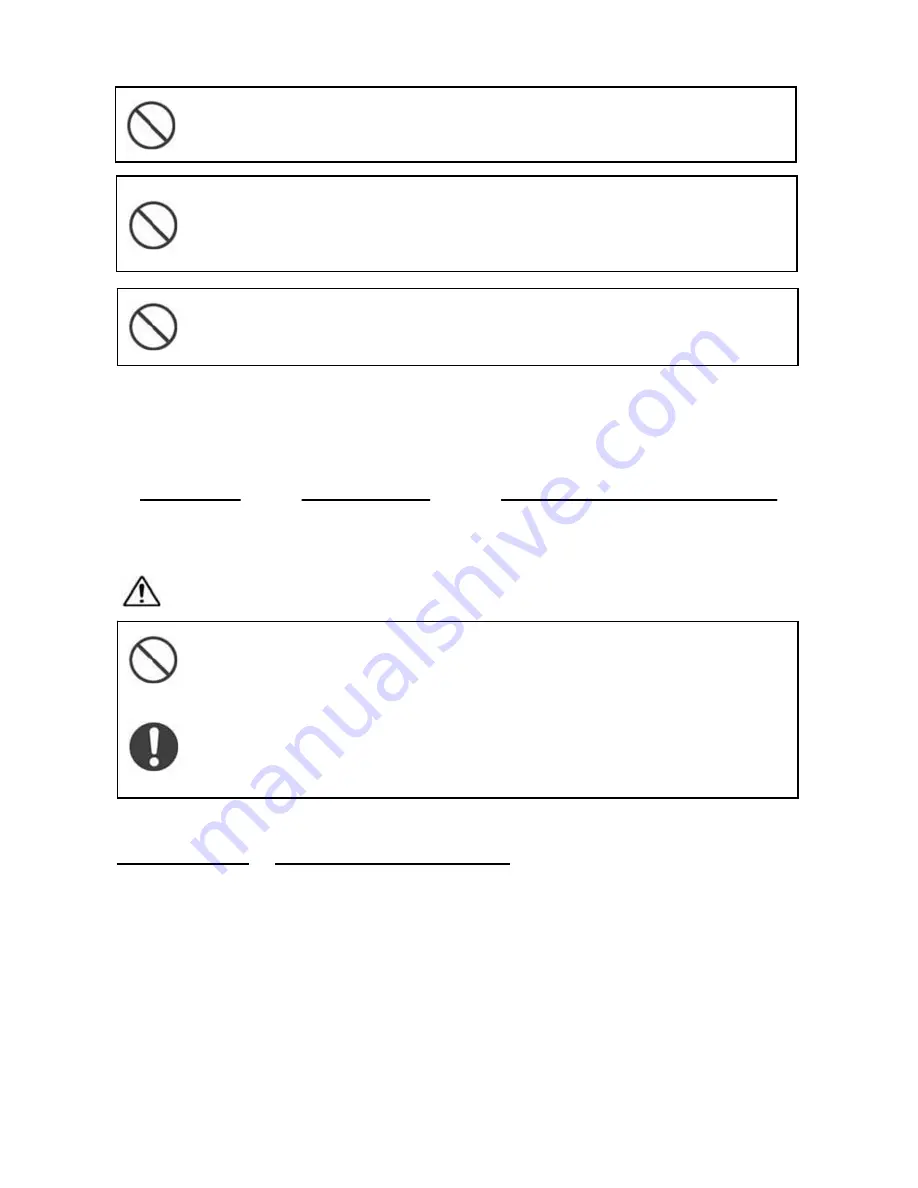
The wires in this mains lead are coloured in accordance with the following code: 

BLUE-NEUTRAL   BROWN-LIVE ( OR ACTIVE )  

As the colours of the mains lead of this appliance may not correspond with the coloured 
markings identifying the terminals in your plug - PROCEED AS FOLLOWS: 
The earth plug pin in unnecessary. As the machine is designed under double insulation 
structure, the earth wire is removed from the machine. The wire coloured BROWN must be 
connected to the terminal marked L or A or coloured RED. The wire coloured BLUE must be 
connected to the terminal marked N or coloured BLACK. Neither core is to be connected to 
the earth terminal of a three-pin plug. 


Do not operate on an unstable surface such as a sofa or a bed.

If the sewing machine falls down, it could cause an injury or damages to the 
machine. 

Do not repair, disassemble or modify except what is mentioned in the 
instruction manual. 

Doing so could cause an electric shock, a fire or an injury. 

Do not drop or insert any foreign objects into any openings such as 
opening space when you remove the face cover and / or the outer casing 
space of bobbin case. 

Doing so could cause an injury or damages to the machine. 

When you change the power plug or cord, do not repair, disassemble or 
modify except at the authorised dealeror service centre. 

Doing so could cause an electric shock or a fire. 
 

If for any reason the power plug for this product is removed it should be 
immediately disposed of safety and not stored anywhere where it could 
be inadvertently used again. 

Doing so could cause an electric shock or a fire. 

Summary of Contents for Vigorelli S1

Page 1: ...Covering Vigorelli S1 M220 M223 M226 Note Some items covered in this manual are optional extras or accessories and may not be included with your machine...

Page 2: ...cause serious even life threatening injuries To avoid this and in order to work safely Before initial use of your sewing machine read these operating instructions thoroughly Keep the operating instruc...

Page 3: ...bol explanation WARNING Do not touch Before use Do not damage the power cord modify it bend it excessively jerk it or twist it Doing so could cause an electric shock or a fire If the power cord is dam...

Page 4: ...away from the needle while operating the sewing machine If the needle breaks it could cause an injury Do not touch moving parts such as the needle take up lever or handwheel Doing so could cause an i...

Page 5: ...a three pin plug Do not operate on an unstable surface such as a sofa or a bed If the sewing machine falls down it could cause an injury or damages to the machine Do not repair disassemble or modify e...

Page 6: ...ewing directions 17 Levelling the machine 18 Adjusting thread tension 19 Changing needle 20 Insert darning plate 20 Fabric Thread Needle table 21 Sewing pattern selector and operation table 22 To star...

Page 7: ...winder stopper 4 Stitch length dial 5 Reverse button 6 Thread guide and needle clamp 7 Needle threader 8 Threading lever 9 Shuttle cover 10 Extension table 11 Presser foot 12 Cutting thread slot 13 Fa...

Page 8: ...7 NAME OF PARTS REAR VIEW 1 Presser foot lever 2 Thumb screw 3 Needle plate 4 Handle 5 Spool pin B 6 Clutch button 7 Hand wheel 8 Spool pin A 9 Bobbin winder spindle 7 1 2 3 9 8 5 6 4...

Page 9: ...8 ACCESSORIES Needle plate screw driver Screw driver Zipper foot Needle Buttonhole cutter Darning plate Bobbin Felt Zigzag foot on machine Buttonhole foot Spool pin A Spool pin B...

Page 10: ...d Warning Please always unplug the power plug before you change the bulb or perform maintenance work to the machine so that you prevent deadly peril and electric shock Bulb replacement 1 Open face cov...

Page 11: ...1 This sewing machine can be used as a flat bed machine but easily converts to a free arm machine by removing the extension table 2 Especially useful for sewing sleeves pant legs tubular fabrics etc...

Page 12: ...osition When bobbin winding is incorrect release the screw of the upper thread guide and adjust up or down until bobbin the winding is balanced 1 Release by pushing clutch button to bobbin and lock by...

Page 13: ...BBIN 1 Raise the needle to its highest position and open shuttle race cover 3 Release the latch and the bobbin will fall out easily 2 Open the hinged latch of the bobbin case and pull the bobbin case...

Page 14: ...bin and insert it into bobbin case as shown 2 Guide the end of thread into the slot 3 Pull the thread through the slot and under the tension spring and draw out about 10 cm of thread Making sure the b...

Page 15: ...E 1 Raise the needle to its highest position Pull the thread to the front open the latch of the bobbin case and hold it 2 Holding the latch open place bobbin case onto the centre pin in the shuttle an...

Page 16: ...DING UPPER THREAD Warning Before contriving please adjust main control switch to O Pass the thread from A to H as shown Twin needle threading A B C D F G B E E H D C F H G For auto threaded system see...

Page 17: ...insert itself into the needle eye Bring the thread around Guide B and under Hook A 3 Push the lever back and lead the needle threader to its original position Pull the thread loop to the back to fini...

Page 18: ...the upper thread by which the lower thread will be brought up in a loop 2 Pull out both threads and place them together under presser foot to the rear of the machine 3 Place fabric under pressure foo...

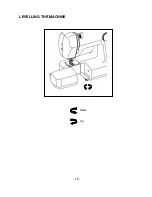
Page 19: ...18 LEVELLING THE MACHINE Down Up...

Page 20: ...usted by turning the thread tension dial Lower thread tension can be increased by turning the screw of the bobbin case slightly to the right clockwise Turning it to the left counter clockwise decrease...

Page 21: ...up as it will go 4 Tighten the needle clamp screw securely INSERT DARNING PLATE Sometimes you will want to control the feeding of fabric yourself Turn the needle bar to its highest position and raise...

Page 22: ...nsion Straight stitch ZZ Stitch Length Dial Nylon 80 Cotton Tricot 60 S Fiber silk Silk 50 Silk Light Wool silk 50 S Fiber silk HA 1 No 11 Type 130R 705H No 80 1 3 1 4 Gingham 60 80 Cotton Thin Jersey...

Page 23: ...h length Presser foot Darning plate A Straight stitch B E Zigzag F Blind stitch G Box stitch H Three step zigzag stitch I Double overlock stitch J Pullover stitch K Honeycomb stitch L Zigzag stitch M...

Page 24: ...fabric you plan to use adjusting the machine for the length of the stitch and tension suitable to your fabric 6 Separate the machine from the power system if you leave it unsupervised 7 When sewing t...

Page 25: ...seam 2 Push the reverse button and sew in reverse for about 3 4 cms 3 Raise needle into its highest position 4 Lift the presser foot and pull the fabric out of the back of the machine 5 Cut threads as...

Page 26: ...ls patterns appliqu etc The zigzag stitch is a universal stitch The satin stitch pattern has short tense stitches which can be used for sewing AUTOMATIC EMBROIDERY These stitches have a wide range of...

Page 27: ...G Use these stitches for oversewing rough edges STRAIGHT AND ZIGZAG STRETCH STITCHES Use this stitch with knitted tricot or other stretchy fabrics The stitch enables your seam to stretch without break...

Page 28: ...27 BLIND STITCH 1 Fold fabric as shown 2 Finish the seam as shown...

Page 29: ...28 Adjust the width to obtain the correct seam Wrong Needle is not piercing edge to fold at all Needle pierces the edge of fold too much Correct seam...

Page 30: ...ch it firmly 3 Place the button between presser foot and fabric and lower the presser foot 4 Manually turn hand wheel towards you ensuring that the needle enters into both holes of button without obst...

Page 31: ...edge thus preventing sewing on zipper 2 Place zipper foot in position and attach firmly 3 Fold the fabric about 2 cm and place the fabric under foot 1 To sew the left side of the zipper set the zipper...

Page 32: ...to 1 position 2 Sew left side 3 Raise the needle 4 Set dial to 2 position 5 Sew 5 6 stitches 6 Raise the needle 7 Set dial to 3 position 8 Sew right side 9 Raise the needle 10 Set dial to 4 position...

Page 33: ...the scroll of the hemmer sufficiently so that the workpiece edge runs freely through the groove under the foot Only suitable materials can be used and some practice may be necessary to achieve the bes...

Page 34: ...oidered QUILTER GUIDE Optional 1 Slide the arm through the hole on top of the pressure foot holder 2 Move the quilter to the required stitch distance SEAM GUIDE Optional 1 Use the seam guide to sew lo...

Page 35: ...leaning shuttle race A Latch knob B Shuttle race cover C Shuttle hook Cleaning feed dog A A B C 1 Raise needle to its highest position 2 Take out the bobbin case 3 Turn the latch knob A as illustrated...

Page 36: ...Tight upper thread tension Bent needle Scratches or nicks on bobbin case Re adjust zigzag width Re thread machine Reduce upper thread tension Replace needle Polish or replace bobbin case Breaking bobb...

Page 37: ......

Page 38: ......

Reviews: