11
2. STARTING TO SEW /
THREADING YOUR MACHINE
Wrong threading may cause skipped
stitches, breaking threads, or other
problems.
Try to master the correct threading before
moving on to test sewing.
Threading must be carried out in the
sequence of Lower Looper - Upper Looper -
Needle.
Open the front cover and the working table.
Raise needle to its highest point by turning
hand wheel towards you.
Before re-threading lower looper, remove
thread from needle eye first, then re-thread
the lower looper. This will prevent tangling.
NOTE :
Thread tension is released when
you pull the tension control knob.
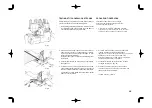
THREADING LOWER LOOPER
1. Feed the thread through the thread
guide as illustrated.
2. Pull the lower looper thread through
right hand tension.
3. Draw the thread through thread guide as
illustrated.
4. Pass the thread through lower looper
eye, and hook it around part A as indi-
cated by the arrow. Leave about 4" (10
cm) extra thread.
3
2
4
A
1
When using normal or thin thread.
When using thick thread.
,1),/$785$'(//$0$&&+,1$
8 Q D V F R U U H W W D L Q I L O D W X U D S X z
FDXVDUHVDOWRSXQWLURWWXUDGHOILORHDOWUL
LQFRQYHQLHQWL
&HUFDWHGLHVHJXLUHODFRUUHWWDLQILODWXUD
SULPDGHOWHVWGLFXFLWXUD
/DVHTXHQ]DGLLQILODWXUDGHYHHVVHUHJDQFLR
LQIHULRUHJDQFLRVXSHULRUHDJR
$SULWHLOFRSHUFKLRIURQWDOHHGLOSLDQRGL
ODYRUR$O]DWHODJRQHOSXQWRSLDOWRUXRWDQGR
L O Y R O D Q W L Q R Y H U V R G L Y R L
3ULPDGLUHLQILODUHLOJDQFLRLQIHULRUHULPXRYHWH
LOILORGDOODFUXQDGHOODJRHSRLUHLQILODWH
LOJDQFLRLQIHULRUH4XHVWRHYLWHUjODJJURYLJOLDUVL
GHLILOL
127$/DWHQVLRQHYLHQHULODVFLDWD
WLUDQGRYHUVRGLYRL
LOERWWRQHFRQWUROORWHQVLRQH
,1),/$785$*$1&,2
,1)(5,25(
)DWHSDVVDUHLOILORQHOJXLGDILOR
FRPHLOOXVWUDWR
7LUDWHLOILORLQIHULRUHDWWUDYHUVRLGLVFKL
GHOERWWRQHFRQWUROORWHQVLRQH
7LUDWHLOILORDWWUDYHUVRLOJXLGDILOR
FRPHLOOXVWUDWR
)DWHSDVVDUHLOILORDWWUDYHUVRODFUXQD
GHOJDQFLRLQIHULRUHHGDJJDQFLDWHORLQWRUQRD
$FRPHLQGLFDWRGDOODIUHFFLD/DVFLDWHOLEHUL
FLUFDFPGLILOR
&20,1&,$5($&8&,5(
4XDQGRXVDWHXQILODWRQRUPDOH
RVRWWLOH
4XDQGRXVDWHXQILODWR
JURVVR


