


29 (E)
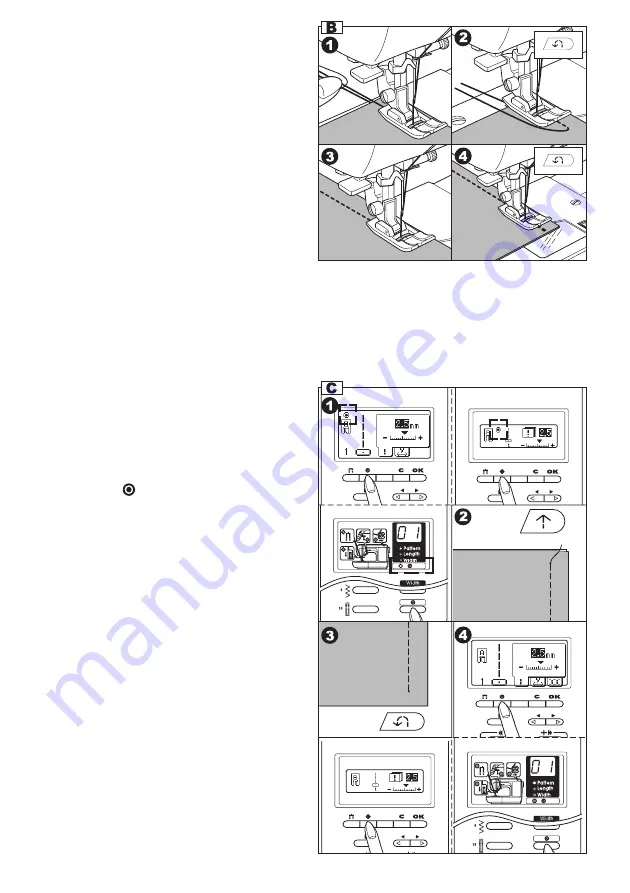
B. REVERSE STITCHING
Reverse stitching is used for reinforcing the
ends of the seams.
1. Place the fabric in position where back
stitching is to be made and lower the
presser foot.
2. Press and hold the reverse button. (Press
the foot controller pedal if attached) Sew
4-5 reverse stitch.
3. Release the reverse button and press the
start/stop button (or press the pedal)
Machine will change to forward sewing.
4. When you reach the end of seam, press
and hold reverse button and sew 4-5
reverse stitches.
C. AUTO TACK STITCH
You can sew tack stitch at the beginning and
end of the stitch.
1. Press the Tack button.
- Model N424E, N422E -
Tack mark “
” will appear on the L.C.D..
- Model N420E -
Tack stitch indicator will turn on.
2. Start to sew.
Machine will sew tacking automatically
and start to sew the selected pattern.
3. When you reach the end of seam, press
the reverse button once.
Machine will sew tacking and stop
automatically.
4. If you want to cancel this function, press
the tack button again.
- Model N424E, N422E -
Tack mark will disappear.
- Model N420E -
Tack stitch indicator will turn off.
- Model N424E, N422E -
This function can use all utility patterns.
- Model N420E -
You can sew tack stitch manually by
selecting the pattern No. 99.
This stitch wil sew tack stitch only and stop
automatically.
Note:
- Model N424E -
The pattern No. 3 and No. 4 have a built-in reverse stitch. See page 33 to sew this stitch.
- Model N422E -
The pattern No. 2 have a built-in reverse stitch. See page 33 to sew this stitch.
- Model N420E -
The pattern No. 02 and 03 have a built-in reverse stitch. See page 33 to sew this stitch.
- Model N424E -
- Model N422E
-
- Model N420E -
- Model N424E -
- Model N422E
-
- Model N420E -


