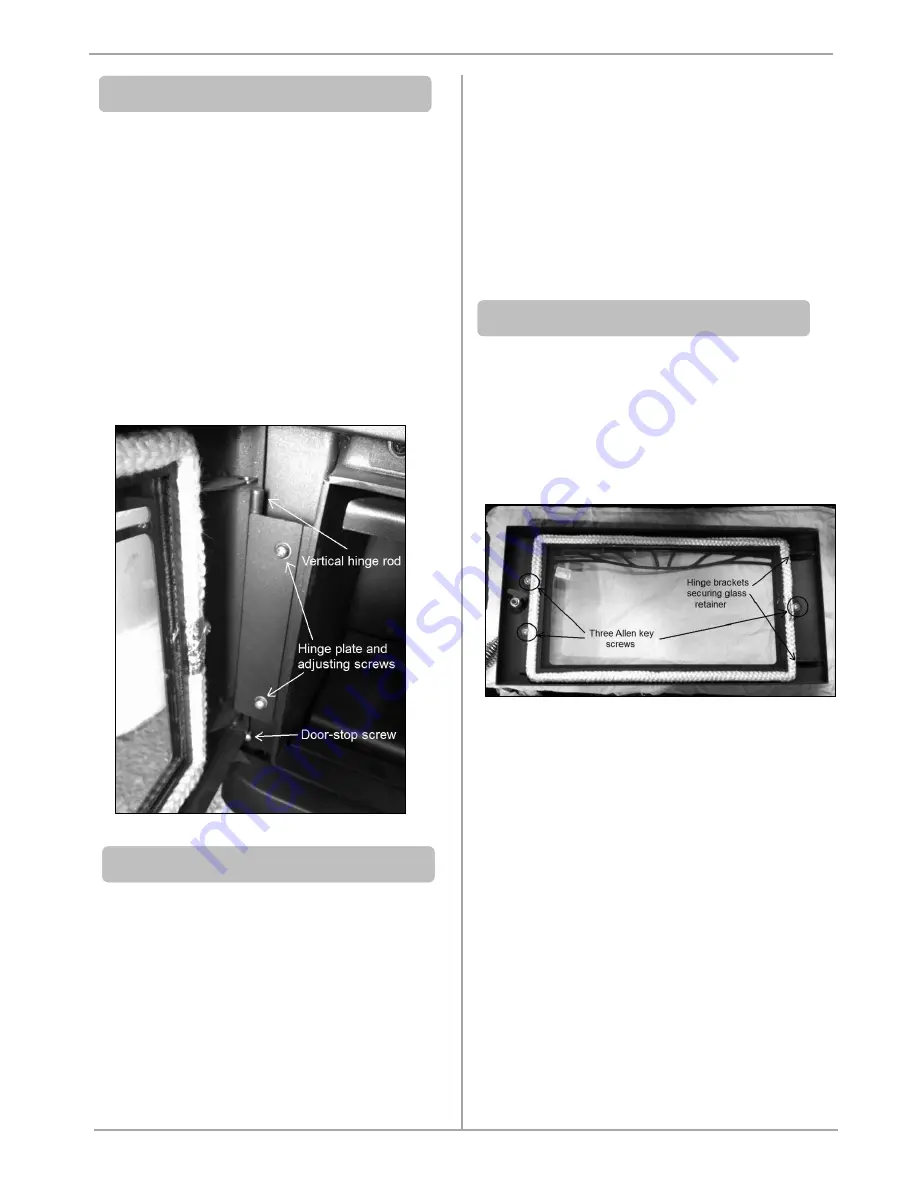
To remove the door:-
i)
Unscrew the air control slide rod.
ii)
Remove the door-stop screw from the bottom left
corner.
iii)
Lift the door up and over the top end of the vertical
hinge rod.
iv)
Lower the door and slide off the bottom end of the
hinge rod.
(Note that sometimes the bottom horizontal panel with
the “Nectre” decal may be hindering the door from
sliding off the bottom end of the hinge rod. If so, then
the bottom panel can be removed by lifting it up and off
from the heater body, it hangs on two lugs.)
Over time the screws securing the door hinge plate to the
heater may loosen resulting in the door dropping, i.e. visually
appears on slight angle and no longer 100% horizontal. This
can result in a poor door seal and unnecessary amounts of
oxygen entering the firebox and wood burning too quickly.
To fix this and reposition the door:-
i)
With the supplied Allen key, loosen the two screws on
the hinge plate.
ii)
With the door 90% closed, slowly lift the bottom right
corner of the door until the door appears horizontal.
iii)
Keeping the door in that position relative to the hinge,
open it and tighten the screws until firm.
iv)
Close the door to 90% again and make any final
adjustments up or down by tapping the door on the
right hand side until it appears parallel relative to the
top and bottom horizontal panels above and below the
door.
v)
Open door again and tighten screws fully.
This task may be easier with the door removed from the
appliance and laid horizontally on a work-bench.
To replace the door glass:
i)
Remove the three M8 size Allen key screws securing
the glass retainer to the door with the supplied Allen
key.
ii)
Lift the left hand side of the glass retainer about
5mm, then slide the retainer across to the left so as
to free it from the two hinge brackets on the right
hand side.
iii)
Gently lift the glass retainer up and out, taking
careful note that the glass may still be intact in the
retainer and potentially could fall out.
iv)
Flip the retainer over, remove the old glass panel.
v)
The new door glass panel should have been supplied
with a length of adhesive glass seal. Peel back the
backing on the tape, and run it along the edges of
the glass panel, folding it equally over each side so as
to create a padded border around the edge of the
glass.
vi)
Fit the new glass into the glass retainer, and fit the
retainer back into the door ensuring that the retainer
is secured beneath the two brackets on the right side
before fastening the three screws.
3. REMOVING THE DOOR
5. FITTING A NEW DOOR GLASS
4. ADJUSTING THE DOOR


