Vacuum Hose Reel 881 EX
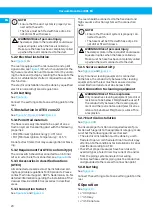
NOTE!
When replacing the spring the spring power
must be completely neutralized (instruction is
delivered together with the spare part spring).
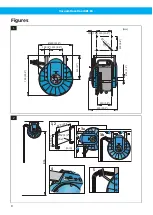
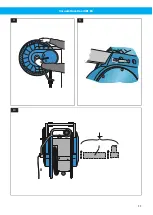
5.1.2 Mounting/Replacing the hose
See
.
When the reel has been mounted on a wall or ceiling,
the hose is replaced in the following way:
NOTE!
• Ensure that the drum is locked by the safety
• Use only Nederman hoses.
1
Remove the cover plate.
2
Remove the old existing hose.
3
Fit the existing hose coupling to the new hose end
and fit the new hose on the connecting piece in-
side the drum.
NOTE!
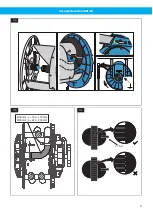
For the length of hose from swivel to
clamp, see
4
Fasten the new hose with the hose clip on the
drum according to the picture.
5
Fit the cover plate.
6
Unlock the safety lock.
7
Let the hose recoil by turning the drum by hand.
Make sure that the hose forms evenly divided on
the drum.
8
Fit the hose stop in the desired position, see
5.1.3 Ratchet mechanism
See
.
The hose reel is delivered with a ratchet mechanism
which retains the hose in the required out-drawn po-
sition. The ratchet will disengage if the hose is drawn
out a little further, and the hose then recoils to the
drum.
NOTE!
The hose should be held by hand as long as
possible during the recoiling.
The ratchet is factory set for wall mounting of the
reel, see
/A. When mounting the reel in the
ceiling, the ratchet must be moved from one position
to another, see
NOTE!
The ratchet must, after it has been mounted,
point towards the centre of the reel, see
.
If the hose is pulled out too far, the ratchet could, un-
fortunately, become permanently locked. It may be
released by the following procedure.
1
Take a steady grip on the drum end plate and turn
a little in the outdraw direction until the ratchet is
disconnected.
2
Holding the endplate and hose at the same time,
slowly release until the hose has recoiled.
3
Fit the ratchet in the other mounting position.
5.1.4 Adjustment of spring tension
.
The reel has a factory set basic spring tension which
after mounting the reel could need an adjustment.
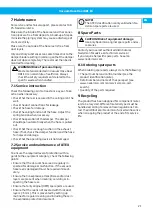
NOTE!
Do not tense the spring more than is needed to
exactly roll the hose to its rest position.
Increasing the spring tension
1
Make sure that the hose is in place and fully re-
coiled on the reel.
2
Use the socket head cap spanner which comes
with the reel. Turn in the direction of the arrow as
shown in the picture.
3
Tense the spring one revolution at a time and test
the coiling operation gradually.
NOTE!
Check that the hose can be fully uncoiled
without stretching the spring to its maxim-
um. If not, decrease the spring tension.
Decreasing the spring tension
1
Make sure that the hose is in place and fully re-
coiled on the reel.
2
/A.
3
Remove the hose stop.
4
Remove one coil of hose.
5
Refit the hose stop.
6
/A.
5.1.5 Damper function
The reel is fitted with a mechanical damper which
automatically opens when the hose is pulled out. The
damper closes when the hose is rewound. Always
check that there is enough suction in the hose before
use. If not, pull the hose out, corresponding approxim-
ately one revolution, to open the damper.
5.2 Installation in non-ATEX zone
and
5.2.1 Connection to duct
.
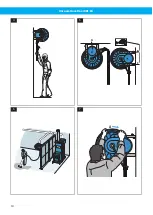
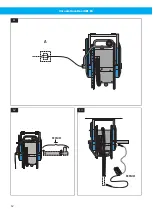
The hose reel should be connected to the fixed duct
and high vacuum extraction system with a connection
hose, see
/A.
EN
19
Summary of Contents for 30805881
Page 9: ...Vacuum Hose Reel 881 EX 3a Ø38 mm L 160 170 mm Ø50 mm L 220 230 mm 3b 1 7 Nm 3c 9 ...
Page 10: ...Vacuum Hose Reel 881 EX 4 A B C 5 6 A 7 10 ...
Page 11: ...Vacuum Hose Reel 881 EX A 8 9 A B 10 11 ...
Page 12: ...Vacuum Hose Reel 881 EX A 11 R 1MΩ 12 R 1MΩ 13 12 ...
Page 14: ...Vacuum Hose Reel 881 EX 38 mm m3 h kPa 16 50 mm kPa m3 h 17 14 ...
Page 120: ...www nederman com ...

