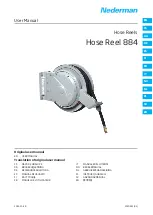
Hose Reel 884
EN
3
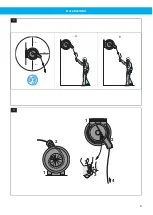
Release the safety latch. Make sure the hose is
under full control without any slack. Do not let go
of the hose before the hose stop meets the hose
outlet.
4
Release the latch mechanism by pulling the hose
slightly in the direction of the arrow. Then let the
hose slowly coil up onto the reel drum.
5
Fit the hose stop at the desired length. See
tion 6.1 Adjustment of spring tension
4.2 Hose outlet
See
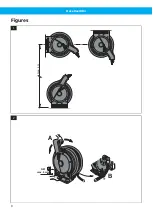
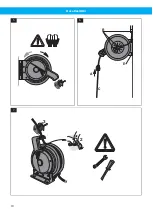
The hose outlet can be rotated and locked in various
positions.
• Select an angle to ensure a minimum bending angle
for the hose against the outlet rollers.
4.3 Connection to the pipework system
See
• The Hose Reel 884 must be connected to the pipe-
work system with an inlet hose only, a minimum of
0.5 m. The hose should go through the ring* which
shall be fitted on the bracket. Check that the hose
is not twisted or strained after connection. A stop
valve should be fitted on the pipe system before the
hose connection.
5 Use
5.1 Selecting hose
When selecting a hose, see the dimension and work-
ing pressure on the Hose Reel 884 identification label.
5.2 Ratchet mechanism
See
The Hose Reel 884 is delivered with a ratchet mech-
anism that retains the hose in the required outdrawn
position. The ratchet will disengage if the hose is
drawn out a little further and the hose then recoils to
the drum.
WARNING! Risk of personal injury
Do not release the hose until the hose stop
meets the hose outlet.
6 Maintenance
Following maintenance is recommended regularly or
at least once a year. Also, see
.
A
Check the spring function by testing if the hose re-
coils properly.
B
Check that swivel and hose couplings do not leak.
Change the seal if required. Clean the swivel and
couplings.
C
Check that the hose is intact. Clean the hose if oily
or dirty.
D
Check the ratchet mechanism.
E
Check the mounting of the reel on the wall or ceil-
ing.
6.1 Adjustment of spring tension
WARNING! Risk of personal injury
Use protective gloves.
.
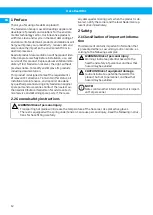
1
Recoil the hose until the hose stop stops against
the outlet. Pull the hose out, to a position where
the ratchet is engaged. Unscrew the hose stop
and the tool connected to the hose.
2
Turn the drum, with all hose wound on: one re-
volution in the direction of the black arrow when
increasing the spring tension, one revolution in
the direction of the grey arrow when decreasing
the spring tension.
3
Refit the hose stop and the tool.
4
Check that the required length of the hose can be
pulled out without stretching the spring to its lim-
it. Do not use higher spring tension than neces-
sary.
6.2 Repair instructions
WARNING! Risk of personal injury
Before starting any operation in the Hose Reel
884:
• Turn off the supply of air/water/oil/grease.
• Engage the safety catch before changing the
hose or swivel.
• Before starting other operations, release the
spring tension by removing the hose stop and
allow the hose to recoil completely.
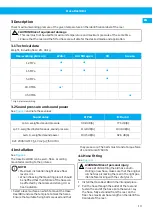
Instructions for hose fitting, see
. Instructions for changing the spring cassette,
swivel or seal comes with each spare part.
7 Spare Parts
CAUTION! Risk of equipment damage
Use only N
$
e
$
d
$
e
$
r
$
m
$
a
$
n
$
original spare parts and ac-
cessories.
Contact your nearest authorized distributor or
N
$
e
$
d
$
e
$
r
$
m
$
a
$
n
$
for advice on technical service or
if you require help with spare parts. See also
w
$
w
$
w
$
.
$
n
$
e
$
d
$
e
$
r
$
m
$
a
$
n
$
.
$
c
$
o
$
m
$
.
7.1 Ordering spare parts
When ordering spare parts always state the following:
• The part number and control number (see the
product identification plate).
14

