7
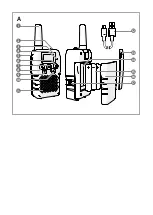
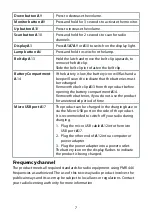
Down button
A
9
Press to decrease the volume.
Monitor button
A
9
Press and hold for 3 seconds to activate the monitor.
Up button
A
10
Press to increase the volume.
Scan button
A
10
Press and hold for 2 seconds to scan for radio
channels.
Display
A
3
Press
A
5
A
7
A
9 or
A
10 to switch on the display light.
Lamp button
A
6
Press and hold to switch on the lamp.
Belt clip
A
13
Hold the latch and move the belt clip upwards, to
remove the belt clip.
Slide the belt clip in to fasten the belt clip.
Battery Compartment
A
14
If the battery is low, the battery icon will flash and a
beep will sound to indicate that the batteries must
be recharged.
Remove the belt clip
A
13 from the product before
opening the battery compartment
A
14.
Remove the batteries, if you do not use the product
for an extended period of time.
Micro USB port
A
17
The product can be charged in the charging base or
via the Micro-USB port on the side of the product.
It is recommended to switch off your radio during
charging.
1. Plug the micro USB cable
A
12 into the micro
USB port
A
17.
2. Plug the other end of
A
12 into a computer or
power adapter.
3. Plug the power adapter into a power outlet.
The battery icon on the display flashes to indicate
the product is being charged.
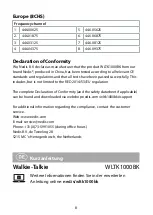
Frequency channel
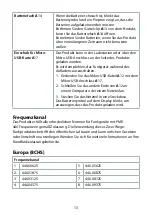
The product meets all required standards for radio equipment using PMR 446
frequencies as authorized. The use of this two-way radio product involves the
public airways and its use may be subject to local laws or regulations. Contact
your radio licensing authority for more information.


