background image

Basic settings    

en

17

Q

Basic settings

Basic settings

There are various settings available to you in order to 

help use your appliance effectively and simply. You can 
change these settings as required.

Changing the basic settings

1.

Touch the 

#

 touch button.

2.

Touch the 

0

 touch button.

3.

Use the 

(

 or 

)

 button to select the "

"

 Settings".

4.

Use the 

 button to navigate to the next line.

5.

Use the 

(

 or 

)

 button to select the setting.

6.

Use the 

&

 button to navigate to the next line.

7.

Use the 

(

 or 

)

 button to select the setting.

8.

Touch the 

0

 touch button.

9.

To save the setting, use the 

&

 button to select 

"Save".
To discard the setting, use the 

%

 button to select 

"Discard".

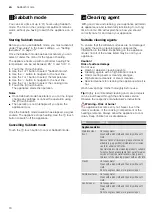
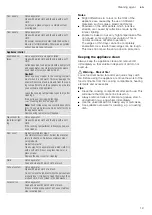
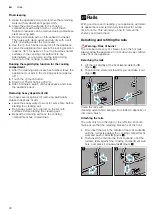
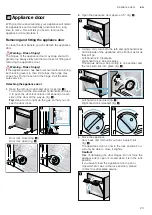
List of basic settings

--------

Setting favourites

You can set which heating types are shown in the Types 
of heating menu.

Note: 

 The "CircoTherm hot air", "Circo-roasting" and 

"Grill, large area" types of heating are always shown in 
the Types of heating menu. They cannot be deactivated.

1.

Touch the 

#

 touch button.

2.

Touch the 

0

 touch button.

3.

Use the 

(

 or 

)

 button to select the "

"

 Settings".

4.

Use the 

 button to navigate to the next line.

5.

Use the 

(

 or 

)

 button to select "Favourites".

6.

Use the 

 button to navigate to the next line.

7.

Use the 

(

 or 

)

 button to select the type of heating.

8.

Use the 

 button to navigate to the next line.

9.

Use the 

(

 or 

)

 button to select "Activated" or 

"Deactivated". 

Note: 

If you have selected "Activated", the type of 

heating is shown in the Types of heating menu. If 
you have selected "Deactivated", the type of heating 
is shown in the Types of heating menu.

10.

Touch the 

0

 touch button.

11.

To save the setting, use the 

&

 button to select 

"Save".
To discard the setting, use the 

%

 button to select 

"Discard".

Setting

Selection

Language

Select language

Time of day

Sets the current time

Date

Sets the current date

Favourites

Set the heating types that should be 
shown in the heating types menu 

~

 "Setting favourites" on page 17

Audible signal duration

Short

Medium

Long

Button tone

Switched off (Exception: The button tone 
for the 

#

 touch button remains switched 

on)

Switched on

Display brightness

Adjustable across 5 levels

Clock display

Digital

Off

Lighting

On during operation

Off during operation

Childproof lock*

Only key lock

Door lock and key lock

Automatic childproof lock Deactivated

Activated

Action after switching on

Main menu

Heating types

Night-time dimming

Switched off

Switched on (display dimmed between 10 
p.m. and 5.59 a.m.)

Brand name logo

Display

Do not display

Fan run-on time

Recommended

Minimum

Pull-out system

No

Yes (double or triple pull-out system retro-
fitted)

Factory settings

Load

*) Depending on the appliance model, this basic setting cannot be se-

lected

Summary of Contents for B57CR23 0B Series

Page 1: ...en INSTRUCTION MANUAL BUILT IN OVEN B57CR23 0B...

Page 2: ......

Page 3: ...hildproof lock 16 Automatic childproof lock 16 One time childproof lock 16 Q Basic settings 17 Changing the basic settings 17 List of basic settings 17 Setting favourites 17 F Sabbath mode 18 Starting...

Page 4: ...e and power cable Always slide accessories into the cooking compartment the right way round Accessories on page 10 Important safety information ImportantsafetyinformationGeneral information Warning Ri...

Page 5: ...ol panel or in the control elements They may affect electronic implants e g heart pacemakers or insulin pumps Wearers of electronic implants must stay at least 10 cm away from the control panel Haloge...

Page 6: ...ment may lead to corrosion Allow the cooking compartment to dry after use Do not keep moist food in the closed cooking compartment for extended periods of time Do not store food in the cooking compart...

Page 7: ...ment Open the appliance door as infrequently as possible when the appliance is in use It is best to bake several cakes one after the other The cooking compartment stays warm This reduces the baking ti...

Page 8: ...n you stop scrolling through the values quickly LUFR7KHUP KRW DLU Display 0 Touch buttons 8 ShiftControl control Touch button Use on off Switching the appliance on or off Switching the appliance on an...

Page 9: ...panel heat up Bread baking 180 240 C For baking bread bread rolls and baked items that require high temperatures Full surface grill 50 290 C For grilling flat items such as steaks or sausages for maki...

Page 10: ...asic settings Basic settings on page 17 _Accessories AccessoriesYour appliance is accompanied by a range of accessories Here you can find an overview of the accessories included and information on how...

Page 11: ...ing accessories You can insert the wire rack and the universal pan at the same time to catch drops of liquid When inserting the wire rack ensure that both spacers are at the rear edge When the univers...

Page 12: ...urrent year 11 Use the button to return to Year 12 Use the button to apply the settings The initial use is complete Notes You can change these settings at any time in the basic settings Basic settings...

Page 13: ...ure Note Depending on the operating mode different settings are available For each further setting use the button to navigate to the next line Use the or button to select the setting 5 Touch the touch...

Page 14: ...s lit the Rapid heat up or PowerBoost function can be activated To deactivate the Rapid heat up or PowerBoost function before it has finished touch the touch button Activating the Rapid heat up functi...

Page 15: ...ooking time As soon as the cooking time has elapsed an audible signal sounds and the appliance ends the operation automatically Touch the 0 touch button to end the audible signal Start delay Ready at...

Page 16: ...uch button until Childproof lock deactivated appears on the display 2 Touch the touch button 3 Switch on the required appliance operation Deactivating 1 Press and hold the 0 touch button until Childpr...

Page 17: ...se the button to navigate to the next line 9 Use the or button to select Activated or Deactivated Note If you have selected Activated the type of heating is shown in the Types of heating menu If you h...

Page 18: ...e cleaning agents To ensure that the different surfaces are not damaged by using the wrong cleaning agent observe the information in the table Depending on the appliance model not all of the areas lis...

Page 19: ...will not be able to be removed Appliance interior Enamelled sur faces Hot soapy water or a vinegar solution Clean with a dish cloth and then dry with a soft cloth Soften baked on food remnants with a...

Page 20: ...Keep children and pets away Follow the instructions even when using the Delayed start function with a delayed end time Preparation Warning Risk of fire Loose food residues grease and meat juices may...

Page 21: ...partment to cool down 2 Wipe off any ash that has been left behind in the cooking compartment and around the appliance door with a damp cloth 3 If you have left an accessory inside the cooking compart...

Page 22: ...osits of dirt Leave the soapy water to work for some time before starting the cleaning aid Rub soapy water onto the dirt on the smooth surfaces before starting the cleaning aid Repeat the cleaning aid...

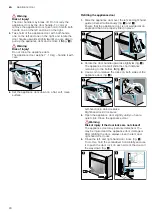
Page 23: ...r horizontally and use it to push the door lock black component on each side of the door all the way up fig Tip Use a torch to light up the gap so that you can see the door locks Door lock closed fig...

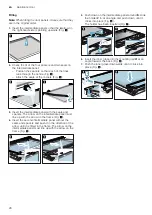
Page 24: ...ide rollers simultaneously fig and Ensure that the appliance door is not wedged at an angle and that it is properly fitted in place 2 Rotate the door handle upwards slightly fig The appliance door wil...

Page 25: ...ont side facing down on an even surface that is soft and clean 3 Push on the left and right hand side on the outside of the appliance door until the inner glass is released on both sides Fig 4 Careful...

Page 26: ...eals and spacers The arrow on the intermediate panel must line up with the arrow on the frame Fig 4 Insert the second intermediate panel without the seals and spacers and push it in the direction of t...

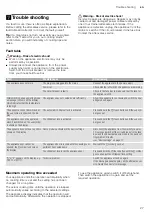
Page 27: ...e Notes remedy The appliance does not work The plug is not plugged into the mains Connect the appliance to the power supply Power cut Check whether other kitchen appliances are working The circuit bre...

Page 28: ...Glass cover If the glass cover of the halogen bulb is damaged it must be replaced You can obtain a new glass cover from the after sales service Please specify the E number and FD number of your appli...

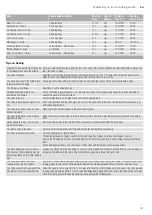
Page 29: ...an Level 3 Baking tray Level 1 Baking tins dishes on the wire rack First wire rack Level 3 Second wire rack Level 1 By preparing several dishes at the same time you can make energy savings of up to 45...

Page 30: ...pie tin 2 170 190 55 70 Quiche quiche tin dark coated 3 190 210 30 40 White Bread loaf tin 1x 900 g or 2x 450 g 2 190 210 25 40 White Bread loaf tin 1x 900 g or 2x 450 g 2 180 200 20 30 Scones baking...

Page 31: ...d increase the temperature if necessary or extend the baking time The cake is too light on top and too dark underneath Bake the cake one level higher in the oven the next time The cake is too dark on...

Page 32: ...not a lid is used If preparing meat in an enamelled or dark metal roasting dish it will need a little more liquid than if cooked in glass cookware The steam evaporates in the cookware when roasting Ca...

Page 33: ...rack 2 180 190 15 25 Pork Roasting joint wire rack 2 180 190 30 35 Loin joint wire rack 2 180 190 35 35 Belly wire rack 2 170 180 30 25 Gammon joint wire rack 2 160 170 30 30 Poultry Chicken whole wir...

Page 34: ...sories on page 10 Roasting in cookware It is more convenient to roast and braise meat in cookware You can take the joint out of the cooking compartment more easily in the cookware and prepare the sauc...

Page 35: ...switches itself continuously on and off this is normal The set temperature determines how frequently this occurs Smoke may be produced when grilling Recommended setting values In the table you can fi...

Page 36: ...ire rack 2 180 200 30 40 Loin joint wire rack 2 180 200 35 35 Belly wire rack 2 200 220 30 25 Gammon joint wire rack 2 180 200 30 25 Poultry Chicken drumstick 150 g each wire rack 3 210 230 20 30 Chic...

Page 37: ...as the limit stop with the bevelled edge facing the appliance door Greaseproof paper Only use greaseproof paper that is suitable for the selected temperature Always cut greaseproof paper to size Recom...

Page 38: ...tment Place the food into the empty cooking compartment before the oven is heated up For CircoTherm eco select a temperature of between 125 and 200 C and for Top bottom heating eco select a temperatur...

Page 39: ...ing times can not be reduced by using higher temperatures Cakes or baked items would only be cooked on the outside but would not be fully cooked in the middle Types of heating used CircoTherm eco Top...

Page 40: ...ion in the tips on slow cooking attached to the settings table Your appliance features the heating type Slow cook Only start operation when the cooking compartment has fully cooled down Allow the cook...

Page 41: ...e dried food will remain Setting ranges are indicated for this reason If you wish to dry additional foodstuffs you should use similar foodstuffs in the table as a reference Type of heating used CircoT...

Page 42: ...move the jars from the cooking compartment after the indicated cooling time Vegetables After a short while small bubbles will form at short intervals As soon as all preserving jars are bubbling reduce...

Page 43: ...f the ingredients The values in the table are therefore only meant to be average values Type of heating used Dough proving Defrosting Use heating type CircoTherm to defrost frozen fruit vegetables and...

Page 44: ...the springform cake tin onto the universal pan instead of onto the wire rack Fatless sponge cake Fatless sponge cake on two levels vertically stack springform cake tins in an offset manner on the wir...

Page 45: ...0 Apple pie 2 x black plate tins diameter 20 cm 2 180 200 60 80 Apple pie 2 levels 2 x black plate tins diameter 20 cm 3 1 170 190 70 90 Dish Accessory Shelf posi tion Type of heating Tempera ture in...

Page 46: ...6...

Page 47: ...6...

Page 48: ...9001134941 9001134941 980209 en...

Reviews: