background image

Cleaning and servicing

 en

17

Suitable cleaning agents

Only use cleaning agents that are suitable for the differ-
ent surfaces on your appliance.

Follow the instructions on cleaning the appliance. 
→ 

"Cleaning the appliance", Page 18

Appliance front

Surface

Suitable cleaning agents Information

Stainless steel

¡

Hot soapy water

¡

Special stainless steel
cleaning products
suitable for hot sur-
faces

To prevent corrosion, remove any limescale, grease, starch or albu-
min (e.g. egg white) stains on stainless steel fronts immediately.
Apply a thin layer of the stainless steel cleaning product with a soft
cloth.

Plastic or painted
surfaces
E.g. control panel

¡

Hot soapy water

Do not use glass cleaner or a glass scraper.
To avoid permanent stains, remove any descaling agent that gets
onto the surface immediately.

Appliance door

Area

Suitable cleaning agents Information

Door panels

¡

Hot soapy water

Do not use a glass scraper or a stainless steel wool.

Tip: 

Remove the door panels in order to clean them thoroughly. 

→ 

"Appliance door", Page 20

Door cover

¡

Made of stainless
steel:
Stainless steel cleaner

¡

Made of plastic:
Hot soapy water

Do not use glass cleaner or a glass scraper.
Do not use stainless steel care products.

Tip: 

Remove the door cover for thorough cleaning. 

→ 

"Appliance door", Page 20

Stainless steel in-
terior door frame

Stainless steel cleaner

Discolouration can be removed using stainless steel cleaner.
Do not use stainless steel care products.

Door handle

¡

Hot soapy water

To avoid permanent stains, remove any descaling agent that gets
onto the surface immediately.

Door seal

¡

Hot soapy water

Do not remove or scrub.

Cooking compartment

Area

Suitable cleaning agents Information

Enamel surfaces

¡

Hot soapy water

¡

Vinegar water

¡

Oven cleaner

Soak any heavily soiled areas and use a brush or steel wool.
Leave the appliance door open to dry the cooking compartment
after cleaning it.

Notes

¡

It is best to use the cleaning function. 
→ 

"Self-cleaning function", Page 18

¡

Enamel burns at very high temperatures, causing minor discol-
ouration. The functionality of your appliance is not affected by
this.

¡

The edges of thin trays cannot be completely enamelled and may
be rough. This does not impair corrosion protection.

¡

Food residues will leave a white coating on the enamel surfaces.
The coating does not pose a health risk. The functionality of your
appliance is not affected by this. You can remove residues with
lemon juice.

Glass cover for
the oven light

¡

Hot soapy water

Use oven cleaner to remove very heavy soiling.

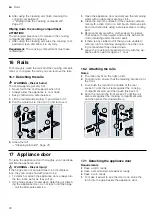
Rails

¡

Hot soapy water

Soak any heavily soiled areas and use a brush or steel wool.

Note: 

To clean thoroughly, detach the rails. 

→ 

"Rails", Page 20

Accessories

¡

Hot soapy water

¡

Oven cleaner

Soak any heavily soiled areas and use a brush or steel wool.
Enamelled accessories are dishwasher-safe.

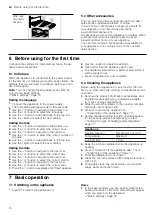
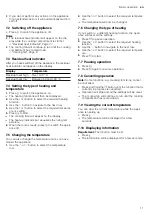
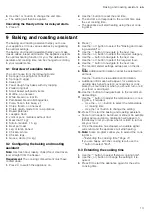
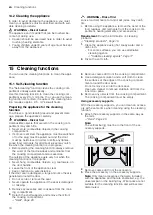
Summary of Contents for B57CS22 0 Series

Page 1: ...Oven en User manual and installation in structions B57CS22 0 ...

Page 2: ...d under the warranty Only use this appliance To prepare meals and drinks In private households and in enclosed spaces in a domestic environment Up to an altitude of max 4000 m above sea level 1 3 Restriction on user group This appliance may be used by children aged 8 or over and by people who have reduced physical sensory or mental abilities or inad equate experience and or knowledge provided that...

Page 3: ... scrapers to clean the glass on the oven door as they may scratch the surface The appliance and its parts that can be touched may have sharp edges Take care when handling and cleaning them If possible wear protective gloves The hinges on the appliance door move when the door is opened and closed which could trap your fingers Keep your hands away from the hinges Components inside the appliance door...

Page 4: ...he cleaning function is in progress Never hang combustible objects e g tea towels on the door handle Leave the front of the appliance clear Keep children at a safe distance If the door seal is damaged a large amount of heat is generated around the door Do not scrub or remove the seal Never operate the appliance if the seal is damaged or missing WARNING Risk of serious harm to health The appliance ...

Page 5: ...remnants from the cooking com partment and the appliance door before you next heat up the appliance If the seal is very dirty the appliance door will no longer close properly during operation This may dam age the front of adjacent kitchen units Keep the seal clean at all times Never operate the appliance if the seal is damaged or missing Sitting or placing objects on the appliance door may damage ...

Page 6: ... your appliance and to obtain information about the operat ing status 1 2 2 3 1 Display 2 Buttons 3 Control element 4 2 Buttons The buttons are touch sensitive areas To select a function press the corresponding button Symbol Name Use On off Switch the appliance on or off Main menu Select operating modes and settings Time setting options childproof lock Set the timer cooking time or Ready at time f...

Page 7: ...ations for using the types of heating For temperatures above 275 C the appliance reduces the temperature to approx 275 C after around 40 minutes Symbol Heating function Temperature Use CircoTherm hot air 40 200 C Bake or roast on one or more levels The fan distributes the heat from the ring shaped heating ele ment in the back wall evenly around the cooking compartment Top bottom heating 50 275 C T...

Page 8: ...easier to use Shelf supports The rails in the cooking compartment enable you to place accessories at different heights Accessories Page 8 Your appliance has four shelf positions The shelf posi tions are numbered from bottom to top You can remove the rails e g for cleaning Rails Page 20 Lighting One or more oven lights illuminate the cooking com partment When you open the appliance door the light i...

Page 9: ...right way round This is the only way to en sure that accessories can be pulled out approximately halfway without tipping 1 Turn the accessories so that the notch is at the rear and is facing downwards 2 Insert the accessory between the two guide rods for a shelf position Wire rack Insert the wire rack with the open side facing the appliance door and the curved lip facing downwards Baking tray E g ...

Page 10: ...t the next setting Setting the date 1 Use the button to navigate to the next row 2 Use the or button to select the correct day 3 Use the button to navigate to the next row 4 Use the or button to select the correct month 5 Use the button to navigate to the next row 6 Use the or button to select the correct year 7 Press the button repeatedly until Date appears 8 Use the button to apply the settings ...

Page 11: ...e food is ready press to switch the appli ance off 7 5 Changing the temperature You can also change the temperature once you have started the appliance 1 Use the or button to select the temperature row 2 Use the or button to select the required temperat ure a The temperature will now be changed 7 6 Changing the type of heating If you switch to a different heating function the appli ance will reset...

Page 12: ...ing function Setting the cooking time 1 Set a heating function and a temperature 2 Press 3 Select the default value Button Default value 10 minutes 30 minutes 4 Use the or button to select the required cooking time 5 Once the cooking time has been set press to start a The cooking time will appear on the display The cooking time will count down a Once the cooking time has elapsed an audible sig nal...

Page 13: ... cooking compartment must have cooled down 1 Press to switch the appliance on 2 Press 3 Use the or button to select the Baking and roast ing assistant 4 Use the button to navigate to the next row 5 Use the or button to select the required category 6 Use the button to navigate to the next row 7 Use the or button to select the required food 8 Use the button to navigate to the next row a The recommen...

Page 14: ...automatic childproof lock 1 Press and hold the button until Childproof lock deactivated appears on the display 2 Press to switch the appliance on 3 Press 4 Use the or button to select MyProfile 5 Use the button to navigate to the next row 6 Use the or button to select Automatic childproof lock 7 Use the button to select the required settings 8 Use the button to set the lock to Deactivated 9 Press ...

Page 15: ...g When you close the appli ance door the appliance continues to heat again Once you have started the operation you cannot change any settings or pause operation Requirement Sabbath mode must be activated in Fa vourites in the basic settings Basic settings Page 15 1 Press to switch the appliance on 2 Use or to select Sabbath mode 3 Use to navigate to the next row 4 Use or to select the temperature ...

Page 16: ...rofile 4 Use the button to navigate to the next row 5 Use the or button to select Favourites 6 Use the button to select Set favourites 7 Use the or button to select the required heating function 8 Use the button to navigate to the next row 9 Use the or button to select a setting Setting Display in the heating func tions menu Activated Yes Deactivated No 10 Press 11 To save your settings use the bu...

Page 17: ... in terior door frame Stainless steel cleaner Discolouration can be removed using stainless steel cleaner Do not use stainless steel care products Door handle Hot soapy water To avoid permanent stains remove any descaling agent that gets onto the surface immediately Door seal Hot soapy water Do not remove or scrub Cooking compartment Area Suitable cleaning agents Information Enamel surfaces Hot so...

Page 18: ...ff or the plug must be pulled out and the door must be held closed in order to stifle any flames Loose food remnants fat and meat juices may catch fire when the cleaning function is in progress Before starting the cleaning function always remove the worst of the food residues and remnants from the cooking compartment and accessories The outside of the appliance gets very hot when the cleaning func...

Page 19: ...s cooled down sufficiently and has gone out 8 After using the cleaning function prepare the appli ance so that it is ready to use again Preparing the appliance for use following the cleaning function Page 19 Preparing the appliance for use following the cleaning function 1 Allow the appliance to cool down 2 Wipe off any ash that has been left behind in the cooking compartment and around the applia...

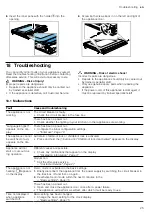
Page 20: ...NG Risk of burns The shelf supports get very hot Never touch the shelf supports when hot Always allow the appliance to cool down Keep children at a safe distance 1 Lift the rail forwards slightly and detach it 2 Pull the whole rail to the front and remove it 3 Clean the rail Cleaning products Page 16 16 2 Attaching the rails Notes The rails only fit on the right or left For both rails ensure that ...

Page 21: ...rection Turn the lock on the right hand side in an anti clockwise direction Left hand lock secured The arrows point to each other Left hand lock released a The lock audibly engages 5 ATTENTION Opening and closing the appliance door when it is in the lock position damages the door hinges Never force the appliance door open or closed If the door hinge has been damaged call the after sales service Mo...

Page 22: ...le and that it is properly fitted in place Attach the appliance door via the left and right hand guide rollers simultaneously 2 Rotate the door handle upwards slightly a The appliance door slides the short distance re maining to the bottom 3 Use a coin to release both locks on the appliance door Insert the coin in the gap in the lock and ro tate as far as it will go Turn the lock on the left hand ...

Page 23: ...y around and carefully lift the retainer until you are able to pull it out 6 Lift the first and second intermediate panes from be low and remove them in the direction of the arrow 7 Remove the spacers and seals for cleaning if required 8 WARNING Risk of injury Scratched glass in the appliance door may develop into a crack Do not use any harsh or abrasive cleaners or sharp metal scrapers to clean t...

Page 24: ...arrow on the frame 4 Insert the second intermediate pane without the spacers and seals and slide it in the direction of the arrow until it is inserted in the sheet metal frame The arrow on the intermediate pane must line up with the arrow on the frame 5 Push down lightly on the first intermediate pane around slide the retainer in at an angle and push down until it clicks into place a The retainer ...

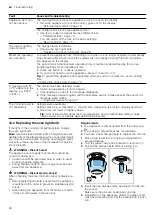
Page 25: ...our kitchen or other appliances are working Language English appears on the dis play There has been a power cut Configure the initial configuration settings Initial use Page 10 The appliance cannot be switched on appears on the dis play Automatic childproof lock or childproof lock is activated Press and hold the button until Childproof lock deactivated appears on the display Appliance will not sta...

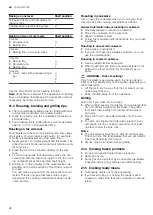
Page 26: ...s not satisfactory Settings were unsuitable Setting values e g temperature or cooking time depend on the recipe quantity and food Next time set lower or higher values Tip A lot of information about the food preparation and corresponding setting values can be found on our website www neff international com 18 2 Replacing the oven light bulb If the light in the cooking compartment fails change the o...

Page 27: ... door Make a note of your appliance s details and the Cus tomer Service telephone number to find them again quickly 21 How it works Here you can find the ideal settings for various types of food as well as the best accessories and cookware We have perfectly tailored these recommendations to your appliance 21 1 General cooking tips Please take note of the following information when cooking all type...

Page 28: ...t be come as dirty Roasting in cookware If you cover the cookware when you cook your food this will keep the cooking compartment cleaner General information about roasting in cookware Use heat resistant ovenproof cookware Place the cookware on the wire rack Glass cookware is best Follow the manufacturer s instructions for your roast ing dishes Roasting in uncovered cookware Use a deep roasting dis...

Page 29: ... Baking tray 3 180 200 1 8 15 Swiss roll Baking tray 3 180 190 1 15 20 Muffins Muffin tray 3 170 190 15 20 Small yeast cakes Baking tray 3 160 180 25 35 Biscuits Baking tray 3 140 160 15 30 Biscuits 2 levels Universal pan Baking tray 3 1 140 160 15 30 Biscuits 3 levels 1 pcs Universal pan 2 pcs Baking tray 4 3 1 140 160 15 30 Bread without a tin 750 g Universal pan or Loaf tin 2 1 210 220 1 2 180 ...

Page 30: ...b and then leave it to cool down to 40 C It is sufficient to heat UHT milk to 40 C 3 Mix 150 g of chilled yoghurt into the milk 4 Pour the mixture into small containers e g cups or small jars 5 Cover the containers with film e g cling film 6 Place the containers on the cooking compartment floor 7 Use the recommended settings when configuring the appliance settings 8 After making the yoghurt leave ...

Page 31: ...s it defrosts Remove pieces that have already defrosted from the cooking compartment Once the food has defrosted switch off the appli ance and leave the food in the appliance for another 10 to 30 minutes to allow the temperature to equal ise Keeping food warm Tips for keeping food warm You can keep cooked food warm at 70 C using the top bottom heating function This prevents con densation from form...

Page 32: ...pan 4 3 1 140 1 35 45 Hot water sponge cake Springform cake tin diameter 26 cm 2 160 170 2 25 35 Hot water sponge cake Springform cake tin diameter 26 cm 2 160 170 2 30 40 Hot water sponge cake on 2 levels Springform cake tin diameter 26 cm 3 1 150 170 2 30 50 1 Preheat the appliance for five minutes Do not use the rapid heating function 2 Preheat the appliance Do not use the rapid heating functio...

Page 33: ... or outside of the area where the appliance is installed Any unsecured units must be secured to the wall using a standard bracket Wear protective gloves so that you do not cut yourself Parts that are accessible dur ing installation may have sharp edges Dimensions of the figures in mm WARNING Danger Magnetism Permanent magnets are used in the control panel or in the controls They may affect elec tr...

Page 34: ...must be adhered to including substructure if applicable The minimum worktop thickness a is based on the required minimum clearance Hob type a raised in mm a flush in mm b in mm Induction hob 37 38 5 Full surface induction hob 47 48 5 Gas hob 27 38 5 Electric hob 27 30 2 22 5 Installation in a tall unit Observe the installation dimensions and the installation instructions when installing in a tall ...

Page 35: ...ork is being carried out The appliance must only be connected using the power cable provided The power cable must be plugged in at the rear of the appliance until you hear a clicking sound A 3 m power cable can be obtained from the after sales service The power cable must only be replaced with a cable from the original manufacturer This is available from after sales service Contact protection must...

Page 36: ...here must be an air gap of at least 4 mm between the appliance and adjacent unit fronts 4 Open the appliance door slightly and unscrew pan els on the left and right 5 Close the appliance door 6 If required you can adjust the height of the appli ance door using the adjustment screws on the left and right Turning the screws clockwise makes the gap smal ler Turning the screws anti clockwise makes the...

Page 37: ...p and the appliance must not be closed by additional battens Thermal insulation strips must not be fitted to the side panels of the surround unit 22 10 Removing the appliance 1 Disconnect the appliance from the power supply 2 Open the appliance door slightly and unscrew the left and right hand panels 3 Undo the fastening screws 4 Lift the appliance slightly and pull it out completely ...

Page 38: ......

Page 39: ......
Page 40: ...y Straße 34 81739 München GERMANY 9001753624 9001753624 020518 en Valid within Great Britain Imported to Great Britain by BSH Home Appliances Ltd Grand Union House Old Wolverton Road Wolverton Milton Keynes MK12 5PT United Kingdom ...

Reviews: