en
Time-setting options
16
Changing or cancelling the appliance
operation
Changing the appliance operation
1.
Use the
#
button to stop the operation.
2.
Use the
&
or
%
button to navigate to the line for the
setting that should be changed.
3.
Use the
(
or
)
button to change the setting.
4.
Use the
#
touch button to start the changed
operation.
Notes
■
The cooling fan may continue to run while an
operation is interrupted.
■
After a temperature change, the paused running time
continues to count. After a change in the type of
heating, the running time starts again from zero.
Cancelling the appliance operation
Press and hold the
#
touch button until the appliance
operation is cancelled.
Note:
Operating modes such as the cleaning function
cannot be cancelled.
Heating up the appliance quickly
You can reduce the heating time using the Rapid
heating function.
Notes
■
When the
°
touch button lights up, rapid heating
can be activated.
■
Touch the
°
touch button to deactivate the Rapid
heating function early.
Activating the "Rapid heating" function
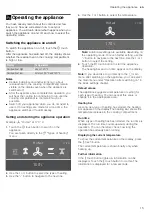
1.
Set
‚
Hot air and the temperature.
Note:
Set a temperature above 100 °C to allow the
appliance to preheat quickly.
2.
Touch the
#
touch button to start the appliance
operation.
3.
Touch the
°
touch button to activate the "Rapid
heating" function.
The
°
symbol appears on the display.
4.
Once the set temperature has been reached, the
"Rapid heating" function switches off automatically.
The
°
symbol disappears from the display. Place
the food in the cooking compartment.
O
Time-setting options
Time-sett
ing optio
ns
Your appliance has different time-setting options.
Note:
If you have set a time-setting option, the time
interval increases if you set a higher value. Example:
You can set a cooking time of up to one hour in one-
minute increments; for cooking times over one hour,
you can set a cooking time in five-minute increments.
Showing and hiding the time-setting options
To show or hide the time-setting options, touch the
0
touch button.
Note:
After a particular length of time, the time-setting
options that are shown are automatically hidden. If you
have already set a cooking time, it will be applied.
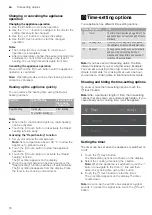
Setting the timer
The timer can be set when the appliance is switched on
or off.
1.
Touch the
0
touch button.
The time-setting options are shown on the display.
2.
Select the cooking time using the
)
button.
Note:
When the appliance is switched on, use the
%
button to navigate to the Timer
.
line and then
select the cooking time using the
)
button.
3.
Touch the
0
touch button to start the timer.
The
.
symbol appears on the display.The timer
counts down.
Note:
As soon as the set time has elapsed, a signal
sounds. To cancel the signal tone, touch the
0
touch
button.
Function
Type of heating
Place the food in
the cooking
compartment
Rapid heating
Hot air
‚
After heating
Top/bottom heating
ƒ
Time-setting option
Use
.
Timer
The timer functions like an egg timer. The
appliance does not switch on and off auto-
matically.
+
Cooking time
Once the set cooking time has elapsed,
the appliance switches off automatically.
*
Ready at
The appliance switches on automatically,
and once the set cooking time has
elapsed and the end time has passed, it
switches off automatically.
PLQ_V
K_PLQ
7LPHU
'XUDWLRQ
5HDG\DW


