


en
Trouble shooting
8
On appliances with a glass plate in the filter pull-out:
■
The glass plate can be removed easily and can be
cleaned in the dishwasher.
■
To remove it, carefully lift the glass plate.
Installing the metal mesh grease filter
1.
Insert the metal mesh grease filter.
While doing this, place the other hand under the
metal mesh grease filter.
2.
Fold the metal mesh grease filter upwards, locking it
in place.
3
Trouble shooting
Trouble s
hooting
Malfunctions often have simple explanations. Please
read the following notes before calling the after-sales
service.
:
Warning
Risk of electric shock!
Incorrect repairs are dangerous. Repairs may only be
carried out and damaged power cables replaced by
one of our trained after-sales technicians. If the
appliance is defective, unplug the appliance from the
mains or switch off the circuit breaker in the fuse box.
Contact the after-sales service.
Malfunction table
--------
Replacing bulbs
These instructions apply to several appliance variants. It
is possible that individual features are described which
do not apply to your appliance.
:
Warning
Risk of burns!
Halogen bulbs become very hot when switched on.
There is still a risk of burning for some time after they
have been switched off. Allow the halogen bulbs to cool
down before replacing them.
:
Warning
Risk of electric shock!
When changing the bulbs, the bulb socket contacts are
live. Before changing the bulb, unplug the appliance
from the mains or switch off the circuit breaker in the
fuse box.
Important!
Only use bulbs of the same type and
wattage.
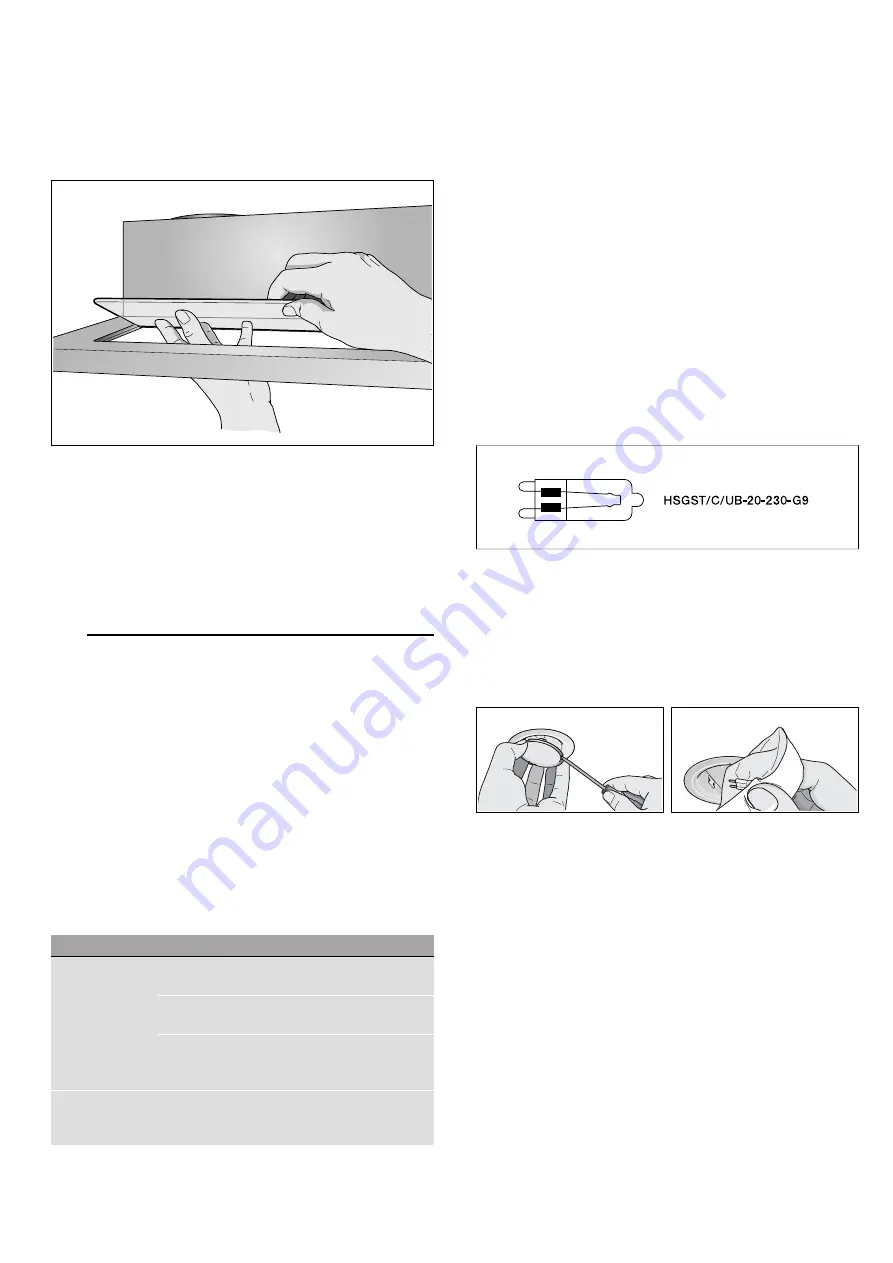
Replacing halogen bulbs
Note:
When inserting halogen bulbs, do not touch the
glass tube. Use a clean cloth to insert the halogen
bulbs.
1.
Carefully remove the bulb ring using a suitable tool.
2.
Pull out the bulb and replace it with a bulb of the
same type.
3.
Insert the bulb cover.
4.
Insert the mains plug or switch on the fuse again.
LED lights
Defective LED lights may be replaced by the
manufacturer, their customer service or a qualified
technician (electrician) only.
:
Warning
Risk of injury!
The light emitted by LED lights is very dazzling, and can
damage the eyes (risk group 1). Do not look directly
into the switched on LED lights for longer than 100
seconds.
Problem
Possible cause Solution
The appliance
does not work
The plug is not
plugged in.
Connect the appliance to the
electricity supply
Power cut
Check whether other kitchen
appliances are working
Faulty fuse
Check in the fuse box to make
sure that the fuse for the
appliance is OK
The lighting does
not work.
The bulbs are
faulty.
For information on changing
the bulbs, see the "Replacing
Bulbs" section.


