background image

en

5

Installing the appliance

Transporting

The appliance is heavy. Secure in position during 

transportation and installation.
Due to the weight/dimensions of the appliance and to 

minimise the risk of injury and damage to the appliance 

at least two persons are necessary to set-up the 

appliance safely.

Installation location

Install the appliance in a dry, well ventilated room. 

The installation location should neither be exposed 

to direct sunlight nor near a heat source, e.g. a cooker, 

radiator, etc. If installation next to a heat source is 

unavoidable, use a suitable insulating plate or observe 

the following minimum distances to a heat source:

3 cm to electric or gas cookers.

30 cm to an oil or coal-fired cooker. 

If installing the appliance next to another refrigerator 

or freezer, ensure a minimum lateral distance of 25 mm 

to prevent the formation of condensation.
If a panel or cupboard is installed above the appliance, 

ensure that a gap of 30 mm is left so that the appliance 

can be pulled out of the recess if required.
The air heated on the rear side of the appliance must 

be allowed to escape unhindered.

Subsurface

Caution

The appliance is very heavy.
Model with dispenser: 143 kg
The floor of the installation location must not give way; 

if required, reinforce floor.
To ensure that the doors can open all the way, observe 

lateral minimum distances when installing 

the appliance in a corner or recess (see chapter 

“Installation dimensions”).
If the depth of the adjacent kitchen equipment is more 

than 60 cm, observe lateral minimum distances 

in order to utilise the full door opening angle (see 

chapter “Door opening angle“).

Observe ambient temperature 

and ventilation

Ambient temperature 

The climate class can be found on the rating plate. 

The climate class indicates within which ambient 

temperatures the appliance can be operated. 

The rating plate is located in the refrigerator 

compartment at the bottom right side.

Note

The appliance is fully functional within the room 

temperature limits of the indicated climatic class. If 

an appliance of climatic class SN is operated at colder 

room temperatures, the appliance will not be damaged 

up to a temperature of +5 °C.

Ventilation

Never cover the ventilation openings on the rear 

of the appliance. Conduction of the heated air must not 

be obstructed. Otherwise, the refrigeration unit must 

work harder. This increases power consumption.
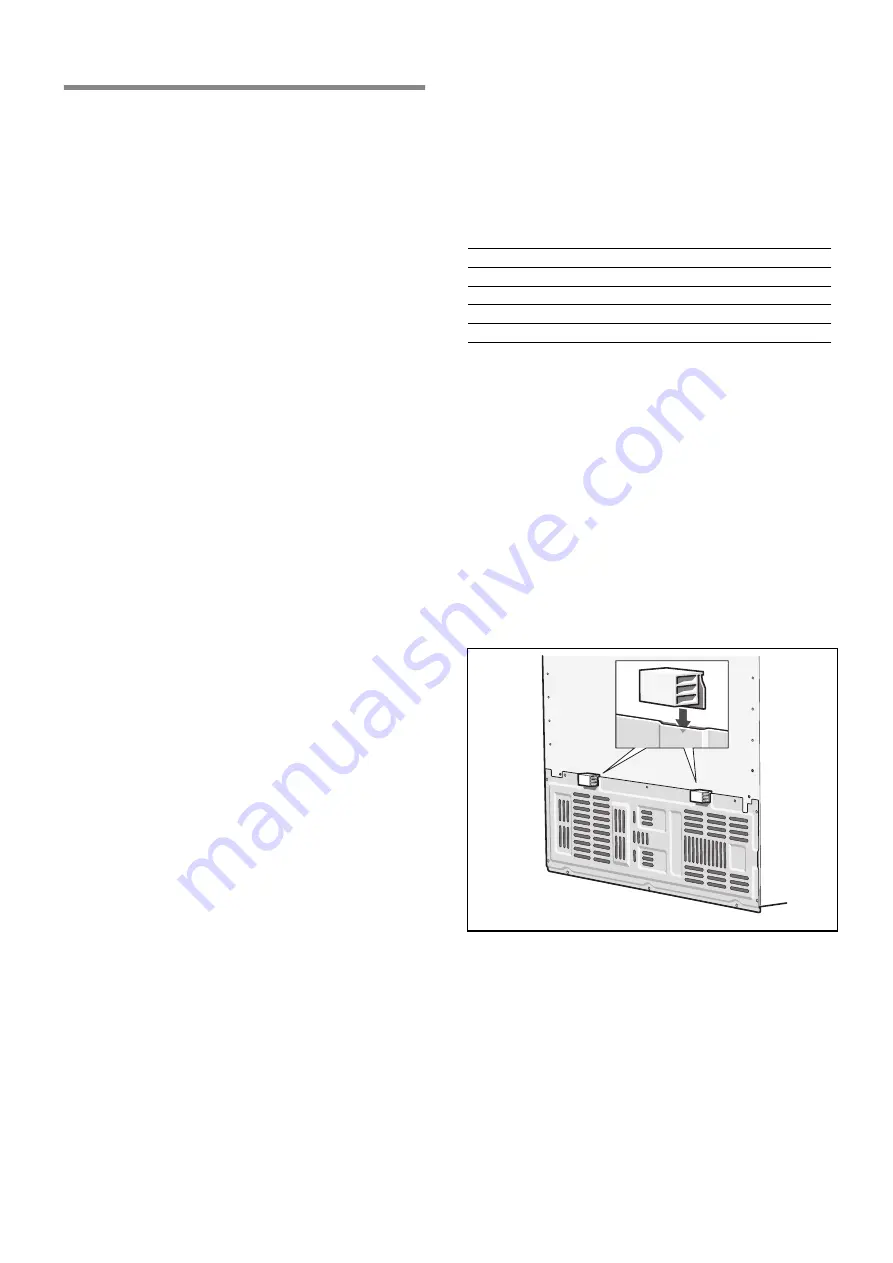
Place the enclosed spacers in the designated holders 

on the back of the appliance. This ensures that there is 

a minimum distance between the appliance and 

the wall.

Climate class

Permitted ambient temperature

SN

+10 °C to 32 °C

N

+16 °C to 32 °C

ST

+16 °C to 38 °C

T

+16 °C to 43 °C

Summary of Contents for K59 D Series

Page 1: ...en Installation instructions and instructions for use K59 D K59 N...

Page 2: ...cal mode 13 Alarm function 13 Usable capacity 13 Freezer compartment 14 Max freezing capacity 14 Freezing fresh food 14 Super freezing 15 Thawing frozen food 15 Refrigerator compartment 15 Super cooli...

Page 3: ...isfy the safety requirements A extension cable may be purchased from customer service only Important information when using the appliance Never use electrical appliances inside the appliance e g heate...

Page 4: ...your local authority about current means of disposal Disposal of your old appliance Old appliances are not worthless rubbish Valuable raw materials can be reclaimed by recycling old appliances m Warni...

Page 5: ...ion must not give way if required reinforce floor To ensure that the doors can open all the way observe lateral minimum distances when installing the appliance in a corner or recess see chapter Instal...

Page 6: ...en 6 Installation dimensions Door opening angle 24 343 1031 160 66 791 90 24 610 725 25 464 1159 90 160...

Page 7: ...g water mains Do not use existing or already used hose sets Connect the appliance to a drinking water line only Minimum pressure 0 2 Mpa 2 bar Maximum pressure 0 8 Mpa 8 bar Pressure over 0 8 MPa 8 ba...

Page 8: ...Removing appliance doors and handles If the appliance will not fit through the house door the appliance doors and handles can be unscrewed m Caution Only customer service may unscrew the appliance do...

Page 9: ...Door shelf 5 Ice maker Ice cube container 6 Air outlet opening 7 Ice and water dispenser 8 Freezer calendar 9 Glass shelf in the freezer compartment 10 Door shelf 11 Frozen food container 12 Ice pack...

Page 10: ...esh container Keep pressing the button until the required zone is marked with an arrow 4 Freezer compartment display Indicates the current temperature setting in the freezer compartment 5 Time display...

Page 11: ...n arrow 2 Set the temperature with the warmer or cooler setting buttons The value last indicated is saved by the system Freezer compartment The freezer compartment can be set from 14 C to 24 C We reco...

Page 12: ...4 Save the set time with the options button Note If the timer function is switched on the time is not displayed IWD off You can use this function to switch off the ice and water dispenser m Caution B...

Page 13: ...without risk to the frozen food when The appliance is switched on Large quantities of fresh food are placed in the freezer Freezer compartment AL flashes on the freezer compartment display panel and a...

Page 14: ...ps Note Keep food which is to be frozen away from food which is already frozen The following foods are suitable for freezing Cakes and pastries fish and seafood meat game poultry vegetables fruit herb...

Page 15: ...hed off SU and super go out on the display panel Note Super freezing automatically switches off after approx 2 days Thawing frozen food Depending on the type and application select one of the followin...

Page 16: ...e ideal storage conditions for fresh food Food can be kept fresh up to three times longer than in the normal cooling zone for even longer freshness nutrient retention and flavour Select the temperatur...

Page 17: ...ser 2 If the ice and water dispenser is not blocked m Caution A full ice cube container is heavy Carefully pull out ice cube container and remove ice cubes which are frozen together When the ice cube...

Page 18: ...ker If the ice has not been used for a prolonged period pour all ice cubes out of the container and also discard the ice produced within the next 24 hours If the appliance or the ice has not been used...

Page 19: ...possibly contains filterable cysts A one year warranty is issued for the entire system except disposable cartridge With reference to disposable cartridges a warranty is issued for material and process...

Page 20: ...storage duration The storage period depends on the type of produce The figures next to the symbols indicate the permitted storage period of the produce in months In the case of commercially available...

Page 21: ...er can be regulated according to the quantity stored Smaller quantities of food slide the regulator to the right Large quantities of food slide the regulator to the left A high air humidity keeps leaf...

Page 22: ...rolonged period 1 Before switching off it is most important that you switch the water supply to the appliance off for a few hours 2 Take all food out of the appliance 3 Switch the appliance off 4 Pull...

Page 23: ...shing up liquid The rinsing water must not run into the light 6 Wipe the door seal with clear water only and then wipe dry thoroughly 7 After cleaning reconnect and switch the appliance back on 8 Put...

Page 24: ...ntainer Push the ice cube container all the way back onto the supports until it locks into position Ice cube production continues Note If the container cannot be pushed all the way back twist the scre...

Page 25: ...nce The energy rating may then increase slightly The arrangement of the fittings does not affect the energy rating of the appliance Operating noises Quite normal noises Droning Motors are running e g...

Page 26: ...press the alarm lock button The display stops flashing The warmesttemperaturereachedin the freezercompartment is indicated on the temperature display for 10 seconds Freezer compartment door is open Cl...

Page 27: ...ty and rub dry Freezer compartment door is open Close the door Power failure Check whether the power is on Water dispenser is not functioning Tap turned off Turn on tap Water supply is interrupted Wat...

Page 28: ...eously press again options and select buttons for 5 seconds Customer service Your local customer service can be found in the telephone directory or in the customer service index Please provide custome...

Page 29: ...Register your product online 8001029298 8001029298 9511 en...

Reviews: