background image

en

39

Cleaning the appliance

m

Caution

Do not use gritty, acidic or chlorine-based cleaning

agents or solvents.
Do not use abrasive cleaning pads or sponges that

may scratch surfaces. This may lead to corrosion of

the metallic surfaces.
Never clean the shelves or containers in the

dishwasher. The parts may warp.

Proceed as follows:
1. Switch off the appliance before cleaning.
2. Unplug the appliance from the mains or switch off

the circuit-breaker.

3. Take out the food and store it in a cool place. Place

an ice block (if you have one) on the food.

4. Wait until the layer of frost has thawed out.
5. Clean the appliance with a soft cloth, lukewarm

water, and a little pH-neutral washing-up liquid. The

washing-up liquid solution must not be allowed to

get into the lights or run into the evaporation tray

through the drain hole.

6. Only wipe the door seal with clean water and then

rub it until it is dry.

7. After cleaning, reconnect the appliance to the mains

and switch it on.

8. Put the food back in.

Fittings

All the variable components of the appliance can be

removed for cleaning (see section headed Fittings).

Smells

If you notice unpleasant smells:
1. Unplug the appliance from the mains or switch off

the circuit-breaker.

2. Remove all food from the appliance.
3. Clean the inside of the appliance (see section

headed Cleaning the appliance).

4. Clean all packaging.
5. Pack strongly smelling food in air-tight containers to

prevent odours.

6. Switch on the appliance again.
7. Arrange the food.
8. After 24 hours, check again to see if the smells

have reappeared.

Lighting (LED)

Your appliance is equipped with a maintenance-free

LED light.
Any repair work on the lighting must only be carried out

by the after-sales service or authorised experts.

Saving energy

Install the appliance in a dry, well ventilated room.

The appliance must be installed out of direct sunlight

and away from heat sources (e.g. heating elements,

cooker).
Use an insulating plate if necessary.
Allow hot food and drinks to cool before placing

them in the appliance.
Place frozen food in the fridge compartment to

defrost and utilise the low temperature of the frozen

food to cool other food.
Only open the appliance doors for as short a time as

possible.
To prevent the food warming up quickly in the event

of a power cut or a fault, place blocks of ice in the

top compartment directly on top of the food.
Make sure that the freezer compartment door is

always closed.
The arrangement of the fittings has no effect on the

energy consumption of the appliance.
To prevent increased power consumption,

occasionally clean the air vent with a soft brush or

vacuum cleaner.

Operating noises

Completely normal noises

Humming

Motors running (e.g. refrigeration units, ventilator).

Bubbling, whirring or gurgling noises

Refrigerant circulating through the pipes.

Clicking

Motors, switches or solenoid valves are switching on/

off.

Preventing noises

The appliance is not standing straight

Make sure the appliance is exactly level by using a

spirit level. To adjust the position of the appliance, use

the adjustable feet or place something underneath.

The appliance is touching adjacent units or

appliances

Move the appliance away from adjacent furniture or

appliances.

Containers or shelves are wobbling or sticking

Check the removable parts and re-insert them if

necessary.

Containers are touching

Move the containers apart slightly.

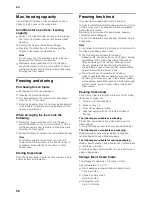
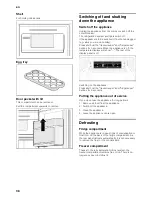
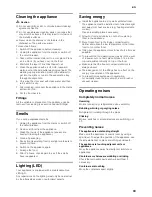
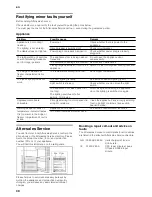
Summary of Contents for KA7902i30

Page 1: ...fr Notices d utilisation et de montage 41 it Istruzioni per l uso ed il montaggio 60 nl Gebruiksaanwijzing en installatievoorschrift 79 KA79 K hl und Gefrierkombination Fridge freezer R frig rateur C...

Page 2: ...ning device The steam may come into contact with electrical components and cause a short circuit Risk of electric shock Do not use pointed or sharp objects to remove layers of ice and frost You could...

Page 3: ...mage the refrigerant circuit pipes before disposing of them properly Specifications supplied After unpacking the appliance check all parts for transport damage If you find any defects contact the reta...

Page 4: ...ntain the minimum clearance of 22 mm from the wall thus providing adequate ventilation Observe the room temperature and ventilation requirements Room temperature The appliance is designed for a certai...

Page 5: ...ers Dimensions in mm Dimensions in mm Dimensions in mm 720 mm with spacers Side panel clearance Side panel depth Drawers can be pulled out fully at door opening of 145 min 22 Dimensions in mm min 22 D...

Page 6: ...the voltage and type of current specified conform to the values of your electricity grid You will find this information on the rating plate m Warning The appliance must never be connected up to an ele...

Page 7: ...e 3 screws holding the base panel and remove it 3 Undo the nut 4 Turn the adjusting nut until the appliance doors are aligned 5 If the freezer compartment door is lower Turn the adjusting nut anti clo...

Page 8: ...ve the top hinged cover 2 Slacken the hinge screw Do not unscrew the screw completely 3 Adjust the fridge compartment door s vertical alignment 4 Tighten the hinge screw 5 Apply the hinged cover and f...

Page 9: ...erating controls 2 Door pocket 2 star compartment Note Only the door pocket is rated as 2 stars the rest of the freezer compartment is 4 star rated 3 Door pockets 4 Ice cube trays 5 Freezer compartmen...

Page 10: ...re in the fridge compartment For switching the fast cooling function on and off 5 Fridge compartment display panel Fridge compartment temperature super symbol shown when fast cooling function is activ...

Page 11: ...area If you cannot open the freezer compartment door again immediately after closing it wait a moment for the low pressure created to equalise Setting the temperature Fridge compartment The temperatu...

Page 12: ...g off Press the freezer super button Note The display panel no longer shows super The temperature automatically switches back to the temperature set before the Fast freezing function was activated But...

Page 13: ...eserves condensed milk and hard cheeses When placing food in the fridge follow these guidelines Keep fresh untouched food in the fridge In that way it will keep longer and stay fresher In the case of...

Page 14: ...colour of the food as much as possible blanch vegetables before they are frozen Blanching is not required for aubergines peppers courgettes and asparagus You can find literature about freezing and bla...

Page 15: ...s shelves The glass shelves can be removed and fitted at different heights Removing Lift the glass shelf at the back and pull it out Inserting Slide the glass shelf backwards on the guide rails until...

Page 16: ...ill show The rest of the display panel is off Switching on the appliance Press and hold the freezer super and fridge super buttons for 5 seconds Putting the appliance out of service If you do not use...

Page 17: ...pped with a maintenance free LED light Any repair work on the lighting must only be carried out by the after sales service or authorised experts Saving energy Install the appliance in a dry well venti...

Page 18: ...roperly plugged in The refrigeration unit switches on with increasing frequency and for longer periods The appliance door is being opened frequently Do not open the appliance door unnecessarily The ve...

Page 19: ...9001000337 9605 de en fr it nl 9001000337 Constructa Neff Vertriebs GmbH Carl Wery Stra e 34 81739 M nchen GERMANY www neff international com...

Reviews: