background image

11

Cleaning and maintenance

Cleaning

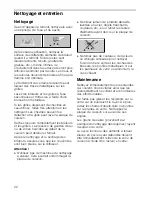
Once the appliance is cool, use a sponge 

to clean it with soap and water.

After each use, clean the surface of the 

respective burner parts once they have 

cooled down. If any residue is left (baked-

on food, drops of grease etc.), however 

little, it will become stuck to the surface and 

more difficult to remove later. The holes 

and grooves must be clean for the flame to 

ignite properly. 
The movement of some pans may leave 

metal residue on the pan supports.
Clean the burners and pan supports using 

soapy water and scrub with a non-wire 

brush.
If the pan supports are fitted with rubber 

rests, ensure that these are also cleaned. 

The rests may come loose and the pan 

support may scratch the hob.
Always dry the burners and pan supports 

completely. Water droplets or damp 

patches on the hob at the start of cooking 

may damage the enamel.
After cleaning and drying the burners, 

make sure the burner caps are correctly 

positioned on the diffuser.
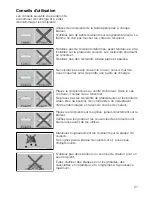
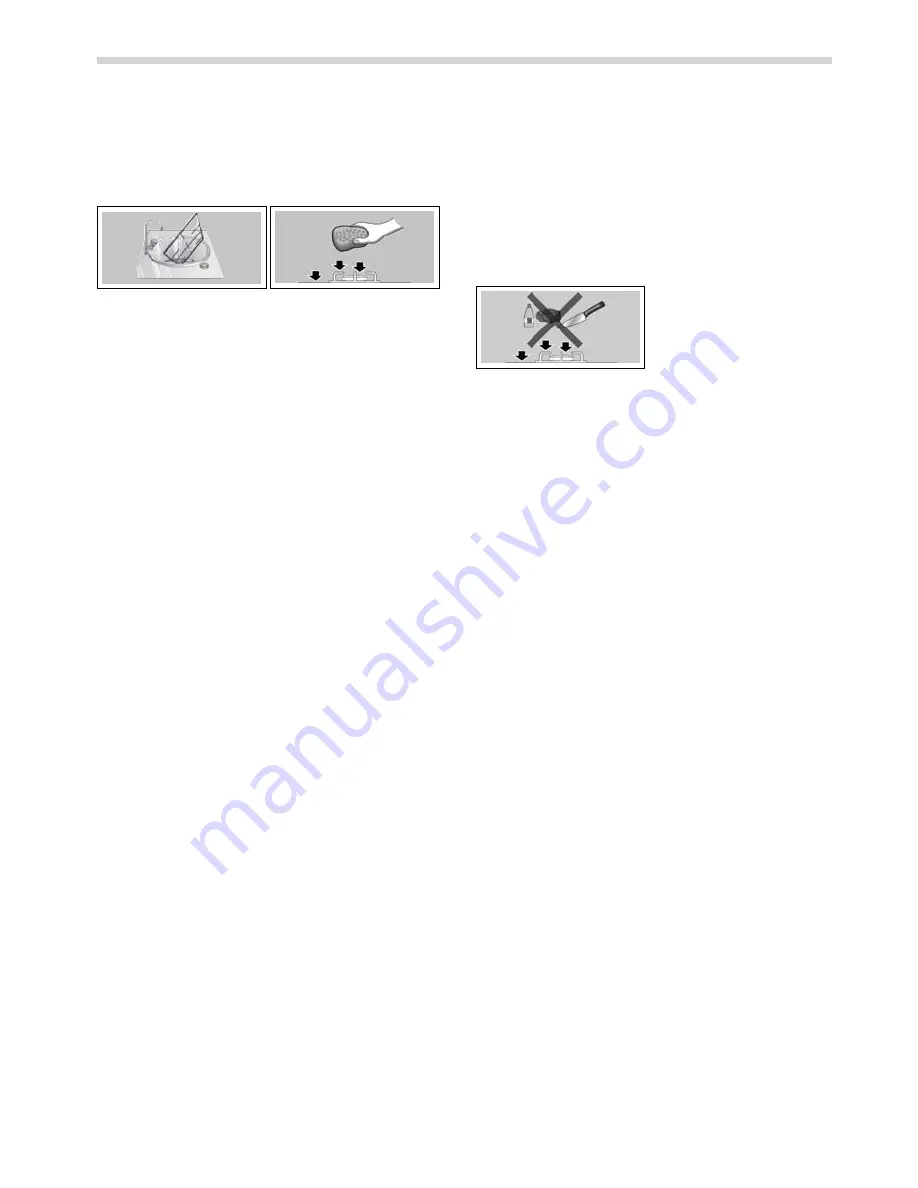
Caution!

Do not use steam cleaners. This could 

damage the hob.

Never use abrasive products, steel 

scourers, sharp implements, knives, etc. 

to remove bits of hardened food from the 

hob.

Do not use knives, scrapers or similar 

implements to clean the point where the 

glass meets the burner trims, the metal 

frames or the glass/aluminium panels, if 

fitted.

Maintenance

Always clean off any liquid as soon as it is 

spilt. This will prevent food remains from 

sticking to the hob surface and you will 

save yourself any unnecessary effort.
Never slide pans across the glass surface, 

as you may scratch it. In addition, try not to 

drop heavy or sharp objects on the glass. 

Never strike any part of the hob.
Grains of sand that may come from 

cleaning fruits and vegetables will scratch 

the glass surface.
Melted sugar, or foods which contain a lot 

of sugar which may have spilt, should be 

cleaned off the hotplate immediately, using 

the glass scraper.

Summary of Contents for T61S31S1

Page 1: ...Neff GmbH Carl Wery Stra e 34 81739 M nchen en Instruction manual 3 fr Mode d emploi 14 Cod 9000512300 B www neff international com...

Page 2: ...8 Switching on automatically 8 Safety system 8 Switching off a burner 8 Power levels 8 Warnings 8 Cooking guidelines 9 Cooking pans 9 Suitable pans 9 Wok pan 9 Precautions for use 10 Cleaning and main...

Page 3: ...ls which are strictly necessary to guarantee efficient protection during transport These materials are 100 recyclable thus reducing the environmental impact You can also contribute to caring for the e...

Page 4: ...e assembly instructions Do not tamper with the appliance s interior If necessary call our Technical Assistance Service Keep the operation and installation instructions and provide them along with the...

Page 5: ...unattended during operation The graphics in this instruction manual are given as a guide only The manufacturer is exempt from all responsibility if the requirements of this manual are not complied wi...

Page 6: ...or the appliance to work correctly Only for use on double flame burners with pans which are more than 26 cm in diameter e g grill pans earthenware casserole dishes and large pans with a round base etc...

Page 7: ...control knob press and hold it down firmly for 4 seconds after lighting the flame Switching off a burner Turn the corresponding control knob clockwise to the 0 setting Power levels The progressive co...

Page 8: ...pre cooked dishes Rapid burner Escalopes steaks omelettes frying Rice white sauce ragout Steaming fish vegetables Semi rapid burner Steamed potatoes fresh vegetables vegetable stews pasta Reheating k...

Page 9: ...energy Always place the pan right over the burner not to one side Otherwise it could tip over Do not place large pans on the burners near the control knobs These may be damaged by the very high tempe...

Page 10: ...amage the enamel After cleaning and drying the burners make sure the burner caps are correctly positioned on the diffuser Caution Do not use steam cleaners This could damage the hob Never use abrasive...

Page 11: ...positioned Check that the burner caps are correctly positioned The appliance is not earthed is poorly connected or the earthing is faulty Contact the electrician The burner flame is not uniform The b...

Page 12: ...in the country of purchase Detailed information is available from retail outlets Proof of purchase must be presented to obtain the benefits of the warranty We reserve the right to introduce changes Us...

Page 13: ...e 19 Syst me de s curit 19 teindre un br leur 19 Niveaux de chauffe 19 Avertissements 19 Conseils pour cuisiner 20 R cipients de pr paration 20 R cipients appropri s 20 R cipient wok 20 Conseils d uti...

Page 14: ...sport Ces mat riaux sont enti rement recyclables ce qui r duit l impact sur l environnement Nous vous encourageons contribuer galement la pr servation de l environnement en suivant les conseils ci des...

Page 15: ...ssaire de le changer veuillez consulter la notice de montage Ne manipulez pas l int rieur de l appareil Si n cessaire contactez notre Service Technique Conservez la notice d utilisation et d installat...

Page 16: ...responsable est pr sente Ne laissez pas l appareil sans surveillance pendant son fonctionnement Les images de cette notice sont propos es titre indicatif Le fabricant est exempt de toute responsabili...

Page 17: ...eurs sont correctement mises en place Pour utiliser exclusivement les br leurs double flamme avec des r cipients de diam tre sup rieur 26 cm comme les grils les cassolettes en c ramique les po les pae...

Page 18: ...lement Pour que cet dispositif soit actif 1 Allumez le br leur normalement 2 Maintenez le bouton de commande enfonc sans le l cher pendant 4 secondes apr s l allumage de la flamme teindre un br leur T...

Page 19: ...ine asiatique Wok R chauffer et maintenir au chaud plats pr par s plats cuisin s Br leur rapide Escalope steak omelette fritures Riz b chamel rago t Cuisson la vapeur poisson l gumes Br leur Semi rapi...

Page 20: ...une partie de l nergie Placez le r cipient bien au centre du br leur Dans le cas contraire il risque de se renverser Ne placez pas les r cipients de grande taille sur les br leurs situ s pr s du bouto...

Page 21: ...yage et le s chage des br leurs assurez vous que les couvercles sont bien plac s sur le diffuseur Attention N utilisez pas de machines de nettoyage vapeur Cela pourrait endommager la plaque de cuisson...

Page 22: ...plac s V rifiez que les couvercles sont bien plac s L appareil n est pas raccord la terre est mal raccord la terre ou la prise de terre est d fectueuse Contactez votre lectricien La flamme du br leur...

Page 23: ...ns le pays o l achat a t effectu Il est possible d obtenir des informations d taill es dans les points de vente Il est n cessaire de pr senter le bon d achat pour b n ficier de la garantie Tout droit...

Reviews: