Disassembly Guide
56
WARNING: Before attempting to open or disassemble the N-550,
disconnect the power cord from the N-550.
CAUTION: Observe ESD (electrostatic discharge) precautions when
working within the N-550.
Note
:
Some spare parts have a business reply card attached. When you
receive these spare parts, please fill out and return the card.
Replacement Level Supported
The replacement level supported for this product is to the printed circuit board
(PCB) and major subassembly level. Once you isolate a suspected PCB,
follow the procedures in
on page 55 to replace the PCB
with a known good PCB. Verify that the trouble symptom disappears and that
the N-550 passes all performance tests. If the trouble symptom persists, swap
back the replacement PCB with the suspected malfunctioning PCB (the
original PCB that was installed when you started troubleshooting) and
continue troubleshooting as directed in this section.
Prior to Disassembly
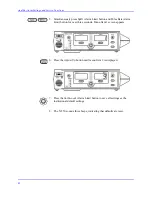
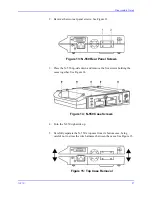
1. Turn the N-550 off by pressing the Power On/Off button.
2. Disconnect the N-550 from the AC power source.
3. Disconnect the sensor and the pulse oximetry cable.
Separating Top and Bottom Cases
1. Complete the procedure in
Prior to Disassembly
on page 56.
Summary of Contents for OxiMax N-550
Page 1: ...N 550 Pulse Oximeter Service Manual min min SpO2 N 550 SatSeconds SpO2 ...
Page 10: ...Blank Page ...
Page 38: ...Blank Page ...
Page 64: ...Blank Page ...
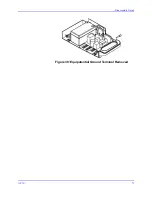
Page 81: ...Disassembly Guide N 550 71 Figure 39 Equipotential Ground Terminal Removed ...
Page 82: ...Blank Page ...
Page 86: ...Spare Parts 76 Figure 40 Exploded View ...
Page 90: ...Blank Page ...
Page 108: ...Blank Page ...
Page 120: ...Blank Page ...
Page 130: ...Figure 56 Main PCB Parts Locator Diagram 129 Technical Description N 550 ...
Page 131: ...Figure 57 Front Panel Parts Locator Diagram 131 N 550 Technical Description ...
Page 136: ...Blank Page ...
Page 137: ... ...

