Troubleshooting
34
If an error code is shown on the NPB-40 front panel display, see Figure 3,turn the
NPB-40 off, wait ten seconds, then turn the NPB-40 on. This clears recoverable
errors encountered by the NPB-40. If the error code still persists, refer to Table 4
for the indicated failure.
Figure 3: Typical Error Code Display
Once you have performed the recommended action, reassemble the NPB-40, refer
to
on page 15, and conduct a performance verification
before returning the NPB-40 to service. If the symptom persists continue
troubleshooting.
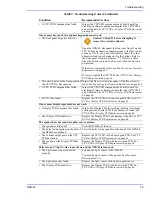
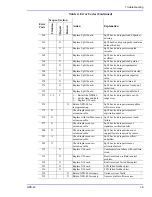
Table 3:
Troubleshooting Guide
Condition
Recommended Actione
The NPB-40 does not turn on when the
Power
button is pressed.
• The
Power
button was not fully
depressed.
Fully press the
Power
button.
• The batteries are missing.
Open the battery compartment and if batteries are missing
install new batteries. Refer to the NPB-40 Operator’s
manual.
• The batteries are installed incorrectly or
they are backwards.
Open the battery compartment and if batteries are not
installed correctly, remove and reinstall the batteries. Refer
to the NPB-40 Operator’s manual.
• The batteries are at or near a voltage too
low for the NPB-40 to operate.
Install new batteries. Refer to the NPB-40 Operator’s
manual.
• The sensor is defective.
Replace the sensor.
• The front panel keypad is defective.
Caution: Unlock J3 before attempting to
remove flex circuit conductor.
Open the NPB-40, disconnect the front case from J3 on the
CPU PCB and connect an ohmmeter between the flex circuit
conductor for J3, pin 5 and the conductor for J3, pin 3.
Observe a short when the
Power
button is pressed and an
open when not pressed. If incorrect, replace the front case.
Front Case Assembly Replacement
If the
Power
button functions correctly, replace CPU PCB.
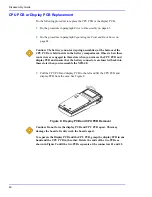
CPU PCB or Display PCB Replacement
• Flex circuit between the front panel and
the CPU PCB is disconnected.
Inspect the flex circuit and reconnect if the flex circuit is
loose. See
Summary of Contents for Oximax NPB-40
Page 1: ......
Page 5: ...Contents NPB 40 iii Power Supply 81 Power Supply Monitoring 81 Index 103...
Page 8: ...Tables vi This Page Intentionally Blank...
Page 18: ...Introduction 10 This Page Intentionally Blank...
Page 22: ...Routine Maintenance 14 This Page Intentionally Blank...
Page 40: ...Performance Verification 32 This Page Intentionally Blank...
Page 50: ...Troubleshooting 42 This Page Intentionally Blank...
Page 66: ...Spare Parts 58 This Page Intentionally Blank...
Page 70: ...Packing for Shipment 62 This Page Intentionally Blank...
Page 82: ...Specifications 74 This Page Intentionally Blank...
Page 90: ...Technical Discussion 82 This Page Intentionally Blank...
Page 92: ...Technical Discussion 84 This Page Intentionally Blank...
Page 94: ...Technical Discussion 86 This Page Intentionally Blank...
Page 96: ...Technical Discussion 88 This Page Intentionally Blank...
Page 98: ...Technical Discussion 90 This Page Intentionally Blank...
Page 100: ...Technical Discussion 92 This Page Intentionally Blank...
Page 102: ...Technical Discussion 94 This Page Intentionally Blank...
Page 104: ...Technical Discussion 96 This Page Intentionally Blank...
Page 106: ...Technical Discussion 98 This Page Intentionally Blank...
Page 108: ...Technical Discussion 100 This Page Intentionally Blank...
Page 110: ...Technical Discussion 102 This Page Intentionally Blank...
Page 113: ......


