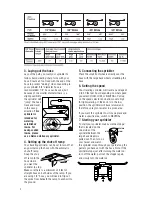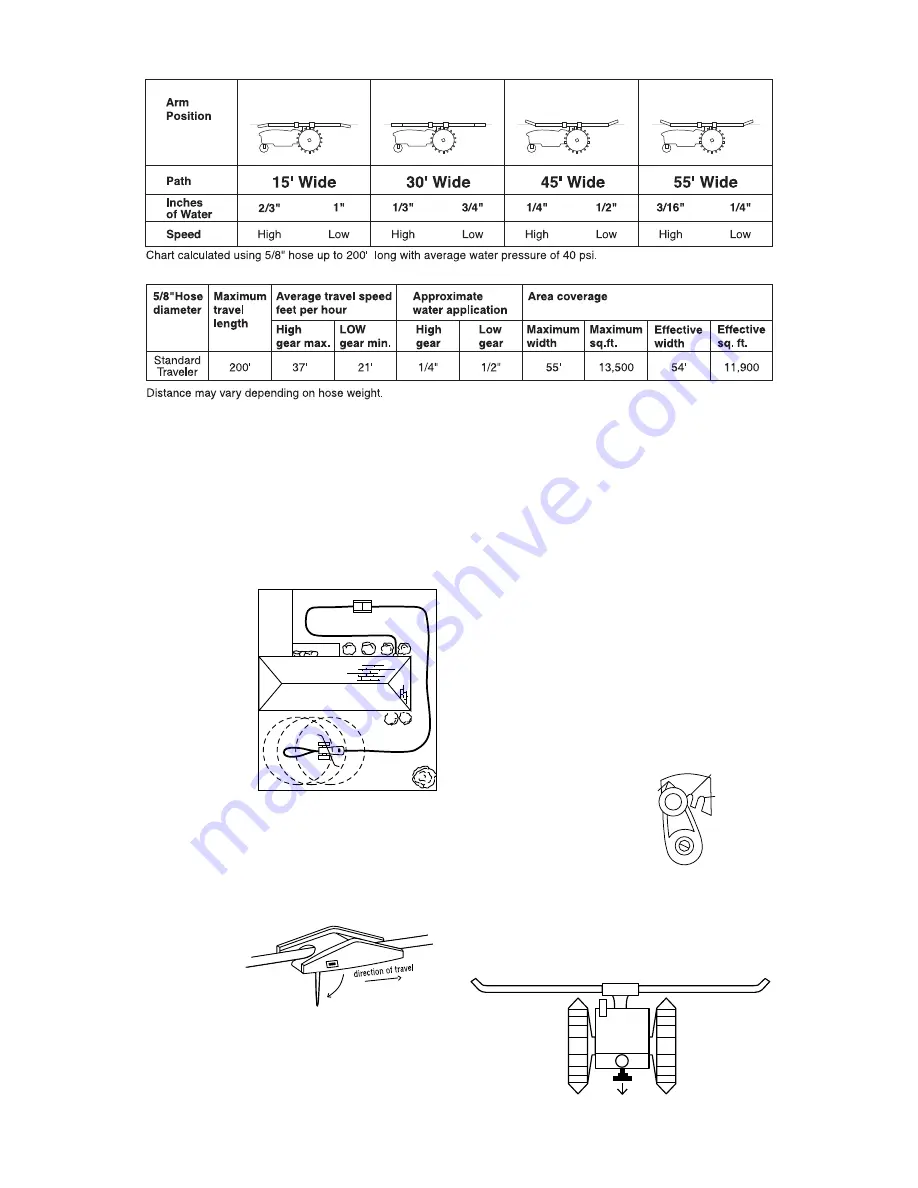
3. Laying out the hose
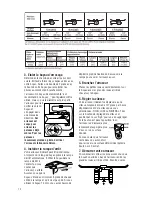
Lay out the path you want your sprinkler to
follow. Avoid creating sharp turns with your
hose. Create a 3 foot loop with the end of the
hose to prevent “kinking” when connecting to
your sprinkler. 5/8” diameter hose is
recommended. 1/2” hose can be used, but
because of the smaller diameter there is a
slight possibility
the sprinkler will
“jump” the hose
track and travel
in the wrong
direction. This
sprinkler is
intended for
watering
established
lawns. For
newly-seeded
lawns, please
use a Nelson stationary sprinkler.
4. Setting up the shut-off ramp
Your traveling sprinkler can be set to turn off at
any point along the hose with the automatic
shut-off ramp.
Snap the shut-
off ramp to the
hose where
you want the
sprinkler to stop.
Make sure there is a minimum of 5 feet of
straight hose on both sides of the ramp. If you
are using 1/2” hose, you will need to flip out
the spike from beneath the ramp to anchor it to
the ground.
5. Connecting the sprinkler
Place the small front wheels directly over the
hose with the large back wheels straddling the
hose.
6. Setting the speed
Your traveling sprinkler will travel an average of
0 to 37 feet per hour depending on what speed
you select: HIGH, LOW, or NEUTRAL. Pull up
on the speed selector knob and move to high
for light watering. If the knob is in the low
position, the sprinkler will travel slower and,
therefore, spray more water in a given area.
If you want the sprinkler to sit in one place and
water a specific area, switch to NEUTRAL.
7. Starting your sprinkler
To start your sprinkler, make sure the stopper
that is located on the
underside of the
sprinkler between the
large back wheels is
pulled out. Then, turn on
your faucet and watch
the sprinkler move through your yard along the
pattern you have set with the hose. Note: If the
sprinkler stops just after turning the water on,
turn off the water, pull out the stopper again,
and slowly turn the water on.
2
HIGH
NEUTRAL
LOW


