background image


14 

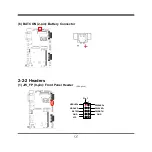
(6)  BATCON (2-pin): Battery Connector   


2-2-2 Headers


(1) JW_FP (9-pin): Front Panel Header   

(2.54 pitch)


PWRLED- 


PWRBTN 


Pin 1 


GND 


GND 


VCC 


RSTSW 


HDDLED- 


Summary of Contents for NF541S Series

Page 1: ...Release date December 13 2022 Trademark Specifications and Information contained in this documentation are furnished for information use only and are subject to change at any time without notice and...

Page 2: ...ii Environmental Protection Announcement Do not dispose this electronic device into the trash while discarding To minimize pollution and ensure environment protection of mother earth please recycle...

Page 3: ...OUT DIAGRAM 3 CHAPTER 2 HARDWARE INSTALLATION 2 1 JUMPER SETTING 7 2 2 CONNECTORS AND HEADERS 10 2 2 1 CONNECTORS 10 2 2 2 HEADERS 14 CHAPTER 3 INTRODUCING BIOS 3 1 ENTERING SETUP 17 3 2 BIOS MENU SCR...

Page 4: ...t is moved from a cold environment to a warmer one to avoid condensation phenomenon These water drops attached on PCB or the surface of the components can bring about phenomena as minor as computer in...

Page 5: ...NOTICE MANUFACTURER PROVIDES THIS MANUAL AS IS WITHOUT WARRANTY OF ANY KIND AND WILL NOT BE LIABLE FOR ANY INDIRECT SPECIAL INCIDENTIAL OR CONSEQUENTIAL DAMAGES INCLUDING DAMANGES FOR LOSS OF PROFIT L...

Page 6: ...1 DDR3L 1066 1333 MHz SO DIMM up to 8GB Support 2 full size Mini PCIE 1 share mSATA Support 1 2 5 SATAII hard disk driver device 3Gb s Support USB 3 0 data transport demand Support VGA HDMI dual disp...

Page 7: ...card intalled in MPE1 Mini PCIE slot LAN Chip Integrated with 2 Intel I211AT PCI E Gigabit LAN chips Support Fast Ethernet LAN function of providing 10 100 1000Mbps Ethernet data transfer rate Storage...

Page 8: ...am Warning The board has a 12V DC in power connector DCIN in I O back panel and an internal ATX12V ATX2P power connector User can only connect one type of compatible power supply to one of them to pow...

Page 9: ...om RJ 45 LAN Ports HDMI Port USB 2 0 Ports USB 2 0 Port Top USB 3 0 Port Bottom Reset Button Internal 12V DC in Power Connector 12V DC in Power Connector Speaker Header Jumper JPCOM1 J1 Block Jumper H...

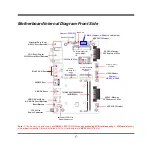
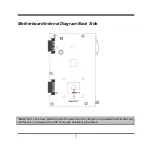
Page 10: ...oard Internal Diagram Back Side Note CPU is the most important part of the board and very fragile to any possible harm Make sure that there is no damage to the CPU during any installation procedures I...

Page 11: ...54 pitch Connectors Connector Name DCIN 12V System DC in Power Jack Connector ATX2P Internal 12V System DC in Power Connector USB1 Top USB 2 0 Port Connector Bottom USB 3 0 Port Connector USB2 USB 2...

Page 12: ...ch SPEAK_CON1 Speaker Header 4 pin Block 2 54 pitch J1 Pin 5 6 LAN2 Activity LED Header Pin 7 8 LAN1 Activity LED Header 10 pin Block 2 54 pitch Chapter 2 Hardware Installation 2 1 Jumper Setting Pin...

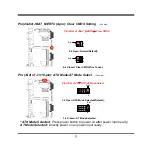
Page 13: ...Normal Default 3 Pin 1 2 4 Pin 1 3 2 4 Pin 1 2 of J1 10 pin ATX Mode AT Mode Select 2 54 pitch Pin 1 2 of J1 ATX AT Mode Select 1 2 Closed AT Mode Selected 1 2 Open ATX Mode Selected Default 2 Pin1 2...

Page 14: ...Used needs to enter BIOS and enable Case Open Detect function In this case if your case is removed next time when you restart your computer a message will be displayed on screen to inform you of this...

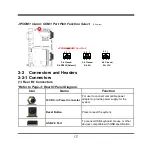
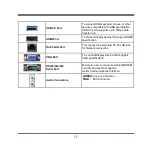
Page 15: ...5 3 1 2 2 Connectors and Headers 2 2 1 Connectors 1 Rear I O Connectors Refer to Page 3 Rear IO Panel Diagram Icon Name Function 12V DC in Power Connector For user to connect compatible power adapter...

Page 16: ...y device that support HDMI specification RJ 45 LAN Port This connector is standard RJ 45 LAN jack for Network connection VGA Port To connect display device that support VGA specification RS232 422 485...

Page 17: ...nsmission Mode Select for COM1 refer to Page 22 at first before using specialized cable to connect different pins of this port 1 2 3 4 5 6 7 8 9 RS232 DCD RS232 SIN RS232 SOUT RS232 DTR GND RS232 RI R...

Page 18: ...13 4 CPUFAN1 4 pin CPUFAN Connector Pin1 Fan Speed Control 12V Fan Power GND 5 SYSFAN1 4 pin SYSFAN Connector GND 12V Fan Power Fan Speed Control Pin1...

Page 19: ...14 6 BATCON 2 pin Battery Connector 2 2 2 Headers 1 JW_FP 9 pin Front Panel Header 2 54 pitch PWRLED PWRBTN Pin 1 2 HDDLED GND GND VCC PWRLED RSTSW HDDLED...

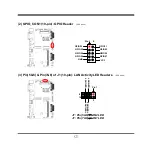
Page 20: ...54 pitch VCC3 GPIO23 GPIO27 GPIO25 Pin 1 2 2 GPIO21 GND GPIO26 GPIO24 GPIO22 GPIO20 3 Pin 5 6 Pin 7 8 of J1 10 pin LAN Activity LED Headers 2 54 pitch J1 Pin 5 6 LAN2 LED J1 Pin 7 8 LAN1 LED Pin1 2 L...

Page 21: ...16 4 SPEAK_CON1 4 pin Speaker Header 2 54 pitch Pin1 Pin No Definition 1 L 2 L 3 R 4 R...

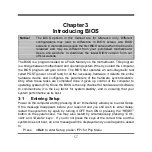
Page 22: ...e hardware device and configures the parameters of the hardware synchronization Only when these tasks are completed done it gives up control of the computer to operating system OS Since the BIOS is th...

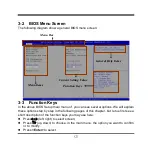
Page 23: ...explain these options step by step in the following pages of this chapter but let us first see a short description of the function keys you may use here Press left right to select screen Press up down...

Page 24: ...to pop up a small help window that describes the appropriate keys to use and the possible selections for the highlighted item To exit the Help Window press Esc 3 5 Menu Bars There are six menu bars on...

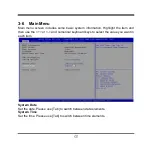
Page 25: ...formation Highlight the item and then use the or and numerical keyboard keys to select the value you want in each item System Date Set the date Please use Tab to switch between data elements System Ti...

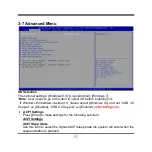
Page 26: ...ing OS If Windows Embedded standard 8 please select Windows 8x and set USB 3 0 Support as Disabled USB 2 0 Support as Enabled refer to Page 32 ACPI Settings Press Enter to make settings for the follow...

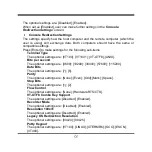
Page 27: ...vice The optional settings Auto IO 3F8h IRQ 4 IO 2F8h IRQ 3 IO 3E8h IRQ 4 IO 2E8h IRQ 3 Transmission Mode Select The optional settings are RS422 RS232 RS485 Mode Speed Select The optional settings are...

Page 28: ...WDT wake up while ERP function is set as Enabled The optional settings Disabled Enabled When set as Enabled the following sub items shall appear WatchDog Wake up Timer Value The setting range is 10 40...

Page 29: ...are VT100 VT100 VT UTF8 ANSI Bits per second The optional settings are 9600 19200 38400 57600 115200 Data Bits The optional settings are 7 8 Parity The optional settings are None Even Odd Mark Space S...

Page 30: ...ave the same or compatible settings Press Enter to make settings for the following sub items Out of Band Mgmt Port The default setting is COM1 Terminal Type The optional settings are VT100 VT100 VT UT...

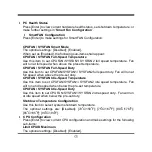
Page 31: ...FAN SYSFAN1 SYSFAN2 full speed duty Fan will run at full speed when above the pre set duty CPUFAN SYSFAN Idle Speed Temperature Use this item to set CPUFAN SYSFAN1 SYSFAN2 idle speed temperature Fan w...

Page 32: ...he additional hardware capabilities provided by Vanderpool Technology EIST The optional settings Disabled Enabled Use this item to enable or disable Intel SpeedStep CPU C State Report Use this item to...

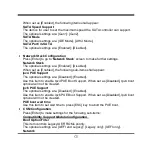
Page 33: ...items shall appear Ipv4 PXE Support The optional settings are Disabled Enabled Use this item to enable Ipv4 PXE Boot Support When set as Disabled Ipv4 boot optional will not be created Ipv6 PXE Suppor...

Page 34: ...disable system wake up by RTC alarm The optional settings Disabled Enabled When set as Enabled Wake up Hour Use this item to select 0 23 For example enter 3 for 3am and 15 for 3pm Wake up Minute Use...

Page 35: ...HCI ownership change should be claimed by EHCI driver The optional settings are Disabled Enabled USB Mass Storage Driver Support The optional settings are Disabled Enabled USB Hardware Delays and Time...

Page 36: ...elay range is from 1 to 40 seconds in one second increments Intel R I211 Gigabit Network Connection XX XX XX XX XX XX Intel R I211 Gigabit Network Connection XX XX XX XX XX XX 3 8 Chipset Menu North B...

Page 37: ...8M 256M MAX Aperture Size The optional settings are 128MB 256MB 512MB GTT Size The optional settings are 1MB 2MB Primary IGFX Boot Display The optional settings are VBIOS Default CRT HDMI South Bridge...

Page 38: ...USB Configuration Press Enter to make settings for the following sub items USB Configuration USB 3 0 Support The optional settings are Enabled Disabled USB 2 0 Support The optional settings are Enabl...

Page 39: ...34 3 9 Security Menu Security menu allow users to change administrator password and user password settings...

Page 40: ...nds to wait for setup activation key Bootup Numlock State Use this item to select keyboard numlock state The optional settings are On Off Quiet Boot The optional settings are Disabled Enabled Boot Opt...

Page 41: ...hanges Discard Changes and Reset This item allows user to reset the system without saving any changes Restore Defaults Use this item to restore load default values for all the setup options Save as Us...

Page 42: ...Override UEFI xx Press this item to select the device as boot disk after save configuration and reset Reset System with TXE disable Mode Press Enter for TXE to run into the temporary disable mode Igno...

Reviews: