Page 9
P: 419.542.7751 ● F: 419.542.6690 ●
800.782.6761
● nemcofoodequip.com
10.
When all updates have been completed save the file to the “1150APP” folder on the thumb
drive. The file must be saved as a .CSV file and not an Excel spreadsheet. Failure to save the file
as a .CSV file will result in failure to upload the new programming.
11.
Using the USB provided and the power to the press “OFF”, insert the USB drive located behind
the front left leg.
12.
Hold down the “HOLD/CANCEL” button and turn the power switch to the “ON” position.
NOTE: You must keep the “HOLD/CANCEL” button depressed throughout the process.
13.
Once power is applied to the press the board will display “bldr” and the LED lights near the
menu buttons will flicker. Once the lights flicker and the board goes black you can now let go of
the “HOLD/CANCEL” button.
14.
Turn power to the press “OFF” and remove the USB from the bottom of the press.
15.
The new program is now uploaded. Turn power to the press back “ON” and continue to cook as
desired.
ADJUSTING TOP HEATER PLATE
1.
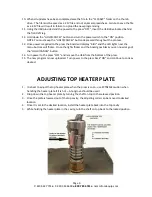
It is best to adjust the top heater plate when the press is cool – use EXTREME caution when
handling the heater plate if it is hot – A hot glove should be used!
2.
Drop down the top heater plate by turning the shaft on top to the released position.
3.
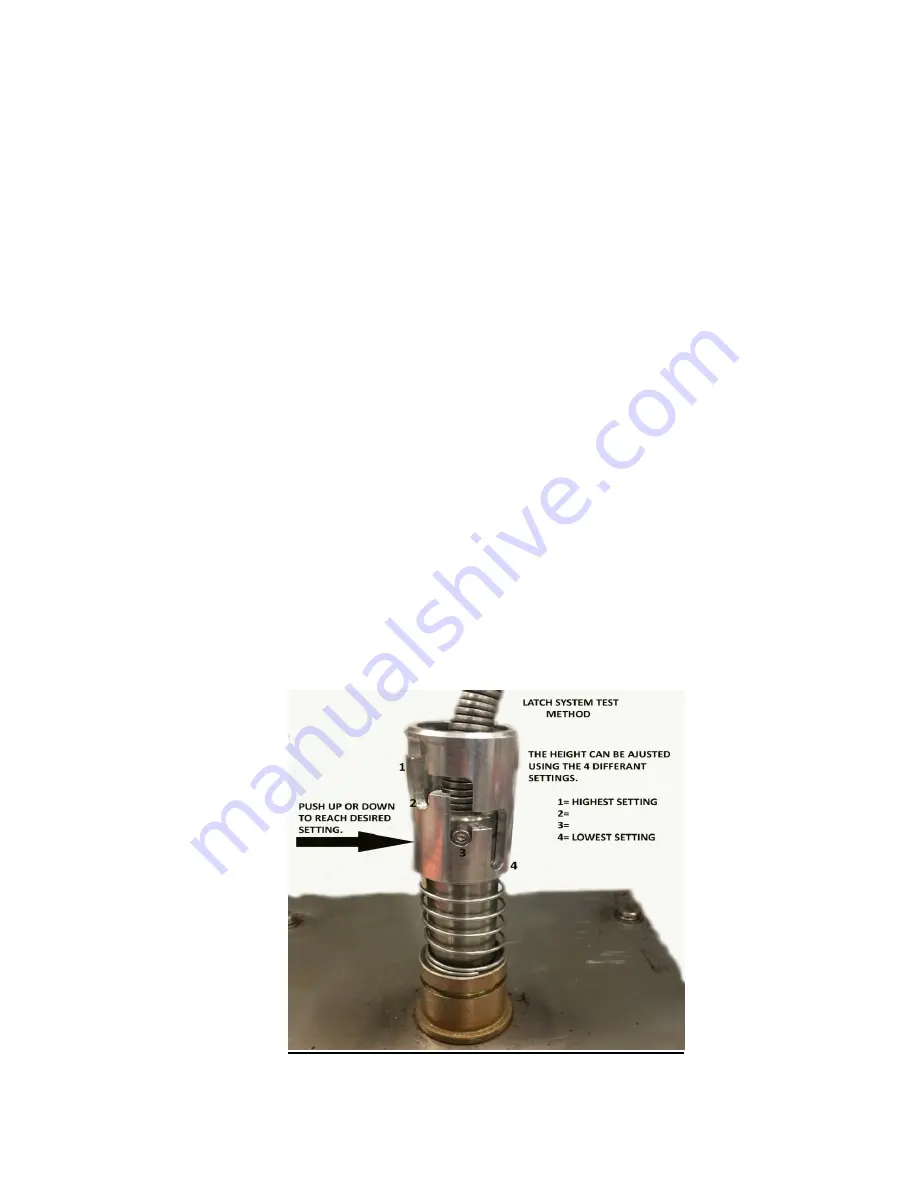
Once the plate is lowered out of the top cavity, the adjusting collar can be moved to desired
location.
4.
Once it is set in the desired location, install the heater plate back into the top cavity.
5.
While holding the heater plate in the cavity, turn the shaft on top back to the locked position.

