6
3. WIRING AND INSTALLATION PROCEDURES
Your Wind Turbine is shipped partially assembled. Please completely read
all procedures before beginning installation. NOTE: Do not install the blade/hub
until the turbine is mounted on the tower
4mm hex key wrench (included)
5mm hex key wrench (included)
8mm hex key wrench (included)
Power cables (not included):
#12 AWG (American Wire Gage) stranded.
Batteries (not included)
Steel Pipe: 1 1/2", Schedule 40 steel pipe (Actual OD 1.875 inches, 48mm) (not
included)
Torque wrench with 4mm, 5mm, and 8mm hex drives (not included)
Soldering iron or propane torch (not included)
Rosin core solder (not included)
Electrical tape or 1/4” (6-7mm) heat shrink (not included)
Wire strippers (not included)
Wire crimpers (not included)
NOTE: Do not connect to the battery.
Precheck
Spin rotor shaft slowly with your fingers
while at the same time connecting and
disconnecting the DC OUTPUT's positive
and negative wires. With the wires
connected, the rotor shaft should become
more difficult to rotate. With the wires
disconnected, it should spin freely.
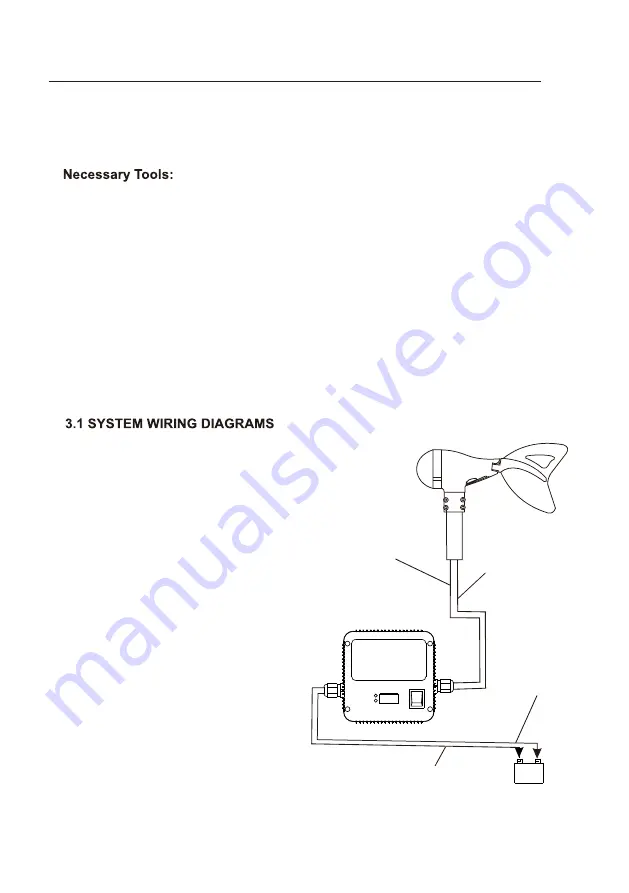
Every time connect the DC
OUTPUT's wires (RED= Positive,
BLACK = Negative)
directly to the set of posts of the
Power Meter box, the controller LED will
lighten to indicate that the
controller is running properly.
CAUTION: DO NOT CONNECT WIND
GENERATOR POSITIVE TO BATTERY
NEGATIVE AND POWER METER BOX
NEGATIVE TO BATTERY POSITIVE FOR
EVEN A SECOND, OR ELSE WILL DAMAGE THE WIND GENERATOR'S
CONTROLLER AND VOID YOUR WARRANTY.
Red wire
Red wire
black wire
Black wire
Power Meter Box


