Neobit 1012VA-II ADSL Ethernet Router User’s Guide
Chapter 3
23
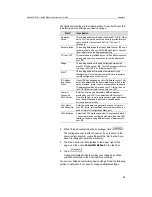
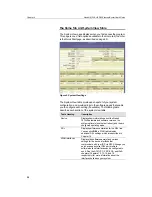
The fields are described in the following table. Consult with your ISP
to determine which settings you need to change.
Field
Description
Operation
Mode
This setting enables or disables the Neobit 1012VA. When
set to “No”, the device cannot be used to provide Internet
connectivity for your network. Set it to “Yes” now, if
necessary.
Encapsulation
This setting determines the type of data link your ISP uses
to communicate with your ADSL/Ethernet router. Contact
them to determine the appropriate setting.
VCI and VPI
These values are provided by your ISP and determine the
unique path your connection uses to communicate with
your ISP.
Bridge
This setting enables or disables bridging between the
Neobit 1012VAand your ISP. Your ISPs may also refer to
this using “RFC 1483” or “Ethernet over ATM”.
IGMP
This setting enables or disables the Internet Group
Management Protocol, which some ISPs use to perform
remote configuration of your device.
IP Address
and
Subnet
Mask
If your ISP has assigned a public IP address to your LAN,
enter the address and the associated subnet mask in the
boxes provided. (Note: in some configurations, the public
IP address should be entered on your PC rather than on
the ADSL/Ethernet router; check with your ISP.)
Primary/
Secondary
DNS Server
Enter the Primary and Secondary DNS addresses
provided by your ISP. If you selected
Auto Dis
User Configured
, you are not required to enter addresses
here; they will be used in addition to any addresses
discovered automatically.
User Name
and
Password
Enter the username and password you use to log in to
your ISP. (Note: this is different from the information you
used to log in to Configuration Manager.)
ATM Interface
Select the ATM interface you want to use (usually atm-0).
You system may be configured with more than one ATM
interface if you are using different types of services with
your ISP.
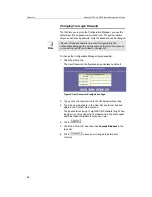
2. When finished customizing these settings, click
.
The settings are now in effect; however, if you reboot or if the
power is disconnected, your settings will be lost. In step 3, you
save the changes to permanent memory:
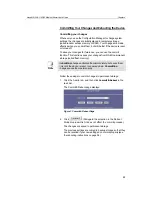
3. Click the Admin tab that displays in the upper right of the
page, and then click
Commit & Reboot
in the task bar.
4. Click
.
A page will display briefly to confirm your changes, and then
you will be returned to the Commit & Reboot page.
You are now finished customizing basic settings. Read the following
section to determine if you need to change additional settings.


