background image

32

Neptronic

®

www.neptronic.com

Evaporative Humidification / Cooling System

De-scaling Method Statement

Descaling

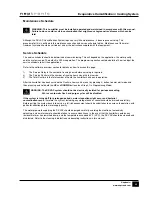
In exceptional circumstances it may become necessary to descale the system. It is recommended that visual inspection

is carried out 3 months after commissioning and then annually thereafter. De-scaled and rinse with clean water if nec-

essary. 

Do not use metal objects or high pressure washers to clean any part of the SK VAP .

The recommended de-scaling equipment is:

1. Suitable de-scaler

2. Descaler neutraliser 

3. Two containers of adequate size to completely immerse a matrix cassette.

Step 1 - Refer to the risk assessment

• Refer to the manufacturers instructions and safety advice.

• Ensure the SK VAP system is OFF and the area well ventilated.

WARNING: When working with de-scaling solution always wear appropriate personal protective clothing,

protective gloves and eye protection.

Step 2 - Dismantle the SK VAP Evaporative Module

• Turn off and isolate all electrical and water supplies to the SK VAP.

• Dismantle the SK VAP Matrix into individual cassettes.

Step 3 - Prepare de-scaling solution

• Note the various control settings.

• All cleaning must be carried out outside as dangerous gas is being  produced.

• Mix the appropriate concentration of descaling solution into adequate sized container.

Step 4 - Prepare clean water bath

• Ensure the clean water container is of adequate size to fully immerse cassettes. 

• Fill the container with fresh, clean water.

Step 5 - Remove scale from individual cassettes

• Using a soft brush, lightly brush any loose scale from the surface of the matrix

• Lower the individual cassettes into the descaling solution. 

• Keep each matrix cassette in the solution until the reaction between the calcium on the matrix and the

descaling solution is complete.

Notes:   

1. The effect of the descaling solution will vary depending of the condition of the matrix material. The above

process may need to be repeated for an improved effect.

2. It may be necessary to descale the humidifier water tray. If so, please consult Neptronic® for advice.

Step 6 - Clean individual cassettes in water

• Lift the individual cassettes out of the acid solution, allow any excess descaling solution to drip and directly 

submerse into the water tub.

• Gently wash the cassettes in the clear water until there is no evidence or odour of any acid left. Ensure that 

no damage is done to the fibres of the matrix.

Step 7 - Reassemble the matrix

• Reassemble the individual cassettes into the SK VAP evaporative Module.

Step 8 - Flush the SK VAP to remove traces of acid

• Before normal operation of the SK VAP the matrix must be flushed and drained several times to ensure no 

acid is left on the cassettes.

• Leave the AHU switched off and flush the unit by filling, operating and draining for at least 5 times.

This procedure should approximately last one hour.

Step 9 - Restart

• Where required, reset to original setting and put unit back into operation. Test for correct operation as per 

commissioning section of the manufacturers manual.

• Check for and complete maintenance requirements as per manufacturers manual.

• Always leave work area clean, dry and tidy.

Summary of Contents for SK VAP

Page 1: ...Montreal Quebec H4N 1R6 CANADA TEL 514 333 1433 FAX 514 333 3163 www neptronic com SK VAP Evaporative Humidifier Cooling System Manual Installation Commissioning Operation and Maintenance SK VAP Vers...

Page 2: ...commercial and Residential application Gas fired humidifiers for commercial application Actuators to regulate air dampers or valves Electric heaters Humidistats Thermostats and other control peripher...

Page 3: ...Stage 6 Connect Power Supply to SK VAP Control panel Page 16 Stage 7 Connect SK VAP Module Page 16 Stage 8 Connect Controls Page 16 Wiring Diagram Page 17 Programming mode Page 18 Alarm and notificati...

Page 4: ...4 Neptronic www neptronic com Evaporative Humidification Cooling System...

Page 5: ...rotect the user from fibres or dust If dust is generated during handling it is recommended that respiratory protection is worn Damage to the evaporative material will affect the performance of the hum...

Page 6: ...n water supply multi stage control is an option which individually operates sec tions of the system for closer control Modular construction facilitates a range of system sizes and efficiencies to matc...

Page 7: ...al applications The evaporative matrix consists of modular cassettes with low pressure drop which are available in a range of sizes and efficiencies The SK VAP evaporative module is constructed from r...

Page 8: ...ammable material UL900 class 1 Safe hygienic resist ance to fungi according to JIS L 1902 ASTM G26 96 2002 Immersion Pump 110 230 V 50 60 Hz IP 55 CE UL CSA Approved 1 2 15mm Pipe work Inlet Solenoid...

Page 9: ...Outputs Control Options Fault Diagnostics Option 12 300mm wide x 17 420mm high x 6 140mm deep 14 5 lb 6 5 kg 110 V AC fused at 10 Amps in the US 490 Watts max Common fault alarm volt free contacts On...

Page 10: ...Step 1 Positioning the Evaporative Module Step 2 Install blanking plates Step 3 Connect feed water supply Step 4 Connect to open drain Step 5 Position and mount Control panel Step 6 Connect power supp...

Page 11: ...and primed and have enough head to overcome the pressure of the system and for hygiene reasons completely drain down On commissioning the system drainage of the humidification section should be tested...

Page 12: ...rative Module has been positioned in the waterproof section of air handling unit non corrosive blanking plates not supplied must be installed to prevent air bypass around the Module in the AHU Typical...

Page 13: ...Evaporative Module inlet as possible via two 1 2 15mm compression fittings It is advisable to mount the PureFlo Ag outside the AHU for ease of access Typically 1 2 15mm interconnecting copper pipework...

Page 14: ...m copper or stainless pipework The drain assembly can be reversed to face in the opposite direction to suit either left or right feed pipe work This drain assembly should be connected to the main buil...

Page 15: ...and the SK VAP Control Panel see Wiring Diagram on page 17 The SK VAP Control panel must have an electrical disconnect switch not supplied fitted within 39 1m for purposes of maintenance and emergenc...

Page 16: ...trol panel This is essential for the purposes of maintenance and emergencies The electrical power cable to SK VAP Control panel should be suitably rated for a 120Vac 10 Amp load in the US The power su...

Page 17: ...17 Neptronic Evaporative Humidification Cooling System www neptronic com Wiring Diagram...

Page 18: ...18 Neptronic www neptronic com Evaporative Humidification Cooling System...

Page 19: ...19 Neptronic Evaporative Humidification Cooling System www neptronic com...

Page 20: ...20 Neptronic www neptronic com Evaporative Humidification Cooling System...

Page 21: ...21 Neptronic Evaporative Humidification Cooling System www neptronic com...

Page 22: ...22 Neptronic www neptronic com Evaporative Humidification Cooling System...

Page 23: ...ve Module has a feed water supply in excess of 29 psi 2 bar connected to the supplied filling hose Ensure that the PureFlo Ag system is installed Check all joints and fittings for leaks 5 Drain instal...

Page 24: ...uipment are available to carry out disinfection as per the method statement in the cleaning and disinfection section of this manual 3 Putting the System into Operation Check that all operating paramet...

Page 25: ...e is the number of running hours since the last service 3 The Total Runtime is the total number of hours the humidifier has been in operation After the humidifier has been serviced the Runtime hours c...

Page 26: ...ater inlet soenoid valve strainer yes yes Check pump operation yes yes Check all hoses yes yes Check water distribution header pipes yes yes Clean water distribution header pipes yes Check drain valve...

Page 27: ...r one hour before being put back into use 2 If the microbial count in the water supply to the SK VAP evaporative module exceeds 103 cfu ml this suggests contamination of the water system within the bu...

Page 28: ...ive Matrix Cassette 300 250 150 85 Type B HU02 200 25 06 Evaporative Matrix Cassette 300 500 150 85 Type B HU02 200 25 07 Evaporative Matrix Cassette 600 250 150 85 Type B HU02 200 25 08 Evaporative M...

Page 29: ...across the face of the humidifier and ensure it is within the specification 4 Insufficient water is being supplied to the matrix Check the rotation of the Module pump Check the water supply pressure...

Page 30: ...e layout of the humidifier pipe work for example where system pipe work splits into H or U shape ensure that disinfection solution reaches all pipe work end of lines Additional procedures will be requ...

Page 31: ...be overridden refer to the programming section of this manual Step 4 Add disinfection solution Add the solution to the water sump tray and allow to mix Measure the strength of the disinfection solutio...

Page 32: ...emove scale from individual cassettes Using a soft brush lightly brush any loose scale from the surface of the matrix Lower the individual cassettes into the descaling solution Keep each matrix casset...

Page 33: ...2750mm 108 HumEvap System Efficiency Matrix Depth A 75 Efficient 100mm 4 B 85 Efficient 150mm 6 C 95 Efficient 200mm 8 X X X X HumEvap OEM Version If Applicable C OEM Circulating D OEM Direct Feed Pro...

Page 34: ...34 Neptronic www neptronic com Evaporative Humidification Cooling System...

Page 35: ...35 Neptronic Evaporative Humidification Cooling System www neptronic com...

Page 36: ...Neptronic 400 boul Lebeau Montreal Quebec H4N 1R6 CANADA TEL 514 333 1433 FAX 514 333 3163 www neptronic com...

Reviews: