background image

Introduction

1-4

MRX920 Getting Started Guide

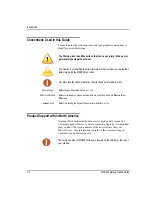
Conventions Used in this Guide

This guide uses the following icons and typographical conventions to 
identify special information.

Product Support within North America

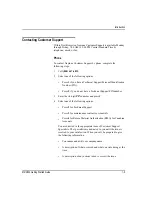
Neptune offers various methods to receive high-quality, responsive 
Customer Support. However, before contacting Neptune, it is important 
that you know the version number of the host software that your 
MRX920 uses. This information is useful to the Customer Support 
Specialist who addresses the call.

The Warning icon identifies actions that can cause injury to the user or 
permanently damage the product.

The Caution icon identifies important information that is critical to ensuring that 

data stored with the MRX920 is not lost.

The Note icon identifies information that clarifies a point within the text.

All small caps

Refers to keys. Examples: 

ENTER

ALT

TAB

All bold initial caps

Refers to field names, menus, buttons, and menu options. Example: 

Device

 field or 

File

 menu.

+ between keys

Refers to pressing the keys at the same time. Example: 

ALT

+

B

The version number of MX900 software is located on the title bar at the top of 

your window.

Summary of Contents for MRX920

Page 1: ...MRX920 Getting Started Guide Versi n en espa ol disponible en www neptunetg com...

Page 2: ......

Page 3: ...MRX920 Getting Started Guide Versi n en espa ol disponible en www neptunetg com...

Page 4: ...arks or registered trademarks of their respective holders Regulatory Compliance Federal Communication Commission FCC Statement FCC ID P2SMRXV4 This device complies with Part 15 of the FCC Rules Operat...

Page 5: ...d in this list having a gain greater than the maximum gain indicated for that type are strictly prohibited for use with this device Approved Antenna List Type Omni Directional Gain 5dBi Impedance 50 o...

Page 6: ...en compromettre le fonctionnement RF Exposure Cet quipement est conforme aux limites d exposition aux radiations dans un environnement non contr l Cet quipement doit tre install et utilis distance min...

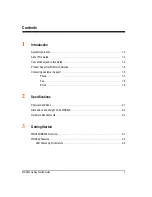
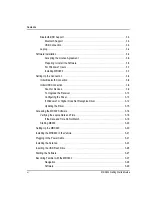
Page 7: ...this Guide 1 4 Product Support within North America 1 4 Contacting Customer Support 1 5 Phone 1 5 Fax 1 6 Email 1 6 2 Specifications Physical Conditions 2 1 Dimensions and Weight of the MRX920 2 2 Har...

Page 8: ...8 Scan for Devices 3 9 To Upgrade the Receiver 3 10 Configuring the Driver 3 10 If Windows 7 or Higher Does Not Recognize Driver 3 12 Updating the Driver 3 15 Accessing the MX900 Software 3 18 Verifyi...

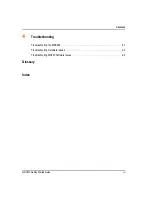
Page 9: ...Contents MRX920 Getting Started Guide vii 4 Troubleshooting Troubleshooting the MRX920 4 1 Troubleshooting Hardware Issues 4 2 Troubleshooting MX900 Software Issues 4 4 Glossary Index...

Page 10: ...Notes viii MRX920 Getting Started Guide Contents...

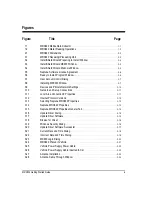
Page 11: ...3 10 3 10 Network and Setup Connections 3 11 3 11 Local Area Connection 6 Properties 3 11 3 12 Internet Protocol Version 4 3 12 3 13 Selecting Neptune MRX920 Properties 3 13 3 14 Neptune MRX920 Prope...

Page 12: ...Figures x MRX920 Getting Started Guide Figure Title Page 3 29 Cable Protector 3 25 3 30 USB Port and Drive 3 26 3 31 Navigating Within the Software 3 28...

Page 13: ...ble Title Page 2 1 Physical Specifications 2 1 2 2 Dimensions and Weight of the MRX920 2 2 2 3 Hardware Requirements 2 3 3 1 LED Status Light Indications 3 3 4 1 Hardware Troubleshooting Table 4 2 4 2...

Page 14: ...xii MRX920 Getting Started Guide Notes Tables...

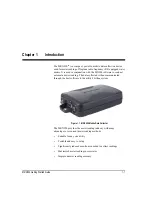
Page 15: ...t automatic meter reading The data collected is then communicated through the host software to the utility s billing system Figure 1 1 MRX920 Mobile Data Collector The MRX920 provides the meter readin...

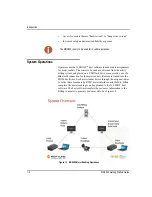
Page 16: ...on a USB flash drive or accessed by use of a Bluetooth connection for the meter readers Routes are loaded into the MX900 software Each meter reader drives through the assigned routes to collect data...

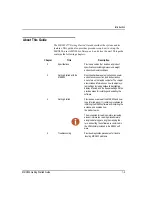
Page 17: ...s on how to turn on the laptop computer The chapter also includes information on how to adjust sys tem settings including keyboard backlighting display intensity and the beeper settings It also provid...

Page 18: ...port Specialist who addresses the call The Warning icon identifies actions that can cause injury to the user or permanently damage the product The Caution icon identifies important information that is...

Page 19: ...do not have a Technical Support PIN number 3 Enter the six digit PIN number and press 4 Select one of the following options Press 2 for Technical Support Press 3 for maintenance contracts or renewals...

Page 20: ...by fax send a description of your problem to 334 283 7497 Please include on the fax cover sheet the best time of day for a Customer Support Specialist to contact you Email To contact Customer Support...

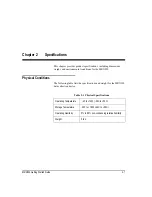
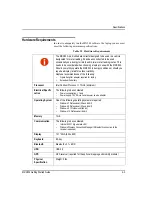
Page 21: ...nmental conditions for the MRX920 Physical Conditions The following table lists the specifications and weight for the MRX920 data collection device Table 2 1 Physical Specifications Operating Temperat...

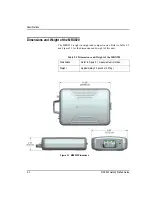
Page 22: ...RX920 is light in weight and compact in size Refer to Table 2 2 and Figure 2 1 for the dimensions and weight of this unit Figure 2 1 MRX920 Dimensions Table 2 2 Dimensions and Weight of the MRX920 Dim...

Page 23: ...the following Cigarette lighter adapter required for laptop Extended life battery Processor Intel Pentium Processor 1 7 GHz minimum Electrical Specifi cation The following to be considered Power consu...

Page 24: ...Specifications Notes 2 4 MRX920 Getting Started Guide...

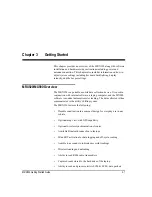
Page 25: ...ware a laptop computer and the MX900 software to conduct automatic meter reading The data collected is then communicated to the utility s billing system The MRX920 features the following Durable const...

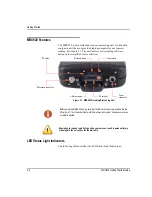
Page 26: ...Processing Unit LED Status Light Indicators The following table describes the LED Status Light Indications Power connection RF status Bluetooth status Power status RF antenna connection USB connectio...

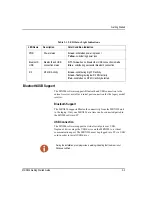
Page 27: ...vice on the MRX920 to a virtual communications port The MRX920 must be plugged into PC via USB cord in order to install USB driver Table 3 1 LED Status Light Indications LED Name Description Color Con...

Page 28: ...car charger or power inverter in order to be charged in the vehicle while reading Software Installation To install the MX900 software Part No 12701 100 MX900 software kit complete the following steps...

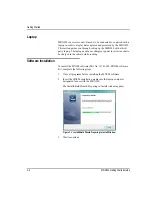
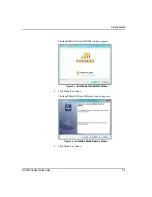
Page 29: ...de 3 5 The InstallShield Wizard MX900 window appears Figure 3 3 InstallShield Wizard MX900 Window 4 Click Next to continue The InstallShield Wizard Welcome window appears Figure 3 4 InstallShield Wiza...

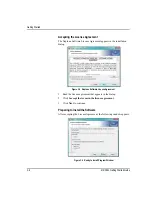
Page 30: ...allation dialog Figure 3 5 Neptune Software License Agreement 1 Read the license agreement that appears in the dialog 2 Click I accept the terms in the license agreement 3 Click Next to continue Prepa...

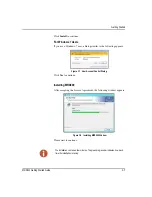
Page 31: ...the following appears Figure 3 7 User Account Control Dialog Click Yes to continue Installing MRX900 After accepting the License Agreement the following window appears Figure 3 8 Installing MRX900 Wi...

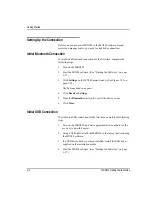
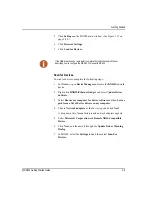
Page 32: ...900 main window See Figure 3 31 on page 3 28 The Settings window appears 4 Click Receiver Settings 5 From the Bluetooth selection list select the device to use 6 Click Close Initial USB Connection To...

Page 33: ...Select Browse my computer for driver software and then Let me pick from a list of device drivers on my computer 4 Choose Network adapters as the device type and click Next A drop down list of manufac...

Page 34: ...he Receiver Connection Settings window appears 4 Click Upgrade Receiver A dialog appears asking you to select the firmware provided by Neptune 5 Click Select File and select the path for the firmware...

Page 35: ...networks in the Network and Sharing Center dialog See Figure 3 10 for available options Figure 3 10 Network and Setup Connections 5 Click the connection and then Properties A dialog similar to the fol...

Page 36: ...99 2 and is listening on port 43431 If Windows 7 or Higher Does Not Recognize Driver If Windows 7 or higher does not automatically prompt you for the device driver complete the following steps 1 Selec...

Page 37: ...de 3 13 The following dialog appears Figure 3 13 Selecting Neptune MRX920 Properties 5 Right click and select Properties The following dialog appears Figure 3 14 Neptune MRX920 Properties 6 Select the...

Page 38: ...Getting Started 3 14 MRX920 Getting Started Guide Figure 3 15 Neptune MRX920 Properties General Tab 7 Click The Neptune MRX920 Properties dialog appears...

Page 39: ...tting Started MRX920 Getting Started Guide 3 15 Updating the Driver Complete the following steps Figure 3 16 Update Driver Dialog 1 Click The following dialog appears Figure 3 17 Update Driver Softwar...

Page 40: ...ct Browse my computer for driver software Figure 3 18 Browse for Driver 3 Click Browse to locate the mrxusbdriver folder on the installation media The following dialog appears Figure 3 19 Windows Secu...

Page 41: ...MRX920 Getting Started Guide 3 17 The following dialog appears Figure 3 20 Update Driver Software Successful 5 Click Close 6 Close all dialogs and go back to Devices and Printers The driver installat...

Page 42: ...th Laptop s Date and Time It is imperative that the system date on your laptop located in the lower right corner of your laptop display is the correct current date and time MX900 relies on this accura...

Page 43: ...d are incorrect Proceed to If the Date and Time are Incorrect If the Date and Time are Incorrect If you click No because the date and time on the dialog are not the current date and time the following...

Page 44: ...omatically opens and the Routes window appears Setting Up the MRX920 To set up the MRX920 please refer to the following sections of this guide for the following instructions Plugging in the Power Cabl...

Page 45: ...t is to place the unit in the passenger seat and fasten the seat belt through the straps on the carrying case Part No 13125 001 See Figure 3 24 Figure 3 24 MRX920 Placed in Vehicle Plugging in the Pow...

Page 46: ...lace 4 After the power supply cable is connected the red dot and red arrow should align ensuring you that the cable is connected 5 Insert the appropriate end of the vehicle power supply power cable in...

Page 47: ...gnificantly There are several options for running the cable Whichever method works best for you depends on the type of vehicle being used The most important consideration when installing the antenna i...

Page 48: ...llation 3 Route the antenna wire through the passenger window or through the door See Figure 3 28 To prevent the cable from crimping protect the cable as illustrated in the following figure Figure 3 2...

Page 49: ...ing the antenna cable so there is no pressure on it Cable protector In some vehicles there is enough room to run the cable through the doorframe of the vehicle without crimping the cable Other vehicle...

Page 50: ...r from the USB port Figure 3 30 USB Port and Drive 3 Insert the USB flash drive into the port on the laptop Neptune recommends that you insert the USB flash drive into the laptop after you place the l...

Page 51: ...er reading Please refer the MX900 Web Help for instructions on operating the MRX920 An audible tone or beeper is available in MRX920 to emit a beep tone for every account that is read and stored in th...

Page 52: ...loaded from the MX900 software About one second after a reading is received the message area and progress bar update the reading status of the route Navigation All MX900 functions are performed by usi...

Page 53: ...ss Although the MX900 software can start and stop the reading of message data it does not control the receive frequency or the decoding of message data Instead the MRX920 contains a receiving and proc...

Page 54: ...Getting Started Notes 3 30 MRX920 Getting Started Guide...

Page 55: ...r troubleshooting MRX920 problems It includes both a hard ware section and a software section It also includes recommendations on how to verify that the MRX920 is performing up to specification Includ...

Page 56: ...on the cable matches the red dot on the MRX920 Internal fuse blown on the power cable Look for the LED on the power cable Dead battery or fuse in the utility vehicle Check the electrical status of the...

Page 57: ...crimps or damage Power is applied the MX900 software executes but no route data is available USB flash drive not inserted Make sure the USB flash drive is properly inserted into an available USB port...

Page 58: ...upper left corner of the Routes window Volume is not turned up on the laptop Verify that the volume on the laptop is turned up and is not on mute Unable to view all accounts in Missed and Captured Rea...

Page 59: ...r method Check Receiver Settings to ensure you are connecting as you intended Bluetooth vs USB Look at front of MRX920 The LED labeled Bluetooth USB is Off when not connected Blue when the selected co...

Page 60: ...Troubleshooting 4 6 MRX920 Getting Started Guide...

Page 61: ...unless the meter reader changes the Enable Tone setting direction keys Special keys on the laptop keyboard that allow you to move up or down a list of items The direction keys the Up F5 and Down F4 ke...

Page 62: ...e heart of all personal computers and most workstations is a microprocessor Microprocessors also control the logic of almost all digital devices MIU ID An abbreviation for meter interface unit Identif...

Page 63: ...route or address by positioning a highlighted area using function keys The highlighted item is selected upload The process of sending readings and route data from the MRX920 to the host computer via...

Page 64: ...Glossary Notes G 4 MRX920 Getting Started Guide...

Page 65: ...3 connecting the MRX920 antenna 3 23 connecting the MRX920 MTX950 antenna 3 24 connection Bluetooth 3 8 establish 3 8 USB 3 8 conventions in manual 1 4 CPU G 1 CPU board G 1 customer support 1 4 1 5 D...

Page 66: ...21 to 3 22 power supply connect 3 23 to 3 24 problems troubleshooting 4 1 product support 1 4 R receiver for use with 3rd party laptop 3 4 MRX920 3 4 S seat belt to secure laptop 3 21 set up hardware...

Page 67: ......
Page 68: ...905 858 4211 Fax 905 858 0428 Neptune Technology Group Inc Avenida Ej rcito Nacional No 418 Piso 12 Desp 1201 1202 Col Chapultepec Morales Delegaci n Miguel Hidalgo 11560 M xico D istrito Federal Tel...

Reviews: