background image

2. Ironing Description

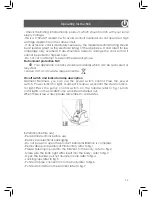
- Add water from the water inlet. The correct way to water, refer to fig.8&9.

- Please do not add hot water.

- Cover the Added outlet cover, Put on a tank in the body.refer to fig.10&11.

- Plug in the power,Open the power switch, refer to fig.12to fig.14

- Wait for the steam power indicator lights and press the pump control switch, 

Pump start work. As the water started just entered boiler will be making a sound 

to be as normal.

- Hold the steam handle so that steam does not focus on people, Vertical 

alignment of steam required to start ironing clothes, refer to fig.15. 

- You can adjust the size of the shift amount of steam.

- At the beginning, there will be some noise come from the hose. It caused from 

the moving of stream inside the hose, it is normal.

- Garment Steamer in order to increase the use of more long time,After use 

Discard excess water in the tank inside, Dry out the water inside the boiler,Turn off 

the power when not out of steam.

3. Accessories instructions

Before using the accessories, please read the instruction manual, first use, sug

-

gest test with some old or waste cloth.

13

Summary of Contents for NC5611 Steam Pro II

Page 1: ...Instruction Manual คู มือการใช งาน STEAM CLEANER MODEL NC5611 Steam Pro II 1750 W 230 V 50 60 Hz ...

Page 2: ...1 ...

Page 3: ...ใช งานจะสามารถตอบสนอความพึงพอใจในการใช งานของท านได อย างคุ มค า A สวิตซ เปิด ปิดพร อมไฟแสดงสถานะ B ปุ มปรับระดับไอน ำ C ข อต อสายส งไอน ำ D แท งก บรรจุน ำ E ช องจ ายน ำ ช องเติมน ำในแท งก บรรจุน ำ F สายส งไอน ำ G เสา ปรับระดับ H อุปกรณ เสริม คลิปหนีบจับจีบผ า I อุปกรณ เสริม หัวแปรง J มือจับหัวพ นไอน ำ K ที วางพักหัวพ น L ที แขวนเสื อ M สวิตซ ม วนเก บสายไฟอัตโนมัติ N ปลั กและสายไฟ 1750 W 230 V 50 ...

Page 4: ...เพื อเป นการป องกันอันตรายจากไฟฟ าช อต ห ามแกะประกอบเครื องหรือซ อมเครื องใช ไฟฟ าด วยตัว ท านเอง 10 ควรส งให ศูนย บริการของบริษัทหรือส งให ช างที มีความช ำนาญเป นผู ซ อมแซมหรือเปลี ยนอะไหล 11 เพื อป องกันอันตรายที อาจเกิดจากสัมผัสไอน ำร อนที ออกมาจากเครื องพ นรีดไอน ำควรตรวจสอบ เครื องทุกครั งก อนการใช งาน โดยการหันหัวพ นไอน ำให ออกจากตัวแล วจึงเปิดการท ำงาน 12 ควรจับหัวพ นรีดไอน ำในแนวตั งเพื อใ...

Page 5: ...ฟฟ าเกิน ไม ควรใช งานเครื องใช ไฟฟ าที ใช ก ำลังไฟสูงหลายๆเครื องในเวลาเดียวกัน กรณีที มีความจ ำเป นต องใช สายไฟต อพ วง ควรตรวจดูให แน ใจว าสายไฟต อพ วงสามารถรองรับก ำลังไฟ ของเครื องพ นรีดไอน ำนี ได หากใช สายต อพ วงที รับก ำลังไฟฟ าได ต ำกว าก ำลังไฟของเครื องอาจท ำให สาย ไฟต อพ วงไหม ได ควรจัดสายไฟให เป นระเบียบและระมัดระวังไม ให ผู ใดสะดุดสายไฟ ห ามตัดหรือพยายามต อสายส งไอน ำ การดูแลรักษาสิ งแว...

Page 6: ... อของสายส งไอน ำลงในช องบนตัวเครื อง fig 6 วางมือจับหัวพ นไอน ำลงในช องวางหัวพ นไอน ำ fig 7 2 วิธีการใช งานพ นรีดผ า เติมน ำลงในแท งก บรรจุน ำโดยการหมุนเปิดฝาแท งก แล วเติมน ำลงในแท งก fig 8 9 ห ามเติมน ำร อนลงในแท งก จากนั นปิดฝาแท งก บรรจุน ำ แล วน ำแท งก ประกอบ ลงบนตัวเครื อง fig 10 11 เสียบปลั กเข ากับเต ารับ กดปุ มเปิดเครื อง fig 12to fig 14 หลังจากเสียบปลั กและกดปุ มเปิดเครื อง ไฟแสดงสถานะติ...

Page 7: ...วพ นไอน ำไม มีความร อน การประกอบหัวแปรง ให หันด านขนแปรงหงายขึ น แล วดันหัวแปรงเข ากับหัวพ นไอน ำเบาๆ จนลงล อก ตามภาพ 1 การพ นรีดผ า ควรพ นรีดจากด านบนลงมาด านล างจนสุดปลายผ า ตามภาพ 2 ก อนถอดหัวแปรงออกจากหัวพ นไอน ำ ให กดสวิตซ ปิดเครื องก อน รอจนกว าไม มี ไอน ำออกมาจากหัวพ น แล ว จึงค อยถอดหัวแปรงออกจากหัวพ นไอน ำ ระวังไม ให มือสัมผัสกับหัวพ นไอน ำที มีความร อน คลิปหนีบจับจีบผ า อุปกรณ เสริม คลิป...

Page 8: ...รท ำความสะอาดเครื อง ท ำความสะอาดตัวเครื องโดยการใช ผ าหมาดๆ เช ดท ำความสะอาด และเพื อรักษาประสิทธิภาพการ ท ำงานของเครื องพ นรีดไอน ำ ควรท ำความสะอาดโดยการขจัดตะกอนตะกรันตามระยะเวลา โดยขึ นอยู กับความถี ในการใช งานหรือระยะเวลาในการใช งาน ควรท ำความสะอาดแท งก น ำอย างน อยปีละครั งหรือ หลังการใช งาน 100 ชั วโมง วิธีการท ำความสะอาดดังต อไปนี น ำแท งก น ำออกมาจากเครื อง ล างตัวเครื องบริเวณฐานรองรับแท...

Page 9: ...หาย เนื องจากอายุการใช งาน หรือข อต อหลวม แท งก น ำช ำรุดหรือแตกหัก มี รอยรั ว กระแสไฟฟ าที จ ายเข าเครื อง อาจมีก ำลังอ อนหรือไฟตก หรือ มีวัสดุไปติดอยู ในสายส งไอน ำ ใส น ำที มีความร อนสูงหรือน ำ เดือดลงในแท งก น ำหรือใส สาร เคมีบางประเภทที มีฤทธิ กัด กร อนลงในแท งก น ำในแท งก บรรจุน ำหมด วิธีการแก ไข ส งเครื องให กับศูนย บริการหรือ ช างผู มีความช ำนาญเป นผู ตรวจสอบ ยกสายส งไอน ำขึ นเพื อให ไอน ำ...

Page 10: ...อนี เด ดขาดรวมถึงการตกแตก การ สึกหรอจากการใช งาน หากท านดัดแปลง เปลี ยนชิ นส วนใดๆที ไม ใช อุปกรณ ที มาเป นชุดของผลิตภัณฑ การรับประกันสินค า ถือว าเป นโมฆะทันที หากเครื องของท านเกิดความเสียหายแล วอยู ในเงื อนไขการรับประกัน ท าน สามารถส งเครื องตรวจเช ค ยังศูนย ตัวแทนจัดจ ำหน ายได โดยบรรจุหีบห อผลิตภัณฑ ให เรียบร อยแล วเขียน ชื อ ที อยู เบอร โทรศัพท และเขียนสาเหตุที ส งเครื องมาว าเป นเพราะเหตุใดพ...

Page 11: ...as the strict quality controls used during manufacture will provide full satisfaction for many years A Power Switch With Lamp B Steam Level Control C Steam Joint D Water Tank E Water Knob F Steam Hose G Telescopic Rod H Splint I Brush J Steam Handle K Steam Head Fixing Rack L Cloth Hanger M Automatic Cord Rewind Switch N Plug And Cord 1750 W 230 V 50 60 Hz 10 ...

Page 12: ...of contact with hot water emitting from steam vents check appliance before each use by holding it away from your body and operating 12 Steam only in an up and down vertical motion Never use steam head in a horizontal position or tilt into a backward position this may result in water discharge 13 To reduce the risk of electric shock do not immerse the appliance in water or other liquids Appliance s...

Page 13: ...e On off switch and indicator lamp description Garment Steamers you can use the power switch control Press the power switch Power indicator light Garment Steamer work Until the steam indica tor light Press the pump control switch on the handle refer to fig 16 Indi cator lights on the handle Pump work Steam started out When there is less water please remember to add water Installation Before use Re...

Page 14: ...steam handle so that steam does not focus on people Vertical alignment of steam required to start ironing clothes refer to fig 15 You can adjust the size of the shift amount of steam At the beginning there will be some noise come from the hose It caused from the moving of stream inside the hose it is normal Garment Steamer in order to increase the use of more long time After use Discard excess wat...

Page 15: ...move splint please power off the power control switch when there is no steam from the steam brush remove the brush please note do not touch the stainless steel panel avoid scald hand Storage After using remove the water tank from the body dump the water in the water tank Make the appliance dry working 5 minutes Make the boiler dry Power off the power switch power indicate lamp will be off remove t...

Page 16: ... interface loosen itself Water tank is broken or has a hole The power source is lower or deposits can obstruct the arrival pipe Over heated water is put Or other chemical element is put The steam creator is broken The internal electric component is broken Solution Check and maintain by specialized technician Raise the steam pipe residual water in top returns into the device Replace the spray head ...

Page 17: ...ing to this instruction carefully Damage or defect from misunderstand how to use or service from non authorized people Damage or defect from not follow this instruction manual Electrical shock or any electrical problem Lost or damage some part by accident or natural damage Some parts are shelf life need replacement Company reserved the right to change all details before notice ...

Page 18: ...ศูนย บริการ บริษัท เนสโก กรุ ป จำ กัด 46 178 ชั น 3 หมู 12 ถนนนวลจันทร แขวงคลองกุ ม เขตบึงกุ ม กรุงเทพๆ 10230 โทรศัพท 0 2363 7757 62 www nescoproduct com ...

Reviews: