Installation Instruction
20201210/ML/01
Nestor Optimus DB Reducers
Page 3 of 6
©
Nestor Cables Ltd. 2020.
10.12.2020
The information contained within this document must not be copied, reprinted or reproduced in any form, either wholly or in part, without the
prior written consent of Nestor Cables Ltd. The information is believed to be correct at the time of issue. Nestor Cables Ltd. reserves the right
to amend this specification without notice. This specification is not contractually valid unless specifically authorized by Nestor Cables Ltd.
Installation
•
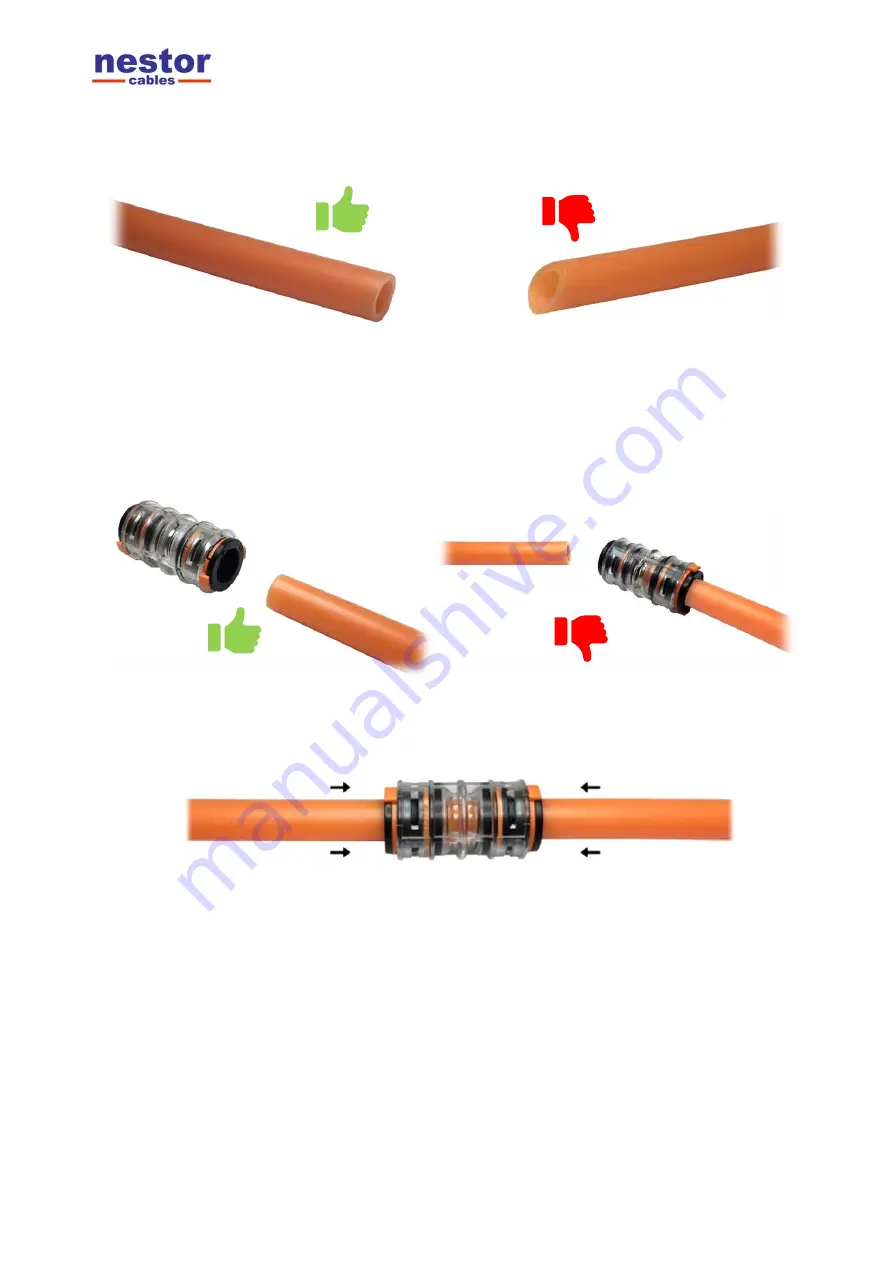
Make sure that the microduct is clean and does not contain any scratches, cracks, cuts or
deformities on its surface.
•
Avoid putting any foreign material into the connector or microduct before and during the
installation.
•
Align the microduct correctly with the connector to ensure the correct installation.
•
Push the microduct into the connector. This may need a moderate force and a slight rotation.
•
The microduct or the connector seal should not be scratched or damaged during the
insertion, otherwise there may be leaks or further misfunctioning.
•
The microduct must be connected by hand without using any kind of tool.
•
Nestor Optimus DB Reducers are pre-fitted with tamper proof locking clips as standard.
Please note that there is no need to remove locking clips during the installation.


