

7. Replace the left end cap.
Cable shelves as switch-attached storage - NS224 shelves
If you have a system in which the NS224 drive shelves need to be cabled as switch-
attached storage (not direct-attached storage), use the information provided.
• Cable NS224 drive shelves through storage switches:
Information for cabling switch-attached NS224 drive shelves
• Install your storage switches:
AFF and FAS Switch Documentation
• Confirm supported hardware, such as storage switches and cables, for your platform model:
Maintain
Replace the boot media - NS224 shelves
When the boot media fails on an NS224 drive shelf in an HA pair that is running ONTAP
9.7 or later, or the shelf is running NVMe shelf module (NSM) firmware version 1.1x or
later, you can replace the boot media. Replacing the boot media can be done
nondisruptively, while the drive shelf is powered on, and I/O is in progress.
Before you begin
• Your HA pair must already be running ONTAP 9.7 or later, which has the minimum supported version of
NSM firmware, or your HA pair must already been running a version of ONTAP 9.6 with NSM firmware
version 1.1x or later.
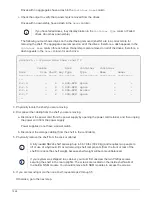
You can enter the
storage shelf show -module
command at the console of either controller to verify
the version of NSM firmware on your shelf.
If your shelf is not running NSM firmware version 1.1x or later, you cannot replace the boot
media, you must replace the NSM module.
Replace an NSM module - NS224 shelves
• You need a Phillips #1 screwdriver.
The screw used to secure the boot media to the board requires a Phillips #1 screwdriver; using a different
type of screwdriver could strip the screw.
• The shelf’s partner NSM module must be up and running, and be cabled correctly so that your shelf
maintains connectivity when you remove the NSM module with the failed FRU (target NSM module).
NetApp Downloads: Config Advisor
1514
Summary of Contents for AFF A700
Page 4: ...AFF and FAS System Documentation 1...
Page 208: ...3 Close the controller module cover and tighten the thumbscrew 205...
Page 248: ...2 Close the controller module cover and tighten the thumbscrew 245...
Page 308: ...Power supply Cam handle release latch Power and Fault LEDs Cam handle 305...
Page 381: ...Power supply Cam handle release latch Power and Fault LEDs Cam handle 378...
Page 437: ...1 Locate the DIMMs on your controller module 434...
Page 605: ...602...
Page 1117: ...3 Close the controller module cover and tighten the thumbscrew 1114...
Page 1157: ...2 Close the controller module cover and tighten the thumbscrew 1154...
Page 1228: ...Power supply Cam handle release latch Power and Fault LEDs Cam handle 1225...
Page 1300: ...Power supply Cam handle release latch Power and Fault LEDs Cam handle 1297...
Page 1462: ...Installing SuperRail to round hole four post rack 1459...
Page 1602: ...1599...
Page 1630: ...1627...
Page 1634: ...Orange ring on horizontal bracket Cable chain 1631...
Page 1645: ...Guide rail 1642...
Page 1669: ...Attention LED light on 1666...