


Until you install license keys, features requiring standard licenses continue to be available to the
replacement
node. However, if the impaired node was the only node in the cluster with a license for the feature, no
configuration changes to the feature are allowed. Also, using unlicensed features on the node might put you
out of compliance with your license agreement, so you should install the replacement license key or keys on
the
replacement
node as soon as possible.
The licenses keys must be in the 28-character format.
You have a 90-day grace period in which to install the license keys. After the grace period, all old licenses are
invalidated. After a valid license key is installed, you have 24 hours to install all of the keys before the grace
period ends.
If the node is in a MetroCluster configuration and all nodes at a site have been replaced, license keys must be
installed on the
replacement
node or nodes prior to switchback.
1. If you need new license keys, obtain replacement license keys on the NetApp Support Site in the My
Support section under Software licenses.
The new license keys that you require are automatically generated and sent to the email
address on file. If you fail to receive the email with the license keys within 30 days, you
should contact technical support.
Steps
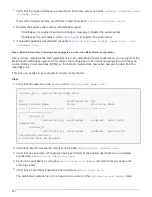
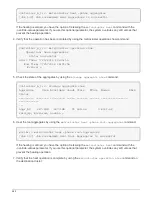
1. Install each license key:
system license add -license-code license-key, license-key...
2. Remove the old licenses, if desired:
a. Check for unused licenses:
license clean-up -unused -simulate
b. If the list looks correct, remove the unused licenses:
license clean-up -unused
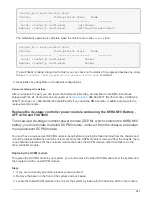
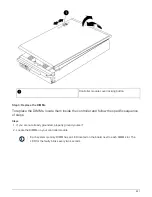
Step 2: Restoring Storage and Volume Encryption functionality
After replacing the controller module or NVRAM module for a storage system that you previously configured to
use Storage or Volume Encryption, you must perform additional steps to provide uninterrupted Encryption
functionality. You can skip this task on storage systems that do not have Storage or Volume Encryption
enabled.
Step
1. Restore Storage or Volume Encryption functionality by using the appropriate procedure in
Encryption overview with the CLI
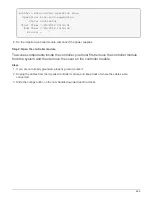
Use one of the following procedures, depending on whether you are using onboard or external key
management:
• “Restoring onboard key management encryption keys”
• “Restoring external key management encryption keys”
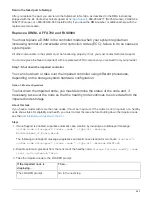
Step 3: Verifying LIFs and registering the serial number
Before returning the
replacement
node to service, you should verify that the LIFs are on their home ports, and
register the serial number of the
replacement
node if AutoSupport is enabled, and reset automatic giveback.
681
Summary of Contents for AFF A700
Page 4: ...AFF and FAS System Documentation 1...
Page 208: ...3 Close the controller module cover and tighten the thumbscrew 205...
Page 248: ...2 Close the controller module cover and tighten the thumbscrew 245...
Page 308: ...Power supply Cam handle release latch Power and Fault LEDs Cam handle 305...
Page 381: ...Power supply Cam handle release latch Power and Fault LEDs Cam handle 378...
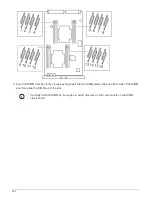
Page 437: ...1 Locate the DIMMs on your controller module 434...
Page 605: ...602...
Page 1117: ...3 Close the controller module cover and tighten the thumbscrew 1114...
Page 1157: ...2 Close the controller module cover and tighten the thumbscrew 1154...
Page 1228: ...Power supply Cam handle release latch Power and Fault LEDs Cam handle 1225...
Page 1300: ...Power supply Cam handle release latch Power and Fault LEDs Cam handle 1297...
Page 1462: ...Installing SuperRail to round hole four post rack 1459...
Page 1602: ...1599...
Page 1630: ...1627...
Page 1634: ...Orange ring on horizontal bracket Cable chain 1631...
Page 1645: ...Guide rail 1642...
Page 1669: ...Attention LED light on 1666...