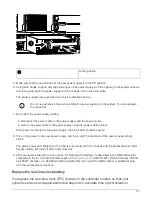


Option 1: Add an X91148A module as a NIC module in a system with open slots
To add an X91148A module as a NIC module in a system with open slots, you must follow
the specific sequence of steps.
Steps
1. Shutdown controller A:
a. Disable automatic giveback:
storage failover modify -node local -auto-giveback
false
b. Take over the target node:
storage failover takeover -ofnode
target_node_name
The console connection shows that the node drops to the LOADER prompt when the takeover is
complete.
2. If you are not already grounded, properly ground yourself.
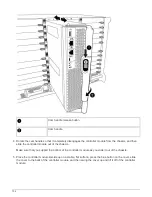
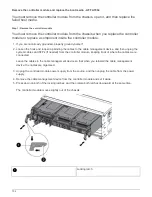
3. Remove the target slot blanking cover:
a. Depress the lettered and numbered cam button.
b. Rotate the cam latch down until it is in a horizontal position.
c. Remove the blanking cover.
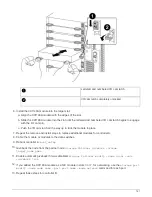
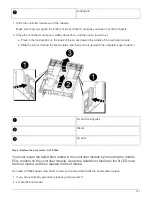
4. Install the X91148A module:
a. Align the X91148A module with the edges of the slot.
b. Slide the X91148A module into the slot until the lettered and numbered I/O cam latch begins to engage
with the I/O cam pin.
c. Push the I/O cam latch all the way up to lock the module in place.
5. Cable the module to the data switches.
6. Reboot controller A:
boot_ontap
7. Giveback the node from the partner node:
storage failover giveback -ofnode
target_node_name
8. Enable automatic giveback if it was disabled:
storage failover modify -node local -auto
-giveback true
9. Repeat these steps for controller B.
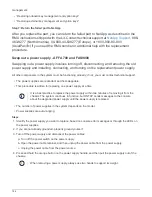
Option 2: Add an X91148A module as a storage module in a system with open slots
To add an X91148A module as a storage module in a system with open slots, you must
follow the specific sequence of steps.
• This procedure presumes slots 3 and/or 7 are open.
Steps
1. Shut down controller A:
a. Disable automatic giveback:
storage failover modify -node local -auto-giveback
false
b. Take over the target node:
storage failover takeover -ofnode target_node_name
738
Summary of Contents for AFF A700
Page 4: ...AFF and FAS System Documentation 1...
Page 208: ...3 Close the controller module cover and tighten the thumbscrew 205...
Page 248: ...2 Close the controller module cover and tighten the thumbscrew 245...
Page 308: ...Power supply Cam handle release latch Power and Fault LEDs Cam handle 305...
Page 381: ...Power supply Cam handle release latch Power and Fault LEDs Cam handle 378...
Page 437: ...1 Locate the DIMMs on your controller module 434...
Page 605: ...602...
Page 1117: ...3 Close the controller module cover and tighten the thumbscrew 1114...
Page 1157: ...2 Close the controller module cover and tighten the thumbscrew 1154...
Page 1228: ...Power supply Cam handle release latch Power and Fault LEDs Cam handle 1225...
Page 1300: ...Power supply Cam handle release latch Power and Fault LEDs Cam handle 1297...
Page 1462: ...Installing SuperRail to round hole four post rack 1459...
Page 1602: ...1599...
Page 1630: ...1627...
Page 1634: ...Orange ring on horizontal bracket Cable chain 1631...
Page 1645: ...Guide rail 1642...
Page 1669: ...Attention LED light on 1666...