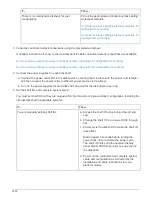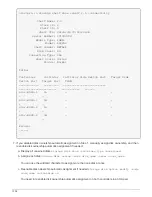
You can use the wildcard character to assign more than one disk at once.
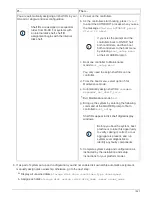
7. Download and run Config Advisor as instructed by the installation and setup instructions for your platform
model to verify SAS connections are cabled correctly and there are no duplicate shelf IDs within the
system.
If any SAS cabling or duplicate shelf ID errors are generated, follow the corrective actions provided.
NetApp Downloads: Config Advisor
You can also run the
storage shelf show -fields shelf-id
command to see a list of shelf IDs
already in use (and duplicates if present) in your system.
8. Verify that in-band ACP was automatically enabled.
storage shelf acp show
In the output, “in-band” is listed as “active” for each node.
Hot-add a shelf - shelves with IOM12 modules
You can hot-add one or more disk shelves with IOM12 modules to an existing stack of
disk shelves with IOM12 modules or hot-add a stack of one or more disk shelves with
IOM12 modules directly to a SAS HBA or an onboard SAS port on the controller.
About this task
You cannot use this procedure to mix a stack: hot-add a shelf with IOM12 modules to a stack of shelves that
has IOM6 modules. If you need to mix a stack, use
Hot-add IOM12 shelves to a stack of IOM6 shelves
.
Requirements for hot-adding disk shelves with IOM12 modules
Your system must meet certain requirements before hot-adding disk shelves with IOM12
modules.
State of your system
• Your system and version of ONTAP must support the disk shelves you are hot-adding, including the IOMs,
disk drives, and SAS cables.
• Your system must have less than the maximum number of disk drives supported, by at least the number of
disk shelves you plan to hot-add.
You cannot have exceeded the maximum number of disk drives supported for your system after hot-adding
disk shelves.
• If you are hot-adding a stack of one or more disk shelves (directly to the platform controllers), your system
must have enough available PCI SAS HBA or onboard SAS ports or a combination of both.
1548
Summary of Contents for AFF A700
Page 4: ...AFF and FAS System Documentation 1...
Page 208: ...3 Close the controller module cover and tighten the thumbscrew 205...
Page 248: ...2 Close the controller module cover and tighten the thumbscrew 245...
Page 308: ...Power supply Cam handle release latch Power and Fault LEDs Cam handle 305...
Page 381: ...Power supply Cam handle release latch Power and Fault LEDs Cam handle 378...
Page 437: ...1 Locate the DIMMs on your controller module 434...
Page 605: ...602...
Page 1117: ...3 Close the controller module cover and tighten the thumbscrew 1114...
Page 1157: ...2 Close the controller module cover and tighten the thumbscrew 1154...
Page 1228: ...Power supply Cam handle release latch Power and Fault LEDs Cam handle 1225...
Page 1300: ...Power supply Cam handle release latch Power and Fault LEDs Cam handle 1297...
Page 1462: ...Installing SuperRail to round hole four post rack 1459...
Page 1602: ...1599...
Page 1630: ...1627...
Page 1634: ...Orange ring on horizontal bracket Cable chain 1631...
Page 1645: ...Guide rail 1642...
Page 1669: ...Attention LED light on 1666...

