Steps
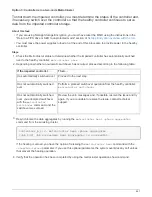
1. Verify that the logical interfaces are reporting to their home server and ports:
network interface show
-is-home false
If any LIFs are listed as false, revert them to their home ports:
network interface revert
2. Register the system serial number with NetApp Support.
◦
If AutoSupport is enabled, send an AutoSupport message to register the serial number.
◦
If AutoSupport is not enabled, call
to register the serial number.
3. If automatic giveback was disabled, reenable it:
storage failover modify -node local -auto
-giveback true
Step 4 (MetroCluster only): Switching back aggregates in a two-node MetroCluster configuration
After you have completed the FRU replacement in a two-node MetroCluster configuration, you can perform the
MetroCluster switchback operation. This returns the configuration to its normal operating state, with the sync-
source storage virtual machines (SVMs) on the formerly impaired site now active and serving data from the
local disk pools.
This task only applies to two-node MetroCluster configurations.
Steps
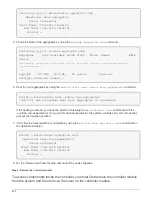
1. Verify that all nodes are in the
enabled
state:
metrocluster node show
cluster_B::> metrocluster node show
DR Configuration DR
Group Cluster Node State Mirroring Mode
----- ------- -------------- -------------- ---------
--------------------
1 cluster_A
controller_A_1 configured enabled heal roots
completed
cluster_B
controller_B_1 configured enabled waiting for
switchback recovery
2 entries were displayed.
2. Verify that resynchronization is complete on all SVMs:
metrocluster vserver show
3. Verify that any automatic LIF migrations being performed by the healing operations were completed
successfully:
metrocluster check lif show
4. Perform the switchback by using the
metrocluster switchback
command from any node in the
surviving cluster.
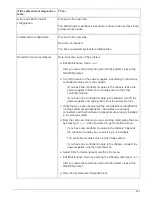
5. Verify that the switchback operation has completed:
metrocluster show
The switchback operation is still running when a cluster is in the
waiting-for-switchback
state:
642

