background image

8. If the power button on the front of the SG6000-CN controller is not currently illuminated blue, press the

button to turn on power to the controller.

Do not press the power button again during the power-on process.

9. Turn on the two power switches on the back of the storage controller shelf. If you have expansion shelves,

turn on the two power switches for each shelf.

Do not turn off the power switches during the power-on process.

The fans in the storage controller shelf and optional expansion shelves might be very loud when they
first start up. The loud noise during start-up is normal.

10. After the components have booted up, check their status.

Check the seven-segment display on the back of each storage controller. Refer to the article about
viewing boot-up status codes for more information.

Verify that the power button on the front of the SG6000-CN controller is lit.

11. If errors occur, correct any issues.

12. Attach the front bezel to the SG6000-CN controller if removed.

Related information

View boot-up status codes for SG6000 storage controllers

View status indicators and buttons on SG6000-CN controller

Reinstall SG6000-CN controller into cabinet or rack

View status indicators and buttons on SG6000-CN controller

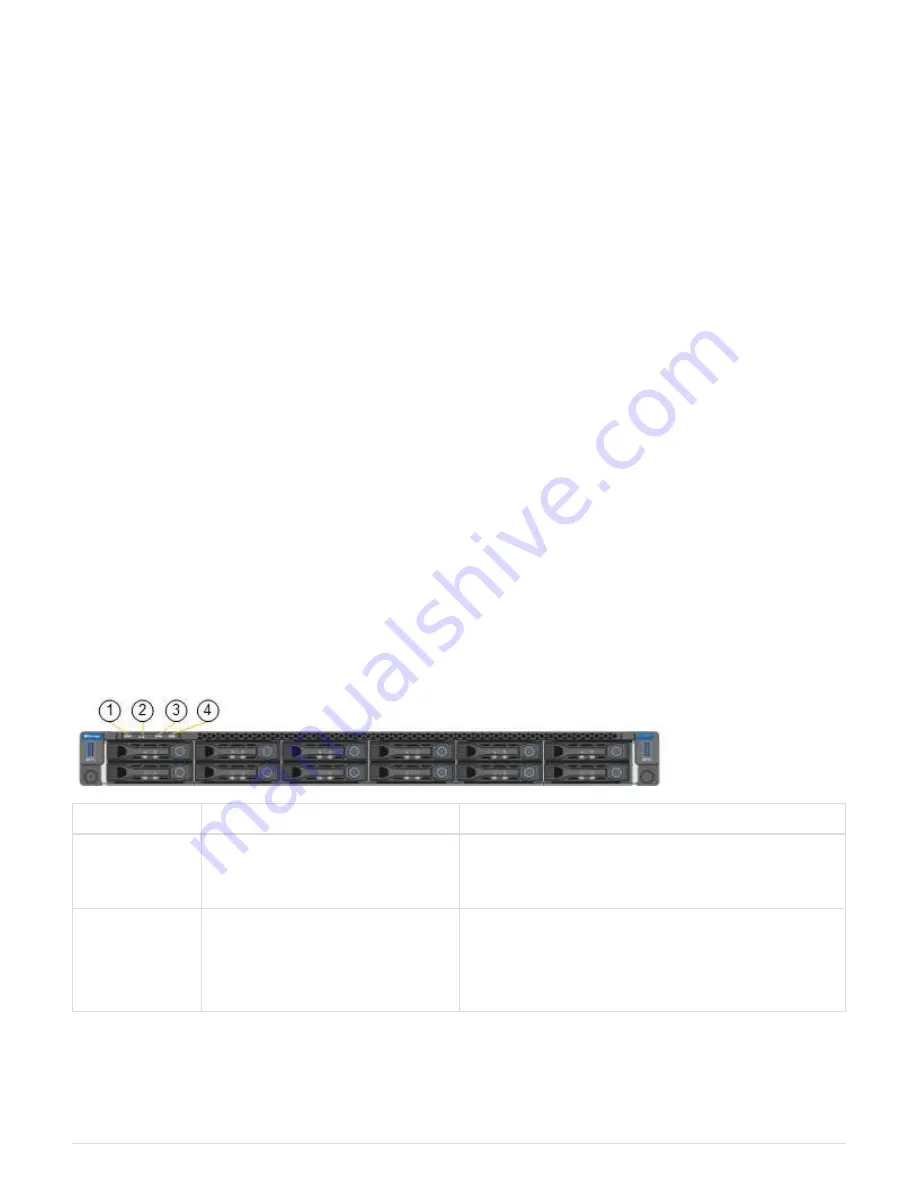
The SG6000-CN controller includes indicators that help you determine the status of the
controller, including the following indicators and buttons.

Display

Description

1

Power button

• Blue: The controller is powered on.

• Off: The controller is powered off.

2

Reset button

No indicator

Use this button to perform a hard reset of the
controller.

15

Summary of Contents for SG6000-CN

Page 1: ...dware SG6000 StorageGRID NetApp March 03 2022 This PDF was generated from https docs netapp com us en storagegrid 116 sg6000 registering hardware html on March 03 2022 Always check docs netapp com for...

Page 2: ...s 4 SGF6024 Install 24 drive shelves into cabinet or rack 5 SG6000 CN Install into cabinet or rack 7 Cable appliance SG6000 9 SG6060 Cabling optional expansion shelves 12 Connect power cords and apply...

Page 3: ...o to the NetApp Support Site at mysupport netapp com 3 Determine whether you need to register the hardware If you are a Follow these steps Existing NetApp customer a Sign in with your username and pas...

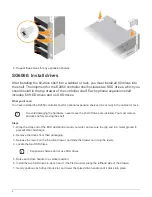
Page 4: ...abinet to prevent the equipment from tipping over To ensure that the heaviest equipment is at the bottom of the cabinet or rack install the SG6000 CN controller above the E2860 controller shelf and ex...

Page 5: ...ide the shelf in To remove the handles pull back on the release latch push down then pull away from the shelf 6 Secure the shelf to the front of the cabinet Insert screws into the first and third hole...

Page 6: ...oid damaging the hardware never move the shelf if drives are installed You must remove all drives before moving the shelf Steps 1 Wrap the strap end of the ESD wristband around your wrist and secure t...

Page 7: ...11 Attach the front bezel to the shelf 12 If you have expansion shelves repeat these steps to install 12 HDD drives into each drawer of each expansion shelf 13 Proceed to the instructions for installi...

Page 8: ...es all the way onto the rails Do not place additional equipment on the rails after you finish installing the enclosure The rails are not designed to bear additional weight If applicable you might need...

Page 9: ...ed in the box and understand the precautions for moving and installing hardware You have the instructions packaged with the rail kit You have installed the E2860 controller shelf and drives or the EF5...

Page 10: ...0 CN controller into the rails 4 Slide the controller into the cabinet or rack When you cannot move the controller any further pull the blue latches on both sides of the chassis to slide the controlle...

Page 11: ...nnect the network ports on the SG6000 CN controller to the Grid Network and optional Client Network for StorageGRID What you ll need You have the four optical cables provided with the appliance for co...

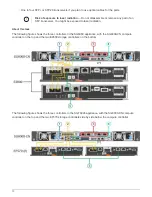
Page 12: ...ser radiation About this task The following figure shows the three controllers in the SG6060 appliance with the SG6000 CN compute controller on the top and the two E2800 storage controllers on the bot...

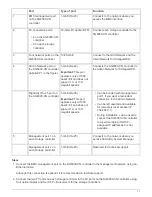
Page 13: ...operates only at 1000 baseT full and does not support 10 or 100 megabit speeds Can be bonded with management port 1 if you want a redundant connection to the Admin Network Can be left unwired and ava...

Page 14: ...valent 4 If you plan to use the Admin Network for StorageGRID connect the Admin Network port on the SG6000 CN controller to the Admin Network using an Ethernet cable 5 If you plan to use the managemen...

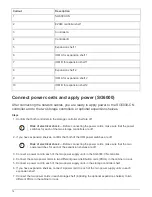
Page 15: ...nect each expansion shelf to the E2860 controller shelf as shown in the diagram This drawing shows two expansion shelves If you have only one connect IOM A to controller A and connect IOM B to control...

Page 16: ...ches for each of the two storage controllers are off 2 If you have expansion shelves confirm that both of the IOM power switches are off Risk of electrical shock Before connecting the power cords make...

Page 17: ...the back of each storage controller Refer to the article about viewing boot up status codes for more information Verify that the power button on the front of the SG6000 CN controller is lit 11 If err...

Page 18: ...boot up the alarm LED lights up To view the boot up and error codes you must access the BMC interface Related information Troubleshoot hardware installation SG6000 Configure BMC interface SG6000 Power...

Page 19: ...is displayed on both storage controllers as shown in this example E2800 controller 3 If one or both controllers show other values see Troubleshoot hardware installation SG6000 and confirm you complete...

Page 20: ...WHETHER IN CONTRACT STRICT LIABILITY OR TORT INCLUDING NEGLIGENCE OR OTHERWISE ARISING IN ANY WAY OUT OF THE USE OF THIS SOFTWARE EVEN IF ADVISED OF THE POSSIBILITY OF SUCH DAMAGE NetApp reserves the...

Reviews: