Web Graphical User In-
terface (GUI) for ESMS
187
Cancel
To cancel the modification and return to LAN destination list.
Procedure:
1. In the
LAN Destination Tab
, choose the slot to be configured. This should be the same slot
that you have selected in the Alert Policy Entry- Destination Selector field. That is if you have
chosen the Destination Selector as 4 in the Alert Policy Entry page of Alert Policy Tab, then you
have to configure the 4th slot of LAN Destination Page.
2. Select the slot and click
Add
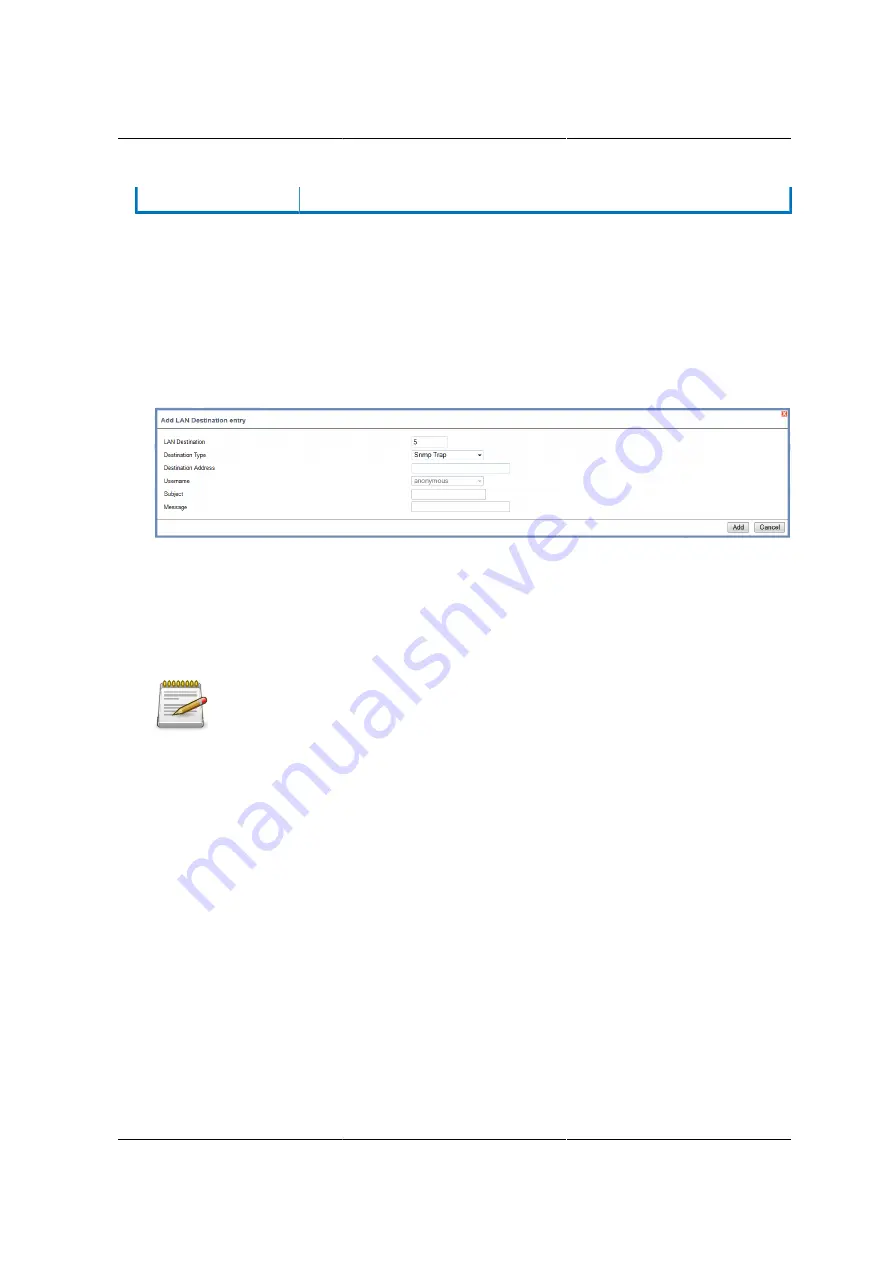
. This opens the
Add LAN Destination entry
.
Figure 8.26. Add LAN Destination entry Page
3. In the
LAN Destination
field, the destination for the newly configured entry is displayed and this
is a read only field.
4. In the
Destination Type
field, select the one of the types.
5. In the
Destination Address
field, enter the destination address.
If Destination type is Email Alert, then give the email address that will receive the
email.
6. Select the
User Name
from the list of users.
7. In the
Subject
field, enter the subject.
8. In the
Message
field, enter the message.
9. Click
Add
to save the new LAN destination and return to LAN destination list.
10.Click
Cancel
to cancel the modification and return to LAN destination list.
11.In the LAN Destination Tab, to modify a configuration, select the row to be modified and click
Modify
.
12.In the Modify LAN Destination Entry page, make the necessary changes and click
Modify
.
13.In the LAN Destination Tab, to delete a configuration, select the slot and click
Delete
.
8.6.7. RADIUS
RADIUS is a modular, high performance and feature-rich RADIUS suite including server, clients,
development libraries and numerous additional RADIUS related utilities.
Summary of Contents for Demos R130 M2
Page 1: ...Netberg Demos R130 M2 server...
Page 2: ...Netberg Demos R130 M2 server...
Page 11: ...Netberg Demos R130 M2 server xi 9 5 Aligning the Rails 222...
Page 14: ...1 Chapter 1 Netberg Demos R130 M2 server...
Page 31: ...Netberg Demos R130 M2 server 18 On HDD failure HDD Fault Amber Off No failure detected...
Page 32: ...19 Chapter 2 Installing hardware...
Page 57: ...Installing hardware 44 Figure 2 36 Installing the Air Duct...
Page 60: ...Installing hardware 47 Figure 2 40 Connecting the Fan Assembly Cables...
Page 143: ...130 Chapter 6 Server Management Software...
Page 169: ...156 Chapter 8 Web Graphical User Interface GUI for ESMS...
Page 230: ...217 Chapter 9 Rail Kit Assembly...
Page 236: ...223 Chapter 10 Troubleshooting...


