


Server Safety Information
191
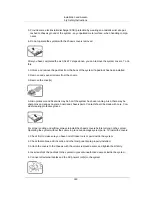
10.5. Power and Electrical Warnings
THE POWER BUTTON, INDICATED BY THE STAND-BY POWER MARKING, DOES
NOT COMPLETELY TURN OFF THE SYSTEM AC POWER, 5V STANDBY POW-
ER IS ACTIVE WHENEVER THE SYSTEM IS PLUGGED IN. TO REMOVE POWER
FROM SYSTEM, YOU MUST UNPLUG THE AC POWER CORD FROM THE WALL
OUTLET. YOUR SYSTEM MAY USE MORE THAN ONE AC POWER CORD. MAKE
SURE ALL AC POWER CORDS ARE UNPLUGGED. MAKE SURE THE AC POWER
CORD(S) IS / ARE UNPLUGGED BEFORE YOU OPEN THE CHASSIS, OR ADD OR
REMOVE ANY NON HOT-PLUG COMPONENTS.
DO NOT ATTEMPT TO MODIFY OR USE AN AC POWER CORD IF IT IS NOT THE
EXACT TYPE REQUIRED. A SEPARATE AC CORD IS REQUIRED FOR EACH
SYSTEM POWER SUPPLY.
SOME POWER SUPPLIES IN SERVERS USE NEUTRAL POLE FUSING. TO AVOID
RISK OF SHOCK USE CAUTION WHEN WORKING WITH POWER SUPPLIES
THAT USE NEUTRAL POLE FUSING.
SOME POWER SUPPLIES IN SERVERS USE NEUTRAL POLE FUSING. TO AVOID
RISK OF SHOCK USE CAUTION WHEN WORKING WITH POWER SUPPLIES
THAT USE NEUTRAL POLE FUSING.
THE POWER SUPPLY IN THIS PRODUCT CONTAINS NO USER-SERVICEABLE
PARTS. DO NOT OPEN THE POWER SUPPLY. HAZARDOUS VOLTAGE, CUR-
RENT AND ENERGY LEVELS ARE PRESENT INSIDE THE POWER SUPPLY. RE-
TURN TO MANUFACTURER FOR SERVICING.
WHEN REPLACING A HOT-PLUG POWER SUPPLY, UNPLUG THE POWER CORD
TO THE POWER SUPPLY BEING REPLACED BEFORE REMOVING IT FROM THE
SERVER.
TO AVOID RISK OF ELECTRIC SHOCK, TURN OFF THE SERVER AND DISCON-
NECT THE POWER CORD, TELECOMMUNICATIONS SYSTEMS, NETWORKS,
AND MODEMS ATTACHED TO THE SERVER BEFORE OPENING IT.
Summary of Contents for Demos R420 M2
Page 1: ...Netberg Demos R420 M2 server User manual...
Page 2: ...Netberg Demos R420 M2 server User manual...
Page 12: ...1 Chapter 1 Safety Information...
Page 19: ...8 Chapter 2 About the Server...
Page 32: ...21 Chapter 3 Installing Hardware...
Page 93: ...82 Chapter 4 Connectors...
Page 95: ...Connectors 84 Figure 4 1 Mainboard Overview...
Page 108: ...Connectors 97 4 9 Sensor Board Connectors Figure 4 13 Sensor Board 1 I2C Connector...
Page 109: ...98 Chapter 5 Cable Routing...
Page 110: ...Cable Routing 99 5 1 Cable Routing for 12 x 3 5 Hard Drives Configuration...
Page 111: ...Cable Routing 100 5 2 Cable Routing for 24 x 2 5 Hard Drives Configuration...
Page 112: ...101 Chapter 6 BIOS...
Page 125: ...BIOS 114 6 3 1 5 CPU Advanced PM Tuning...
Page 172: ...BIOS 161 6 4 2 View FRU Information...
Page 176: ...BIOS 165 Menu Fields Settings Comments Network Device BBS Priorities 1...
Page 182: ...171 Chapter 7 Rail Kit Assembly...
Page 186: ...Rail Kit Assembly 175 Figure 7 3 Tightening the Thumbscrews...
Page 187: ...176 Chapter 8 Troubleshooting...


