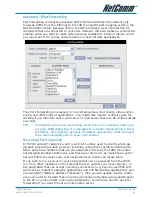
NB1 User Guide
YML780 Rev1
50
www.netcomm.com.au
Option
Description
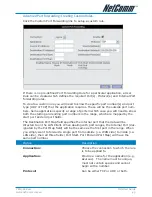
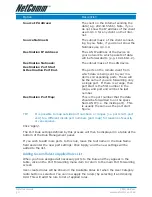
Source IP Address:
The client on the Internet sending the
data (e.g. 202.44.55.66). Note, if you
do not know the IP address of the client
use 0.0.0.0 for any client on the Inter-
net.
Source Netmask:
The subnet mask of the client connect-
ing to you. Note, if you do not know the
Netmask use 0.0.0.0.
Destination IP Address:
The LAN IP address of the device on
your network to which packets of data
will be forwarded to (e.g. 192.168.1.2).
Destination Netmask:
The subnet mask of the LAN device.
Destination Port Start
& Destination Port End.
The ports on the remote client from
which data is being sent to your mo-
dem’s corresponding ports. These will
be the same if you are forwarding only
a single port. If there is a range, then
port start is the first number in the
range, and port end will be the last
number.
Destination Port Map:
This is the port number that the data
should be forwarded to on the speci-
fied LAN IP (i.e. the inside port). This
is usually the same as the port start
figure.
TIP:
It is possible to map outside port numbers, or ranges [i.e. port start…port
end] to a different inside port numbers [port map] for reasons of security
or convenience.
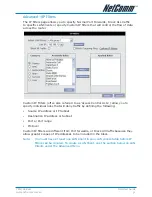
Click ‘Apply’.
The Port Rule settings defined by this process will then be displayed in a table at the
bottom of the Rule Management panel.
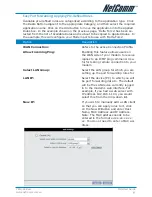
If you wish to add more ports to this rule, leave the text name in the Rule Name
field and enter the new port settings. Click ‘Apply’ and the new settings will be
added to the list.
Adding Custom Rules to Applied Rules List
When you have assigned all necessary ports to the Rule and they appear in the
table, click on the Port Forwarding menu item to return to the main Port Forwarding
screen.
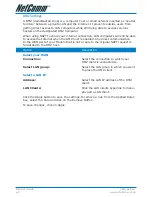
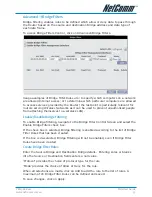
User-created rules will be shown in the Available Rules list when the User Category
radio button is selected. You can now apply the rule(s) by selecting it and clicking
Add. This will add the rule to list of applied rules.

