NTC-221/NTC-222/NTC-223/NTC-224
–
Firmware Upgrade Guide
8 of 10
FI01155 v1.0 13 May 2019
© NetComm 2019
2
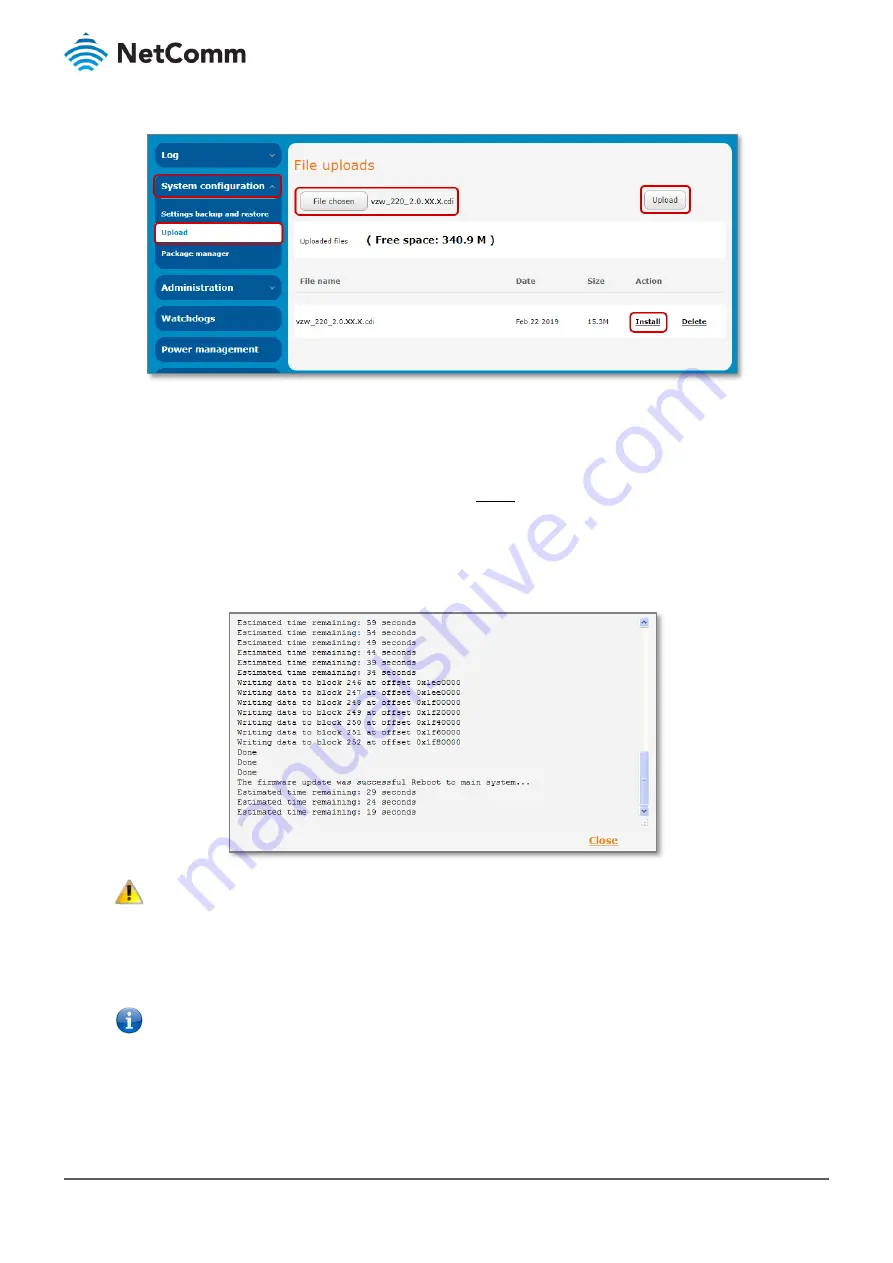
From the System menu on the left, select System Configuration and then Upload from its submenu.
3
Click the Choose a file button and select the ntc_220_x.x.xx.x.cdi file that you had previously downloaded
from the NetComm support website, refer to steps 5 and 6 of the
Check and download most recent firmware
section of this guide, above.
4
Once chosen, the filename will appear after the File Chosen button
5
When the new file appears in the File name list, click its Install link to install the new firmware on to the
router.
6
You will be asked to confirm that you want to install the selected file. Click the OK button to proceed.
7
The LED lights on the front of the router will begin to flash and the progress details will be displayed in the
bottom area of the File uploads page:
Important
–
Do not remove the power when the router’s LEDs are flashing as this is when the firmware update is in process.
8
The installation is complete when the countdown reaches zero. The router automatically reboots into the
main system.
9
Log in and check that you can access the router
’s web interface.
Note
–
Your login password should be the same one that you had defined prior to the firmware upgrade.
10
Go to the Status page and check in the System information section that the Firmware version has changed.
The firmware upgrade is complete.


