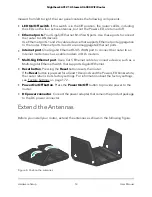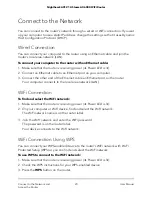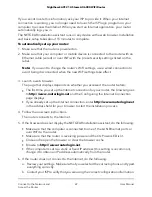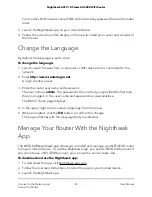
Viewed from left to right, the rear panel contains the following components:
•
LED On/Off switch
. If this switch is in the Off position, the router’s LEDs, including
the LEDs on the four active antennas, but not the Power LED, are turned off.
•
Ethernet ports
. Four Gigabit Ethernet RJ-45 LAN ports. Use these ports to connect
the router to LAN devices.
Use Ethernet ports 1 and 2 to cable a device that supports Ethernet port aggregation
to the router. Ethernet ports 3 and 4 are nonaggregate Ethernet ports.
•
Internet port
. One Gigabit Ethernet RJ-45 WAN port to connect the router to an
Internet modem such as a cable modem or DLS modem.
•
Multi-Gig Ethernet port
. Use a Cat 5 Ethernet cable to connect a device, such as a
Multi-Gigabit Ethernet Switch that supports Gigabit Ethernet.
•
Reset button
. Pressing the
Reset
button resets the router.
If the
Reset
button is pressed for at least 10 seconds and the Power LED blinks white,
the router returns to its factory settings. For information about the factory settings,
see Factory Settings on page 172.
•
Power On/Off button
. Press the
Power On/Off
button to provide power to the
router.
•
DC power connector
. Connect the power adapter that came in the product package
to the DC power connector.
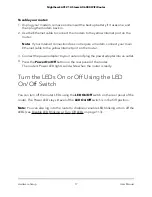
Extend the Antennas
Before you install your router, extend the antennas as shown in the following figure.
Figure 4. Position the antennas
User Manual
14
Hardware Setup
Nighthawk AX12 12-Steam AX6000 WiFi Router


