8
|
Chapter 1. Getting Started
NTV550 Ultimate HD Media Player User Manual
Cabling the Ultimate HD Media Player
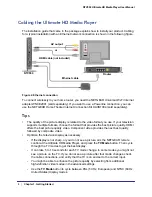
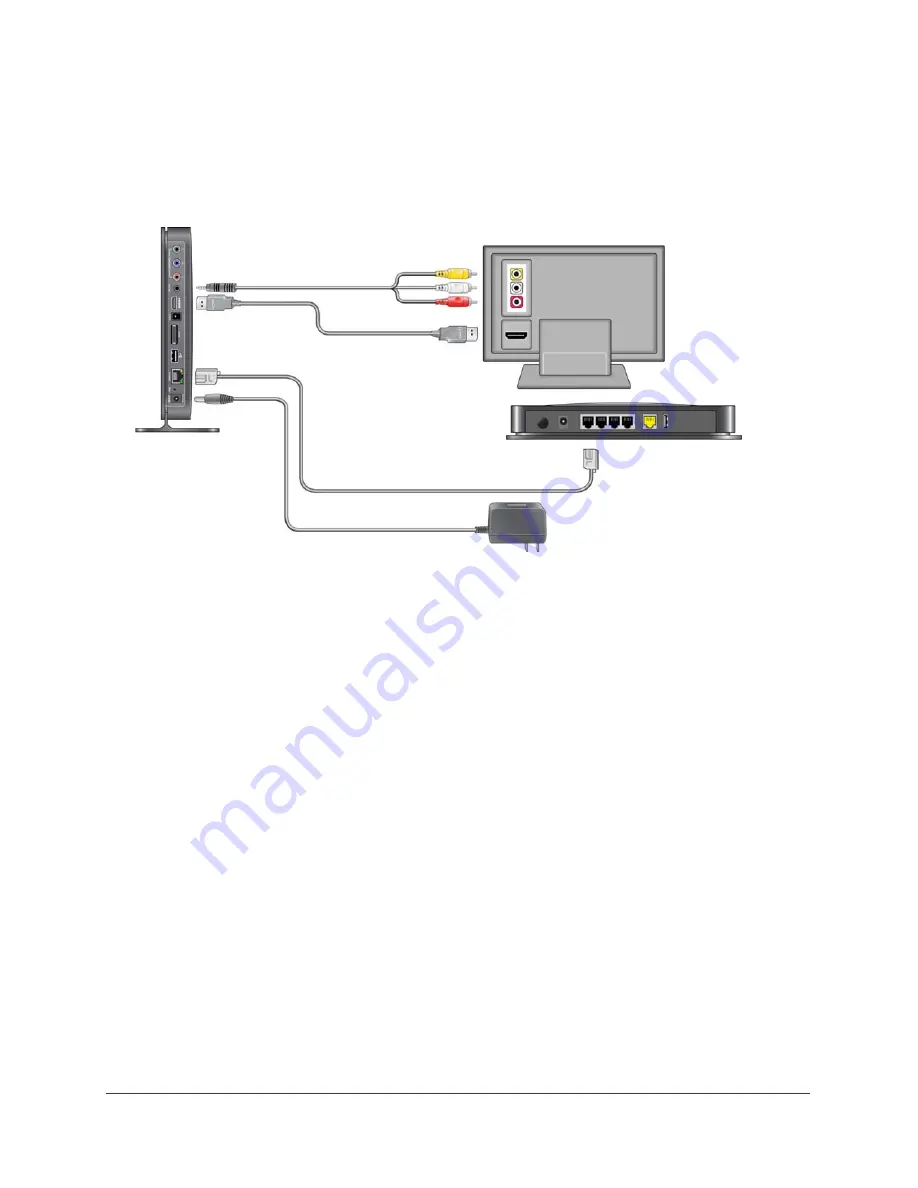
The installation guide that came in the package explains how to install your product. Cabling
for a typical installation with an Ethernet network connection is shown in the following figure.
Router
HDMI cable (not included)
AV output
or
NTV550
Ethernet cable
Figure 2. Ethernet connection
To connect wirelessly to your home router, you need the NETGEAR Universal Wi-Fi Internet
adapter WNCE2001 (sold separately). If you want to use a Powerline connection, you can
use the NETGEAR Home Theater Internet Connection Kit XAVB1004 (sold separately).
Tips
•
The quality of the picture display is related to the video format you use. If your television
supports multiple formats, choose the format that provides the best picture quality. HDMI
offers the best picture quality video. Component video provides the next best quality,
followed by composite video.
•
Optimize the television display as necessary.
-
If the display is not sharp, or you do not see a picture, aim the NETGEAR remote
control at the Ultimate HD Media Player, and press the
TV
Mode
button. Then cycle
through the TV modes to get the best display.
-
It can take 5 to 10 seconds for each TV mode change. In some modes you might not
see a picture on the TV. If you do not see a picture after four mode changes, check
the cable connections, and verify that the TV is on and set to the correct input.
-
You might be able to enhance the picture quality by selecting from additional
high-definition video modes in the advanced settings.
-
Use the
TV Mode
button to cycle between PAL (50 Hz, European) and NTSC (60 Hz,
United States) display modes.

