ProSafe Wireless-N VPN Firewall SRXN3205 Reference Manual
Wireless Configuration
4-11
v1.0, July 2008
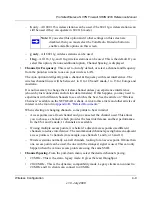
The Auto option intelligently picks a channel &
frequency
with least interference. The
wireless channel in use will be between 1 to 11 for US and Canada, 1 to 13 for Europe and
Australia. If you select Auto for channel & frequency, then the only available Channel
Width is Dynamic 20/40MHz.
It is not necessary to change the wireless channel unless you experience interference
(shown by lost connections and/or slow data transfers). If this happens, you may need to
experiment with different channels to see which is the best. See the article on “Wireless
Channels” available on the NETGEAR website. A link to this article and other articles of
interest can be found in
Appendix B, “Related Documents
.”
•
When selecting or changing channels, some points to bear in mind:
–
Access points use a fixed channel and you can select the channel used. This allows
you to choose a channel, which provides the least interference and best performance.
In the USA and Canada, 13 channels are available.
–
If using multiple access points, it is better if adjacent access points use different
channels to reduce interference. The recommended channel spacing between adjacent
access points is 8 channels (for example, use channels 36 and 44, or 44 and 52).
–
In “Infrastructure” mode, wireless stations normally scan all channels, looking for an
access point. If more than one access point can be used, the one with the strongest
signal is used. This can only occur when the various access points are using the same
SSID.
•
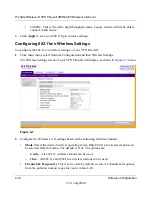
Channel Spacing.
From the pull-down menu, select the desired channel spacing.
•
20 MHz - This is the static, legacy mode. It gives the least throughput.
•
20/40 MHz - This is the dynamic, compatibility mode. Legacy clients can connect to
20 MHz and 11n clients can connect to 40 MHz.
•
40 MHz - This is the static, high-throughput mode. Legacy clients will not be able to
connect in this mode.
3.
Click
Apply
to save your 802.11a/n wireless settings.
Testing Wireless Connectivity (No Security)
Follow the instructions below to test wireless connectivity. Once you have established wireless
connectivity, you can enable security settings appropriate to your needs.
1.
From your Web browser, log in to the SRXN3205 using its default address of
http://192.168.1.1
.

