background image

ProSecure Web/Email Security Threat Management (STM) Appliance Reference Manual

5-8

Managing Users, Groups, and Authentication

v1.0, September 2009

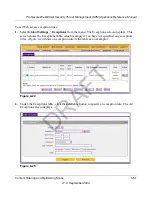
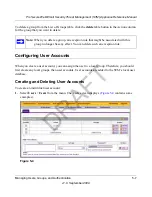
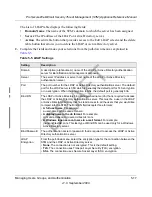
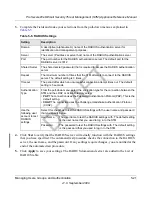
The List of Users table displays the users with the following fields:

Enable

.


The checkbox allows you to enable or disable the user.

Name

. The name of the user. 

Group

. The group to which the user is assigned. If no group is displayed, the user is not 

assigned to any group.

Action

. The edit table button that provides access to the Edit User screen and the delete 

table button that allows you to delete the user.

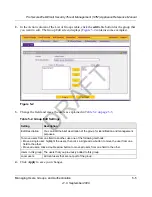
2.

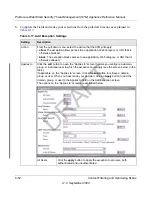
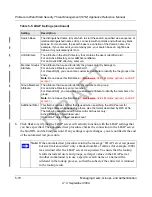
In the Add New Users section of the screen, complete the fields, make your selection from the 
pull-down menu, and select the radio buttons as explained in 

Table 5-4 on page 5-8

.

3.

Click the 

add

 table button. The new user is added to the List of Users table.

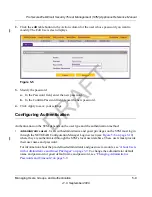
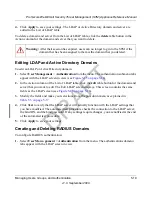
To delete a user from the List of Users table, click the 

delete

 table button in the Action column for 

the user that you want to delete.

Editing User Accounts

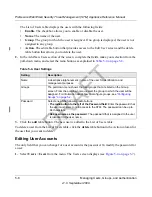
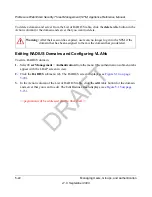
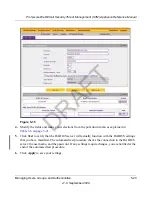
The only field that you can change for a user account is the password. To modify the password for 
a user:

1.

Select 

Users 

Users 

from the menu. The Users screen displays (see 

Figure 5-4 on page 5-7

).

Table 5-4. User Settings

Setting

Description

Name

A descriptive (alphanumeric) name of the user for identification and 
management purposes.

Groups

The pull-down menu shows the local groups that are listed on the Group 
screen. From the pull-down menu, select the group to which the user will be 
assigned. For information about how to configure groups, see 

“Configuring 

Groups” on page 5-2

.

Password

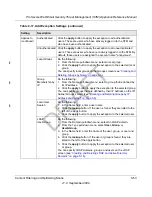
Select one of the following radio buttons:

The radio button to the left of the Password field

. Enter the password that 

the user must enter to gain access to the STM. The password can be up to 
64 characters.

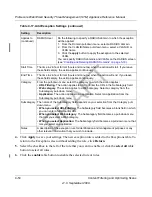
Use username as the password

. The password that is assigned to the user 

is identical to the user name.

DRAFT

Summary of Contents for STM150 - ProSecure Web And Email Threat Management Appliance

Page 1: ...202 10519 01 1 0 September 2009 NETGEAR Inc 350 East Plumeria Drive San Jose CA 95134 ProSecure Web Email Security Threat Management STM Appliance Reference Manual D R A F T ...

Page 2: ...proved by NETGEAR could void the user s authority to operate the equipment EU Regulatory Compliance Statement The ProSecure Web Email Security Threat Management Appliance STM150 STM300 or STM600 is compliant with the following EU Council Directives 89 336 EEC and LVD 73 23 EEC Compliance is verified by testing to the following standards EN55022 Class B EN55024 and EN60950 1 Bestätigung des Herstel...

Page 3: ...adman brg gladman uk net Worcester UK All rights reserved TERMS Redistribution and use in source and binary forms with or without modification are permitted subject to the following conditions 1 Redistributions of source code must retain the above copyright notice this list of conditions and the following disclaimer 2 Redistributions in binary form must reproduce the above copyright notice this li...

Page 4: ... IMPLIED WARRANTIES INCLUDING BUT NOT LIMITED TO THE IMPLIED WARRANTIES OF MERCHANTABILITY AND FITNESS FOR A PARTICULAR PURPOSE ARE DISCLAIMED IN NO EVENT SHALL THE OpenSSL PROJECT OR ITS CONTRIBUTORS BE LIABLE FOR ANY DIRECT INDIRECT INCIDENTAL SPECIAL EXEMPLARY OR CONSEQUENTIAL DAMAGES INCLUDING BUT NOT LIMITED TO PROCUREMENT OF SUBSTITUTE GOODS OR SERVICES LOSS OF USE DATA OR PROFITS OR BUSINES...

Page 5: ...ld liable for any damages arising from the use of this software Permission is granted to anyone to use this software for any purpose including commercial applications and to alter it and redistribute it freely subject to the following restrictions 1 The origin of this software must not be misrepresented you must not claim that you wrote the original software If you use this software in a product a...

Page 6: ...v1 0 September 2009 vi D R A F T ...

Page 7: ... for Content Filtering 1 4 Autosensing Ethernet Connections with Auto Uplink 1 4 Easy Installation and Management 1 5 Maintenance and Support 1 5 STM Model Comparison 1 5 Service Registration Card with License Keys 1 6 Package Contents 1 7 Hardware Features 1 7 Front Panel Ports and Status LEDs 1 7 Rear Panel Features 1 14 Bottom Panel With Product Label 1 15 Choosing a Location for the STM 1 17 U...

Page 8: ...s 2 21 Setup Wizard Step 8 of 11 HTTP Proxy Settings 2 23 Setup Wizard Step 9 of 11 Web Categories 2 24 Setup Wizard Step 10 of 11 Configuration Summary 2 26 Setup Wizard Step 11 of 11 Restarting the System 2 27 Verifying Proper Installation 2 27 Testing Connectivity 2 27 Testing HTTP Scanning 2 27 Registering the STM with NETGEAR 2 28 What to Do Next 2 30 Chapter 3 Performing Network and System M...

Page 9: ...Settings 4 2 Configuring E mail Protection 4 4 Customizing E mail Protocol Scan Settings 4 4 Customizing E mail Anti Virus Settings 4 5 E mail Content Filtering 4 12 Protecting Against E mail Spam 4 15 Configuring Web and Services Protection 4 23 Customizing Web Protocol Scan Settings 4 23 Configuring Web Malware Scans 4 25 Configuring Web Content Filtering 4 27 Configuring Web URL Filtering 4 34 ...

Page 10: ... 22 Global User Settings 5 24 Viewing and Logging Out Active Users 5 26 Chapter 6 Monitoring System Access and Performance Configuring Logging Alerts and Event Notifications 6 1 Configuring the E mail Notification Server 6 2 Configuring and Activating System E mail and Syslog Logs 6 3 Configuring Alerts 6 8 Monitoring Real Time Traffic Security Statistics and Web Usage 6 10 Understanding the Infor...

Page 11: ...r IP Address a Time out Error Occurs 7 4 Troubleshooting a TCP IP Network Using a Ping Utility 7 4 Testing the LAN Path to Your STM 7 4 Testing the Path from Your PC to a Remote Device 7 5 Restoring the Default Configuration and Password 7 6 Problems with Date and Time 7 7 Using Online Support 7 7 Enabling Remote Troubleshooting 7 7 Installing Hot Fixes 7 8 Sending Suspicious Files to NETGEAR for ...

Page 12: ...ProSecure Web Email Security Threat Management STM Appliance Reference Manual xii v1 0 September 2009 D R A F T ...

Page 13: ... readers with intermediate computer and networking skills Conventions Formats and Scope The conventions formats and scope of this manual are described in the following paragraphs Typographical conventions This manual uses the following typographical conventions Formats This manual uses the following formats to highlight special messages Italic Emphasis books CDs Bold User input IP addresses GUI sc...

Page 14: ...eader is available on the Adobe Web site at http www adobe com Danger This is a safety warning Failure to take heed of this notice might result in personal injury or death Product ProSecure Web Email Security Threat Management Appliance STM150 STM300 or STM600 Manual Publication Date September 2009 Note Product updates are available on the NETGEAR Inc website at http prosecure netgear com Note Go ...

Page 15: ...Management STM Appliance Reference Manual xv v1 0 September 2009 Revision History Manual Part Number Manual Version Number Publication Date Description 202 10519 01 1 0 September 2009 Initial publication of this reference manual D R A F T ...

Page 16: ...ProSecure Web Email Security Threat Management STM Appliance Reference Manual xvi v1 0 September 2009 D R A F T ...

Page 17: ...e STM on page 1 17 What Is the ProSecure Web Email Security Threat Management Appliance STM150 STM300 or STM600 The ProSecure Web Email Security Threat Management Appliance STM150 STM300 or STM600 hereafter referred to as the STM is an appliance based Web security solution that protects the network perimeter against Web borne threats from spyware viruses and e mail and blended threats Ideally depl...

Page 18: ...s scan engine checks traffic as it enters the network ensuring unimpeded network performance Set access policies for individual users or groups You can configure Web and e mail access access policies for individual users and groups based on the STM s local database on group IP address on LDAP domain group or user or on RADIUS VLAN Receive real time alerts and generate comprehensive reports You can...

Page 19: ...database containing hundreds of thousands of signatures of spyware viruses and other malware Automatically updated malware signatures as frequently as every 15 minutes Multiple anti spam technologies to provide extensive protection against unwanted mail Spam and malware quarantine for easy analysis Web application control including access control for instant messaging media applications peer to pe...

Page 20: ...oth Web and e mail security covering six major network protocols HTTP HTTPS FTP SMTP POP3 and IMAP The STM uses enterprise class scan engines employing both signature based and Distributed Spam Analysis to stop both known and unknown threats The malware database contains hundreds of thousands of signatures of spyware viruses and other malware Objectionable traffic protection The STM prevents objec...

Page 21: ...stic functions The STMl incorporates built in diagnostic functions such as Ping Trace Route DNS lookup and remote restart Remote management The STM allows you to login to the Web Management Interface from a remote location on the Internet For security you can limit remote management access to a specified remote IP address or range of addresses Visual monitoring The STM s front panel LEDs provide a...

Page 22: ...orts 1 uplink 4 downlink Total of 3 ports 1 uplink 1 downlink 1 management Total of 5 ports 2 uplink a 2 downlink 1 management Gigabit RJ45 Ports with Failure Bypass 0 b 2 4 Dedicated Management VLAN RJ45 Ports 0 1 1 a The STM600 provides two pairs of uplink and downlink ports allowing for support of two separate networks or subnets with strict traffic separation b All STM models including the STM...

Page 23: ... materials in case you need to return the product for repair Hardware Features The front panel ports and LEDs rear panel ports and bottom label of the STM models are described below Front Panel Ports and Status LEDs The front panels of the three STM models provide different components Note When you reset the STM to the original factory default settings after you have entered the license keys to ac...

Page 24: ...ot operable on any STM model 4 One uplink WAN Gigabit Ethernet port with an RJ 45 connector left LED and right LED 5 Four downlink LAN Gigabit Ethernet ports with RJ 45 connectors left LEDs and right LEDs The function of each STM150 LED is described in the following table Figure 1 2 Note All Gigabit Ethernet ports provide switched N way automatic speed negotiating auto MDI MDIX technology Table 1 ...

Page 25: ...e Viewing System Status on page 6 19 Uplink WAN Port Left LED Off The WAN port has no physical link that is no Ethernet cable is plugged into the STM On Green The WAN port has a valid connection with a device that provides an Internet connection Blink Green Data is being transmitted or received by the WAN port Right LED Off The WAN port is operating at 10 Mbps On Green The WAN port is operating at...

Page 26: ...tatus LED 4 Hard drive HDD LED 5 One non functioning USB port this port is included for future management enhancements The port is currently not operable on any STM model 6 Dedicated management Mgmt Gigabit Ethernet port with an RJ 45 connector 7 One uplink WAN Gigabit Ethernet port with an RJ 45 connector left LED and right LED 8 One downlink LAN Gigabit Ethernet port with RJ 45 connectors left L...

Page 27: ... Status LED from blinking renew the license or click the Stop LED Blinking button on the System Status screen see Viewing System Status on page 6 19 HDD On Green Information is being written to the hard drive Off No hard drive activity Uplink WAN Port Left LED Off The WAN port has no physical link that is no Ethernet cable is plugged into the STM On Green The WAN port has a valid connection with a...

Page 28: ...ve HDD LED 5 One non functioning USB port this port is included for future management enhancements The port is currently not operable on any STM model 6 Dedicated management Mgmt Gigabit Ethernet port with an RJ 45 connector 7 Pair 1 uplink WAN and downlink LAN Gigabit Ethernet ports with RJ 45 connectors left LEDs and right LEDs 8 Pair 2 uplink WAN and downlink LAN Gigabit Ethernet ports with RJ ...

Page 29: ... Status LED from blinking renew the license or click the Stop LED Blinking button on the System Status screen see Viewing System Status on page 6 19 HDD On Green Information is being written to the hard drive Off No hard drive activity Uplink WAN Port Left LED Off The WAN port has no physical link that is no Ethernet cable is plugged into the STM On Green The WAN port has a valid connection with a...

Page 30: ... 7 Gnd 2 Kensington lock Attach an optional Kensington lock to prevent unauthorized removal of the STM150 3 Power Button Press to restart the STM150 Restarting does not reset the STM150 to its factory defaults 4 Reset Button Using a sharp object press and hold this button for about 10 seconds until the front panel Test light flashes and the STM150 returns to factory default settings 5 AC power soc...

Page 31: ...or STM600 to its factory defaults 2 AC power socket Attach the power cord to this socket Bottom Panel With Product Label The product label on the bottom of the STM s enclosure displays the STM s default IP address default user name and default password as well as regulatory compliance input power and other information Figure 1 6 Note The STM300 and STM600 do not provide a Reset button To reset the...

Page 32: ...ProSecure Web Email Security Threat Management STM Appliance Reference Manual 1 16 Introduction v1 0 September 2009 STM150 Product Label STM300 Product Label Figure 1 7 Figure 1 8 D R A F T ...

Page 33: ...ment room A mounting kit containing two mounting brackets and four screws is provided in the STM package Consider the following when deciding where to position the STM The unit is accessible and cables can be connected easily Cabling is away from sources of electrical noise These include lift shafts microwave ovens and air conditioning units Water or moisture cannot enter the case of the unit Airf...

Page 34: ...ical Specifications Using the Rack Mounting Kit Use the mounting kit for the STM to install the appliance to a rack A mounting kit is provided in the product package for the STM The mounting brackets supplied with the STM are usually installed before the unit is shipped out If the brackets are not yet installed attach them using the supplied hardware Before mounting the STM in a rack verify that Y...

Page 35: ...ridge appliance that can easily be deployed to any point on the network without requiring network reconfiguration or additional hardware The following are the most common deployment scenarios for the STM Depending on your network environment and the areas that you want to protect you can choose one or a combination of the deployment scenarios that are described in the following sections Gateway De...

Page 36: ...gateway and another in front of the server group This type of deployment helps split the network load and provides the e mail server with dedicated protection against malware including e mail borne viruses and spam Figure 2 2 on page 2 3 shows a typical server group deployment scenario Figure 2 1 Note This configuration helps protect the e mail server from threats from internal as well as external...

Page 37: ...t one STM appliance is installed in front of each network segment This type of deployment helps split the network load and protects network segments from malware coming in through the gateway or originating from other segments Figure 2 3 on page 2 4 shows a typical segmented LAN deployment scenario Figure 2 2 Note In segmented LAN deployment VLAN is not supported VLAN traffic cannot pass through t...

Page 38: ... according to the instructions in the installation guide See the ProSecure Web Email Security Threat Management Applliance STM150 STM300 or STM600 Installation Guide for complete steps A PDF of the Installation Guide is on the NETGEAR ProSecure website at http prosecure netgear com 2 Log in to the STM After logging in you are ready to set up and configure your STM See Logging In to the STM on page...

Page 39: ... VPN users should choose a browser that supports JavaScript Java cookies SSL and ActiveX to take advantage of the full suite of applications Note that Java is only required for the SSL VPN portal not for the Web Management Interface Logging In to the STM To connect to the STM your computer needs to be configured to obtain an IP address automatically from the STM via DHCP For instructions on how to...

Page 40: ...Configuration Manager Login screen displays in the browser see Figure 2 4 which shows the STM600 3 In the User field type admin Use lower case letters 4 In the Password field type password Here too use lower case letters Figure 2 5 Note The STM user name and password are not the same as any user name or password you might use to log in to your Internet connection D R A F T ...

Page 41: ...PN connection you might get a warning message regarding the SSL certificate If you are using a Windows computer with Internet Explorer 5 5 or higher simply click Yes to accept the certificate Other browsers provide you with similar options to accept and install the SSL certificate If you connect to the STM through the User Portal login screen you can import the STM s root certificate by clicking t...

Page 42: ...navigation menu link the letters are displayed in white against an orange background 2nd Level Configuration menu links The configuration menu links in the gray bar immediately below the main navigation menu bar change according to the main navigation menu link that you select When you select a configuration menu link the letters are displayed in white against a grey background 3rd Level Submenu t...

Page 43: ...the configuration Next Go to the next screen for wizards Back Go to the previous screen for wizards Search Perform a search operation Cancel Cancel the operation Send Now Send a file or report When a screen includes a table table buttons are displayed to let you configure the table entries The nature of the screen determines which table buttons are shown Figure 2 9 shows an example Any of the foll...

Page 44: ...ettings screen in view 2 From the Global Setting configuration menu select Setup Wizard The following sections explain the 11 configuration screens of the Setup Wizard On the 10th screen you can save your configuration The 11th screen is just an informational screen The tables in the following sections explain the buttons and fields of the Setup Wizard screens Additional information about the sett...

Page 45: ...ote After you have completed the steps in the Setup Wizard you can make changes to the network settings by selecting Global Settings Network Settings For more information about these network settings see Configuring Network Settings on page 3 1 Table 2 1 Setup Wizard Step 2 Network Settings Setting Description or Subfield and Description Management Interface Settings System Name The name for the S...

Page 46: ...ubnet mask The subnet mask specifies the network number portion of an IP address The STM will automatically calculate the subnet mask based on the IP address that you assign Unless you are implementing subnetting use 255 255 255 0 as the subnet mask computed by the STM Gateway Address Enter the IP address of the gateway through which you will access the STM Primary DNS Specify the IP address for t...

Page 47: ...p 3 of 11 Time Zone Enter the settings as explained in Table 2 2 on page 2 14 then click Next to go the following screen Figure 2 12 Note After you have completed the steps in the Setup Wizard you can make changes to the date and time by selecting Administration System Date Time For more information about these settings see Configuring Date and Time Service on page 3 5 D R A F T ...

Page 48: ... will be set to the default Netgear NTP servers Note A list of public NTP servers is available at http ntp isc org bin view Servers WebHome Server 1 Name IP Address Enter the IP address or host name the primary NTP server Server 2 Name IP Address Enter the IP address or host name the secondary NTP server Manually Enter the Date and Time Date Enter the date in the yyyy mm dd year month date format ...

Page 49: ... you can make changes to the email security settings by selecting Email Security Policy or Email Security Anti Virus The Email Anti Virus screen also lets you specify notification settings and email alert settings For more information about these settings see Configuring E mail Protection on page 4 4 Tip To enhance performance you can disable scanning of any protocols that will be used seldom or n...

Page 50: ...ature of the malware a virus log entry or spyware log entry is created Delete attachment The e mail is not blocked but the attachment is deleted and a log entry is created Block infected email This is the default setting The e mail is blocked and a log entry is created Quarantine infected email The e mail is is placed in the malware quarantine for further research In addition and depending on the ...

Page 51: ... is not blocked but the attachment is deleted and a log entry is created Log only Only a log entry is created The e mail is not blocked and the attachment is not deleted Scan Exceptions From the pull down menu select to Block or Skip any email attachment that exceeds the size that you specify in the file size field For the STM600 and STM300 the default setting is to block any attachment larger tha...

Page 52: ...can field HTTPS HTTPS scanning is disabled by default To enable HTTPS scanning select the corresponding checkbox You can change the standard service port port 443 or add another port in the corresponding Ports to Scan field FTP FTP scanning is enabled by default on standard service port 21 To disable FTP scanning deselect the corresponding checkbox You can change the standard service port or add a...

Page 53: ...ser to experience more transparent Web downloading FTP From the FTP pull down menu specify one of the following actions when an infected Web file or object is detected Quarantine file The Web file or object is removed and placed in the malware quarantine for further research In addition and depending on the nature of the malware a virus log entry or spyware log entry is created Delete file This is...

Page 54: ...hese settings see Configuring the E mail Notification Server on page 6 2 Table 2 5 Setup Wizard Step 6 Email Notification Server Settings Setting Description or Subfield and Description Email Notification Server Settings Show as Mail sender A descriptive name of the sender for e mail identification purposes For example enter stm600notification netgear com Send Notifications to The email address to...

Page 55: ... Authentication If the SMTP server requires authentication select the Mail Server Requires Authentication checkbox and enter the following settings User Name The user name that is used for SMTP server authentication Password The password that is used for SMTP server authentication Figure 2 16 Table 2 5 Setup Wizard Step 6 Email Notification Server Settings continued Setting Description or Subfield...

Page 56: ...date From Select one of the following radio buttons Default update server The scan engine and signatures are updated from the NETGEAR default update server Another Server address The scan engine and signatures are updated from a server that you specify by entering the server IP address or host name in the Server Address field Server Address The update server IP address or host name Update Componen...

Page 57: ...roxy For more information about these settings see Configuring the HTTP Proxy Settings on page 3 7 Table 2 7 Setup Wizard Step 8 HTTP Proxy Settings Setting Description or Subfield and Description HTTPS Proxy Settings Use a Proxy Server to Connect to the Internet If computers on the network connect to the Internet via a proxy server select the Use a Proxy Server to Connect to the Internet checkbox...

Page 58: ...b Email Security Threat Management STM Appliance Reference Manual 2 24 Using the Setup Wizard to Provision the STM in Your Network v1 0 September 2009 Setup Wizard Step 9 of 11 Web Categories Figure 2 18 D R A F T ...

Page 59: ...on page 4 27 Table 2 8 Setup Wizard Step 9 Web Categories Settings Setting Description or Subfield and Description Select the Web Categories You Wish to Block Select the Enable Blocking checkbox to enable blocking of Web categories which is the default setting Select the checkboxes of any Web categories that you want to block Use the action buttons in the following way Allow All All Web categories...

Page 60: ...ail Security Threat Management STM Appliance Reference Manual 2 26 Using the Setup Wizard to Provision the STM in Your Network v1 0 September 2009 Setup Wizard Step 10 of 11 Configuration Summary Figure 2 19 D R A F T ...

Page 61: ...ts automatically with the new configuration Verifying Proper Installation Test the STM before deploying it in a live production environment The following instructions walk you through a couple of quick tests designed to ensure that your STM is functioning correctly Testing Connectivity Verify that network traffic can pass through the STM Ping an Internet URL Ping the IP address of a device on eith...

Page 62: ...E mail Scanning Settings on page 5 2 and Customizing Web Scanning Settings on page 5 12 2 Check the downloaded eicar com test file and note the attached malware information file Registering the STM with NETGEAR To receive threat management component updates and technical support you must register your STM with NETGEAR The support registration key is provided with the product package see Service Re...

Page 63: ...ember 2009 If your STM is connected to the Internet you can activate the service licenses 1 Select Support Registration from the menu The Registration screen displays 2 Enter the license key in the Registration Key field 3 Fill out the customer and VAR fields 4 Click Register 5 Repeat step 2 and step 4 for additional license keys Figure 2 21 D R A F T ...

Page 64: ...u might want to address before you deploy the STM in your network are listed below Changing Administrative Passwords and Timeouts on page 3 9 Managing Digital Certificates on page 3 25 Configuring Groups on page 5 2 Configuring User Accounts on page 5 7 Configuring Authentication on page 5 9 Setting Scanning Exclusions and Web Access Exceptions on page 4 49 Note When you reset the STM to the origi...

Page 65: ...ime Service on page 3 23 Managing Digital Certificates on page 3 25 Managing the Quarantine Settings on page 3 31 Performance Management on page 3 32 Configuring Network Settings If you have used the Setup Wizard you might already have configured the Web Management Interface and maximum transmission unit MTU settings the Network Settings screen allows you to modify these settings and to specify th...

Page 66: ...gure the STM s network settings 1 Select Global Settings Network Settings from the menu The Network Settings submenu tabs appear with the Network Settings screen in view see Figure 3 1 which shows the STM600 Figure 3 2 on page 3 3 shows the Interface Speed Duplex Settings section of the Network Settings screen of the STM300 Figure 3 1 STM600 D R A F T ...

Page 67: ...e Settings System Name The name for the STM for purposes of identification and management The default name is the name of your model STM150 STM300 or STM600 IP Address Enter the IP address of the STM through which you will access the Web Management Interface The factory default IP address is 192 168 1 201 Note If you change the IP address of the STM while being connected through the browser you wi...

Page 68: ...x pull down menu make one of the following selections auto Speed autosensing This is the default setting 10baseT Half Ethernet speed at half duplex 10baseT Full Ethernet speed at full duplex 100baseT Half Fast Ethernet speed at half duplex 100baseT Full Fast Ethernet speed at full duplex PAIR1 UPLINK PAIR1 DOWNLINK PAIR2 UPLINK PAIR2 DOWNLINK STM300 see Figure 3 2 on page 3 3 MGMT From the Set Spe...

Page 69: ... absolute number or as a percentage of the STM s total connection capacity per user which is 10000 sessions You cannot change the total connection capacity per user If a user exceeds the number of allocated sessions packets might be dropped To configure session limits and timeouts 1 Select Global Settings Network Settings from the menu The Network Settings submenu tabs appear with the Network Sett...

Page 70: ...forming Network and System Management v1 0 September 2009 2 Click the Session Limits submenu tab The Session Limits screen displays 3 Select the radio buttons make your selections from the pull down menu and complete the fields as explained in Table 3 2 on page 3 7 Figure 3 4 D R A F T ...

Page 71: ... enable session limits and then specify the Limit Type and Limit Value fields The No radio button is selected by default Limit Type From the Limit Type pull down menu make one of the following selections Percentage of Maximum Sessions Session limits are set as a percentage of the the total connection capacity per user Sessions per User Session limits are set as an absolute number Limit Value Depen...

Page 72: ...3 5 Table 3 3 HTTP Proxy Settings Setting Description or Subfield and Description HTTPS Proxy Settings Use a Proxy Server to Connect to the Internet If computers on the network connect to the Internet via a proxy server select the Use a Proxy Server to Connect to the Internet checkbox to specify and enable a proxy server Enter the following settings Proxy Server The IP address and port number of t...

Page 73: ...t and the default password for a guest is guest NETGEAR recommends that you change these passwords to more secure passwords The login window that is presented to the administrator and guest user is the NETGEAR Configuration Manager Login screen see Figure 5 6 on page 5 10 Changing Administrative Passwords and Timeouts In addition to changing the default password for the administrator and guest use...

Page 74: ...Administrator and Guest Settings Setting Description or Subfield and Description User Selection Select one of the following radio buttons Edit Administrator Settings Allows you to modify the administrator settings while the guest settings are masked out Edit Guest Settings Allows you to modify the guest settings while the administrator settings are masked out Administrator Settings Guest Setting N...

Page 75: ...st enter https not http and type the STM s WAN IP address into your browser For example if the STM s WAN IP address is 172 16 0 123 type the following in your browser https 172 16 0 123 The STM s remote login URL is New Password Enter the new password Retype New Password Confirm the new password Table 3 5 Set Password Settings screen Web Interface Timeout Settings Setting Description or Subfield a...

Page 76: ...you can enter a port ranging from 1024 to 65535 You cannot use some ports such as 2080 and 8088 that might be used by the STM This section of the screen also displays the HTTPS hyperlink through which you can access the Web Management Interface of the STM The hyperlink consists of the IP address or fully qualified domain name FQDN for the STM and the port number that you have assigned Note The STM...

Page 77: ... network attached devices for conditions that warrant administrative attention SNMP exposes management data in the form of variables on the managed systems which describe the system configuration These variables can then be queried and sometimes set by managing applications SNMP lets you monitor and manage your STM from an SNMP manager It provides a remote means to monitor and control network devi...

Page 78: ...rforming Network and System Management v1 0 September 2009 To enable SNMP and to configure the SNMP settings 1 Select Administration SNMP from the menu The SNMP screen displays 2 Select the radio buttons and complete the fields as explained in Table 3 6 on page 3 15 Figure 3 8 D R A F T ...

Page 79: ...unity string to allow an SNMP manager access to the MIB objects of the STM for the purpose of reading only The default setting is public Set Community The community string to allow an SNMP manager access to the MIB objects of the STM for the purpose of reading and writing The default setting is private Contact The SNMP system contact information that is available to the SNMP manager This setting i...

Page 80: ...leared to factory default settings Once the STM is installed and works properly make a back up of the configuration file to a computer If necessary you can later restore the STM settings from this file The Backup and Restore Settings screen lets you back up and save a copy of the current settings restore saved settings from the backed up file revert to the factory default settings To display the B...

Page 81: ...which you want to save the file specify the file name and save the file If you have your browser configured to save downloaded files automatically the file will be saved to your browser s download location on the hard disk Restore Settings To restore settings from a backup file 1 On the Backup and Restore Settings screen see Figure 3 9 on page 3 16 next to Restore save settings from file click Bro...

Page 82: ...up Wizard you might have already configured the software update settings the Software Update screen allows you to modify these settings Warning Once you start restoring settings do not interrupt the process Do not try to go online turn off the STM shut down the computer or do anything else to the STM until the settings have been fully restored Warning When you restore the factory default settings ...

Page 83: ...ng system OS that includes the kernel modules and hardware drives The STM provides two methods for updating components Scheduled automatic update Manual update Because new virus threats can appear any hour of the day it is very important to keep both the pattern file and scan engine firmware as current as possible The STM can automatically check for updates as often as every 15 minutes to ensure t...

Page 84: ...M Appliance Reference Manual 3 20 Performing Network and System Management v1 0 September 2009 2 Select the radio buttons complete the field and make your selections from the pull down menus as explained in Table 3 7 on page 3 21 Figure 3 10 D R A F T ...

Page 85: ... and the date of the last update are displayed Update Settings Update From Select one of the following radio buttons Default update server The scan engine and signatures are updated from the NETGEAR default update server Another Server address The scan engine and signatures are updated from a server that you specify by entering the server IP address or host name in the Server Address field Server ...

Page 86: ... Updates That Require a Restart If a downloaded update requires a restart you are prompted to perform the update when you log in to the STM Figure 3 12 shows an example of a Critical Update screen which provides information about the update and allows you to install it immediately or are a later time To install the update immediately click Install Now To install the update at a later time click La...

Page 87: ...een Network Time Protocol NTP is a protocol that is used to synchronize computer clock times in a network of computers Setting the correct system time and time zone ensures that the date and time recorded in the STM logs and reports are accurate Changing the time zone requires the STM to restart to apply the updated settings To set time date and NTP servers 1 Select Administration System Date and ...

Page 88: ... select this option but leave either the Server 1 or Server 2 field blank both fields will be set to the default NETGEAR NTP servers Note A list of public NTP servers is available at http ntp isc org bin view Servers WebHome Server 1 Name IP Address Enter the IP address or host name the primary NTP server Server 2 Name IP Address Enter the IP address or host name the secondary NTP server Manually ...

Page 89: ...st and the purpose matches its use The STM uses digital certificates to authenticate connecting HTTPS servers and to allow HTTPS clients to be authenticated by remote entities A digital certificate that authenticates a server for example is a file that contains the following elements A public encryption key to be used by clients for encrypting messages to the server Information identifying the ope...

Page 90: ...en or from the Certificate Management screen for browser import However NETGEAR recommends that you replace this digital certificate with a digital certificate from a well known commercial CA prior to deploying the STM in your network The STM s Certificate Management screen lets you to view the currently loaded digital certificate for HTTPS scans upload a new digital certificate manage the trusted...

Page 91: ...The Certificate Management screen displays Figure 3 15 shows only the Certificate Used for HTTPS Scans section of the screen The top part of the Certificate Used for HTTPS Scans section displays information about the current certificate that is used for HTTPS scans Downloading the Certificate in to Your Browser To download the current certificate in to your browser 1 Click Download for browser Imp...

Page 92: ... 1 Select the Use imported certificate PKCS12 format radio button 2 Click Browse next to the Import from File field 3 Navigate to a trusted certificate file on your computer Follow the instructions of your browser to place the certificate file in the Import from File field 4 If required enter the appropriate password in the Certificate password field 5 Click the upload button 6 Click Apply to save...

Page 93: ... the screen The Trusted Certificate Authorities table contains the trusted certificates from third party Web sites that are signed by the Certificate Authorities Viewing Trusted Certificate Details To view details of a trusted certificate 1 Select the certificate from the Trusted Certificate Authorities table 2 Click View Details A new screen opens that displays the details of the certificate Dele...

Page 94: ...ate is added to the Trusted Certificate Authorities table Managing Untrusted Certificates To manage untrusted certificates Select Web Security Certificate Management from the menu The Certificate Management screen displays Figure 3 17 shows only the Untrusted Certificates section of the screen When the STM detects an untrusted or invalid certificate it automatically places the certificate in the U...

Page 95: ...Select the certificate from the Untrusted Certificates table 2 Click Add to Trusted List The previously untrusted certificate is added to the Trusted Certificate Authorities table Managing the Quarantine Settings You can specify how much memory the STM reserves for quarantined items and how long these items remain in memory In general the default settings work well for most situations To change th...

Page 96: ...utative for all users For the STM600 the default setting is 200 MB and the maximum setting is 512 MB For the STM150 and STM300 the default setting is 100 MB and the maximum setting is 512 MB Note After the limit has been exceeded old items are automatically purged from the malware quarantine to make space for new items Spam Quarantine Area Size Specify the maximum amount of memory in MB that is al...

Page 97: ...an reject e mails based on keywords in the subject line file type of the attachment and file name of the attachment For more information see E mail Content Filtering on page 4 12 Protecting against spam Set up spam protection to prevent spam from using up valuable bandwidth For more information see Protecting Against E mail Spam on page 4 15 Web Content Filtering The STM provides extensive methods...

Page 98: ...ecurity or blocked For more information see Configuring Web Malware Scans on page 4 25 For these features with the exception of Web object blocking and setting the size of files to be scanned you can set schedules to specify when Web content will be filtered see Configuring Web Content Filtering on page 4 27 and configure scanning exclusions and access exceptions see Setting Scanning Exclusions an...

Page 99: ...d e mail content filtering options Web browsing activity reporting e mail anti virus and anti spam options and instant alerts via e mail You can establish restricted Web access policies that are based on the time of day Web addresses and Web address keywords You can also block Internet access by applications and services such as instant messaging and peer to peer file sharing clients Note For info...

Page 100: ... Protocols SMTP Enabled Block infected e mail POP3 Enabled Delete attachment if infected IMAP Enabled Delete attachment if infected Web Server Protocols a HTTP Enabled Delete file if malware detected HTTPS Disabled No action scan disabled FTP Enabled Delete file if malware detected Instant Messaging Services Google Talk Allowed ICQ Allowed mIRC Allowed MSN Messenger Allowed QQ Allowed Yahoo Messen...

Page 101: ... Allowed with the exception of School Cheating Gaming Blocked Inactive Sites Allowed Internet Communication and Search Allowed with the exception of Anonymizers Leisure and News Allowed Malicious Blocked Politics and Religion Allowed Sexual Content Blocked Technology Allowed Uncategorized Blocked a For the STM300 and STM600 files and messages that are larger than 10240 KB are skipped by default Fo...

Page 102: ...izes that will be scanned Keywords file types and file names in e mails that will be filtered to block objectionable or high risk content Customer notifications and e mail alerts that will be sent when events are detected Rules and policies for spam detection Customizing E mail Protocol Scan Settings If you have used the Setup Wizard you might have already configured the e mail policies the e mail...

Page 103: ... settings 1 Select Email Security Anti Virus from the menu The anti virus submenu tabs appear with the Action screen in view see Figure 4 2 on page 4 6 Table 4 2 E mail Policy Settings Setting Description Services to Scan SMTP Select the SMTP checkbox to enable Simple Mail Transfer Protocol SMTP scanning This service is enabled by default and uses default port 25 POP3 Select the POP3 checkbox to e...

Page 104: ...but the attachment is removed and placed in the malware quarantine for further research In addition and depending on the nature of the malware a virus log entry or spyware log entry is created Delete attachment The e mail is not blocked but the attachment is deleted and a log entry is created Block infected email This is the default setting The e mail is blocked and a log entry is created Quaranti...

Page 105: ...r spyware log entry is created Delete attachment This is the default setting The e mail is not blocked but the attachment is deleted and a log entry is created Log only Only a log entry is created The e mail is not blocked and the attachment is not deleted IMAP From the IMAP pull down menu specify one of the following actions when an infected e mail is detected Quarantine attachment The e mail is ...

Page 106: ...s the size that you specify in the file size field Skip The file is not scanned but skipped leaving the end user vulnerable This is the default setting Block The file is blocked and will not reach the end user The default and maximum file sizes are For the STM600 and STM300 the default setting is to block any attachment larger than 10240 KB The maximum file size that you can specify is 51200 KB Fo...

Page 107: ...2009 Configuring E mail Anti Virus Notification Settings To configure the e mail anti virus notification settings 1 Select Email Security Anti Virus from the menu The anti virus submenu tabs appear with the Action screen in view 2 Click the Notifications submenu tab The Notifications screen displays see Figure 4 4 on page 4 10 D R A F T ...

Page 108: ...ProSecure Web Email Security Threat Management STM Appliance Reference Manual 4 10 Content Filtering and Optimizing Scans v1 0 September 2009 Figure 4 4 Adjust size D R A F T ...

Page 109: ... checkbox is deselected and no safe stamp is inserted Append Warning if Attachment Exceeds Scan Size Limit SMTP and POP3 For SMTP and POP3 e mail messages select this checkbox to append a default warning message to an e mail if the message or an attachment to the message exceeds the scan size limit The warning message informs the end user that the attachment was skipped and might not be safe to op...

Page 110: ...pressed files Email Alert Settings Note Ensure that the Email Notification Server see Configuring the E mail Notification Server on page 6 2 is configured before you specify the e mail alert settings Send alert to In addition to inserting an warning message to replace an infected e mail you can configure the STM to send a notification e mail to the sender the recipient or both by selecting the cor...

Page 111: ... File name blocking You can block e mails based on the names of attached files Such names can include for example names of known malware such as the Netsky worm which normally arrives as netsky exe To configure e mail content filtering 1 Select Email Security Filters from the menu The Filters screen displays Figure 4 5 Adjust size D R A F T ...

Page 112: ...d Log The e mail is blocked and a log entry is created Log This is the default setting Only a log entry is created The e mail is not blocked Filter by Password Protected Attachments ZIP RAR etc Action SMTP From the SMTP pull down menu specify one of the following actions when a password protected attachment to an e mail is detected Block attachment Log The email is not blocked the attachment is bl...

Page 113: ...u None The most common file extensions are listed without being narrowed down to a category This is the default setting Executables The File Extension field lists executable file extensions Audio Video The File Extension field lists audio and video file extensions Compressed Files The File Extension field lists compressed file extensions Action SMTP From the pull down menu specify an action when a...

Page 114: ...ils Setting Up the Whitelist and Blacklist You can specify e mails that will be accepted or blocked based on the originating IP address domain and e mail address by setting up the whitelist and blacklist You can also specify e mails that will be accepted based on the destination domain and e mail address The whitelist ensures that e mail from listed that is trusted sources and recipients are not m...

Page 115: ...ProSecure Web Email Security Threat Management STM Appliance Reference Manual Content Filtering and Optimizing Scans 4 17 v1 0 September 2009 Figure 4 6 D R A F T ...

Page 116: ...and POP3 Whitelist Enter the sender e mail domains from which e mails can be trusted Blacklist Enter the sender e mail domains from which e mails will be blocked Click Apply to save your settings or click Reset to clear all entries from these fields Sender Email Address SMTP and POP3 Whitelist Enter the e mail addresses from which e mails can be trusted Blacklist Enter the e mail addresses from wh...

Page 117: ...nu tab The Real time Blacklist screen displays 3 Select the checkboxes to the left of the default blacklist providers Spamhaus and Spamcop that you want to activate 4 Select the Enable checkbox 5 Click Apply to save your settings To add a blacklist provider to the real time blacklist 1 In the Add Real time Blacklist section add the following information In the Provider field add the name of the bl...

Page 118: ...age format or encoding type Message patterns can be divided into distribution patterns and structure patterns Distribution patterns determine if the message is legitimate or a potential threat by analyzing the way it is distributed to the recipients while structure patterns determine the volume of the distribution The STM uses a Distributed Spam Analysis architecture to determine whether or not an...

Page 119: ...reen displays 3 Complete the fields select the checkboxes and make your selections from the pull down menus as explained in Table 4 8 Figure 4 8 Table 4 8 Distributed Spam Analysis Settings Setting Description or Subfield and Description Distributed Spam Analysis SMTP Select the SMTP checkbox to enable Distributed Spam Analysis for the SMTP protocol You can enable Distributed Spam Analysis for bot...

Page 120: ... tag The default setting is to add the default tag to the subject line Add tag X NETGEAR SPAM to mail header When the option Tag spam email is selected from the Action pull down menu see above select this checkbox to add the X NETGEAR SPAM tag to the e mail header The default setting is to add the default tag to the e mail header Send Quarantine Spam Report Note Ensure that the Email Notification ...

Page 121: ...ications and e mail alerts that will be sent when events are detected Schedules that determine when content filtering will be active Customizing Web Protocol Scan Settings If you have used the Setup Wizard you might have already configured the Web protocol scan settings the Web Policy screen allows you to modify these settings Scanning all protocols enhances network security but might affect the p...

Page 122: ... Select the HTTPS checkbox to enable Hypertext Transfer Protocol over Secure Socket Layer HTTPS This service is disabled by default and uses default port 443 Note Skype cannot log in through port 443 when you enable HTTPS scanning FTP Select the FTP checkbox to enable File Transfer Protocol FTP This service is enabled by default and uses default port 21 Note If a protocol uses a port other than th...

Page 123: ...e Scan screen allows you to modify these settings Whether or not the STM detects Web based malware you can configure it to take a variety of actions some of the default actions are listed in Table 4 1 on page 4 2 skip files that are too large and send notifications e mails or both to the end users To configure the Web based malware settings 1 Select Application Security HTTP HTTPS from the menu Th...

Page 124: ...d HTTP or HTTPS file parts to the end user Streaming is enabled by default Scan Exception From the pull down menu specify one of the following actions when a file or message exceeds the size that you specify in the file size field Skip The file is not scanned but skipped leaving the end user vulnerable This is the default setting Block The file is blocked and will not reach the end user The defaul...

Page 125: ...Flash proxies and cookies and you can disable Java scripts However Web sites that are on the whitelist see Configuring Web URL Filtering on page 4 34 are never subject to Web object blocking Web category blocking You can block entire Web categories because their content is undesired offensive or not relevant or simply to reduce traffic Notification Settings Select the Replace Page with the Followi...

Page 126: ...type of Web blocking for trusted domains by adding the exact matching domain names to the trusted host list see Specifying Trusted Hosts on page 4 41 Access to the domains on the trusted host list is allowed for PCs in the groups for which file extension object or category blocking or a combination of these types of Web blocking has been enabled Note You can bypass any type of Web blocking for tru...

Page 127: ...ns 4 29 v1 0 September 2009 2 Click the Content Filtering submenu tab The Content Filtering screen displays Because of the large size of this screen it is presented in this manual in three figures Figure 4 11 Figure 4 12 on page 4 30 and Figure 4 13 on page 4 31 Figure 4 11 Content Filtering screen 1 of 3 D R A F T ...

Page 128: ...ProSecure Web Email Security Threat Management STM Appliance Reference Manual 4 30 Content Filtering and Optimizing Scans v1 0 September 2009 Figure 4 12 Content Filtering screen 2 of 3 D R A F T ...

Page 129: ...erence Manual Content Filtering and Optimizing Scans 4 31 v1 0 September 2009 3 Complete the fields select the checkboxes and make your selections from the pull down menus as explained in Table 4 11 on page 4 32 Figure 4 13 Content Filtering screen 3 of 3 D R A F T ...

Page 130: ... lists executable file extensions Audio Video The File Extension field lists audio and video file extensions Compressed Files The File Extension field lists compressed file extensions Block Web Objects Select one or both of the following checkboxes Remove Embedded Objects All embedded objects such as ActiveX Java and Flash objects are removed from downloaded Web pages Note Because embedded objects...

Page 131: ... sure that you keep the FULL CATEGORY LIST meta word in the text to enable the STM to insert all the categories that the blocked Web page falls under In addition you can insert the URL meta word to show the URL of the blocked page As an option you can select one or both of the following checkboxes Allow Users to Submit a Report a URL Misclassification Form When you select this checkbox the screen ...

Page 132: ...4 14 on page 4 35 Web Category Lookup URL Enter a URL to find out if it has been categorized and if so in which category Then click the lookup button If the URL has been categorized the category appears next to Lookup Results Clear Web Category Cache Click Clear Web Category Cache to enable the STM to synchronize with the NETGEAR server and download the most recent Web categorizations Note Synchro...

Page 133: ...ity Threat Management STM Appliance Reference Manual Content Filtering and Optimizing Scans 4 35 v1 0 September 2009 3 Complete the fields and select the checkboxes as explained in Table 4 12 on page 4 36 Figure 4 14 D R A F T ...

Page 134: ...p liveupdate symantecliveupdate coms http liveupdate symantec com http update microsoft com http update mozilla org http update trendmicro com http update nai com delete To delete one or more URLs highlight the URLs and click the delete table button export To export the URLs click the export table button and follow the instructions of your browser Add URL Type or copy a URL in the Add URL field Th...

Page 135: ...s in the URL field will be overwritten when you import a list of URLs from a file Replace the Content of a Blocked Page with the Following Text When a user attempts to access a blocked URL the STM replaces the content of the blocked URL with the following text which you can customize Internet Policy has restricted access to this location URL Note Make sure that you keep the URL meta word in the te...

Page 136: ...en an HTTPS server and an HTTP client in two parts A connection between the HTTPS client and the STM A connection between the STM and the HTTPS server The STM simulates the HTTPS server communication to the HTTPS client including the SSL negotiation certificate exchange and certificate authentication In effect the STM functions as the HTTPS server for the HTTPS client The STM simulates the HTTPS c...

Page 137: ...t certificate can be downloaded from the STM s User Portal Login screen see Figure 5 7 on page 5 10 If client authentication is required the STM might not be able to scan the HTTPS traffic because of the nature of SSL SSL has two parts client and server authentication HTTPS server authentication occurs with every HTTPS request but HTTPS client authentication is not mandatory and rarely occurs Ther...

Page 138: ...izing Scans v1 0 September 2009 To configure the HTTPS scan settings 1 Select Web Security HTTP HTTPS from the menu The HTTP HTTPS submenu tabs appear with the Malware Scan screen in view 2 Click the HTTPS Settings submenu tab The HTTPS Settings screen displays see Figure 4 17 on page 4 40 Figure 4 17 D R A F T ...

Page 139: ...from trusted hosts is not scanned see Specifying Trusted Hosts on page 4 41 Note For HTTPS scanning to occur properly you must add the HTTP proxy server port in the Ports to Scan field for the HTTPS service on the Services screen see Configuring the HTTP Proxy Settings on page 3 7 HTTPS 3rd Party Website Certificate Handling Select this checkbox to allow a Secure Sockets Layer SSL connection with ...

Page 140: ...canning of the https example com site you must add all three hosts to the trusted hosts list because different files from these three hosts are also downloaded when a user attempts to access the https example com site To specify trusted hosts 1 Select Web Security HTTP HTTPS from the menu The HTTP HTTPS submenu tabs appear with the Malware Scan screen in view 2 Click the Trusted Hosts submenu tab ...

Page 141: ...ted in the Host field Hosts This field contains the trusted hosts for which scanning will be bypassed To add a host to this field use the Add Host field or the Import from File tool see below You can add a maximum of 200 URLs delete To delete one or more hosts highlight the hosts and click the delete table button export To export the hosts click the export table button and follow the instructions ...

Page 142: ...hreat Management STM Appliance Reference Manual 4 44 Content Filtering and Optimizing Scans v1 0 September 2009 To configure the FTP scan settings 1 Select Web Security FTP from the menu The FTP screen displays Figure 4 19 D R A F T ...

Page 143: ...mum file sizes are For the STM600 and STM300 the default setting is to block any file or object larger than 10240 KB The maximum file size that you can specify is 51200 KB For the STM150 the default setting is to block any file or object larger than 8192 KB The maximum file size that you can specify is 25600 KB Note Setting the maximum file size to a high value might affect the STM s performance N...

Page 144: ...n is presented the Application Control screen is divided and presented in this manual in three figures Figure 4 20 shows only the very top part of the screen Figure 4 21 on page 4 47 shows the Instant Messaging and Media Application sections and Figure 4 22 on page 4 47 shows the Peer to Peer and Tools sections 2 In the Application Settings section of the screen select the Enable Application Contr...

Page 145: ...ecurity Threat Management STM Appliance Reference Manual Content Filtering and Optimizing Scans 4 47 v1 0 September 2009 Figure 4 21 Application Control screen 2 of 3 Figure 4 22 Application Control screen 3 of 3 D R A F T ...

Page 146: ...ction You must save the configuration changes for each section individually For reference you can specify access control for the following applications Instant Messaging Google Talk ICQ mIRC MSN Messenger QQ Yahoo Messenger Media Applications iTunes Music Store update Quicktime Update Real Player Guide Rhapsody Guide Music Store Winamp Internet Radio TV Peer to Peer BitTorrent eDonkey Gnutella Too...

Page 147: ... resources you can configure scanning exclusions for IP addresses and ports that you know are secure For example if your network includes a Web server that hosts Web pages that are accessible by anyone on the Internet the files that are hosted by your Web server do not need to be scanned To prevent the STM from scanning these files you can configure a scanning exclusion for your Web server To conf...

Page 148: ...the Action column Setting Web Access Exception Rules You can set exception rules for users and members of a group to allow access to applications Web categories and URLs that you have blocked for all other users or the other way around to block access to applications Web categories and URLs that you have allowed access to for all other users To specify members of a LAN group and to customize LAN g...

Page 149: ...Global Settings Exceptions from the menu The Exceptions screen displays This screen shows the Exceptions table which is empty if you have not specified any exception rules Figure 4 24 shows an exception rule in the table as an example 2 Under the Exceptions table click the add table button to specify an exception rule The Ad Exception screen displays Figure 4 24 Figure 4 25 D R A F T ...

Page 150: ...ption blocks access to an application Web category or URL that is otherwise allowed Applies to Click the edit button to open the Applies to screen that lets you configure a domain group or individual user to which the exception must apply see the screen below in the table If applicable on the Applies to screen click a lookup button to retrieve a domain group or user When you have made your decisio...

Page 151: ...efined by its IP address 2 Click the apply button to apply the exception to the selected group You can specify groups that are defined by their IP address on the IP Subnet Groups screen see Creating and Deleting Groups by IP Address and Subnet on page 5 6 Local User Search Do the following 1 In the Name field enter a user name 2 Click the lookup button If the user is found they are listed to the l...

Page 152: ...e fields empty the action applies continuously End TIme The time in 24 hour format hours and minutes when the action will end If you leave these fields empty the action applies continuously Category From the pull down menu select the category to which the action applies URL Filtering The action applies to a URL Enter the URL in the Subcategory field Web category The action applies to a Web categor...

Page 153: ...t the checkbox to the left of the rule that you want to delete or disable or click the select all table button to select all rules 2 Click one of the following table buttons disable Disables the rule or rules The status icon will change from a green circle to a grey circle indicating that the rule is or rules are disabled By default when a rule is added to the table it is automatically enabled del...

Page 154: ...ProSecure Web Email Security Threat Management STM Appliance Reference Manual 4 56 Content Filtering and Optimizing Scans v1 0 September 2009 D R A F T ...

Page 155: ...in and then you create users that you assign to a group The STM does not let you create domains the local groups that you define are automatically assigned to the STM s prosecuredomain default domain However you can use existing LDAP and RADIUS domains on the STM The main purpose for using groups and domains is to apply exceptions that is adding or removing restrictions for Web browsing URL access...

Page 156: ... subnet The login window that is presented to this type of users is the User Portal Login screen see Figure 5 7 on page 5 10 which requires three items a user name a password and a domain selection The domain determines the authentication method that must be used LDAP Active Directory RADIUS or the STM s local database Configuring Groups The use of groups simplifies the application of exception po...

Page 157: ...1 Select User Management Groups from the menu The Groups screen displays Figure 5 1 contains one example The List of Groups table displays the local groups with the following fields Name The name of the group which is the defining characteristic of the group Brief Description An optional brief description of the group Action The edit table button that provides access to the Edit Group screen and t...

Page 158: ...or the group that you want to delete Editing Groups by Name To edit a local group that you created by name 1 Select User Management Groups from the menu The Groups screen displays see Figure 5 1 on page 5 3 Table 5 1 Group Settings Setting Description Name A descriptive alphanumeric name of the group for identification and management purposes Description A brief description of the group for identi...

Page 159: ...ply to save your changes Figure 5 2 Table 5 2 Group Edit Settings Setting Description Edit Description You can edit the brief description of the group for identification and management purposes To move users from one field to another use one of the following methods Move a single user highlight the users then click a single arrow button to move the user from one field to the other Move all users c...

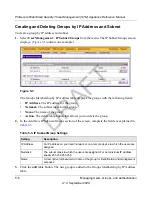
Page 160: ...The subnet mask for the group Name The name of the group Action The delete table button that allows you to delete the group 2 In the Add New IP Subnets Groups section of the screen complete the fields as explained in Table 5 3 3 Click the add table button The new group is added to the Groups Membership by IP Address table Figure 5 3 Table 5 3 IP Subnet Group Settings Setting Description IP Address...

Page 161: ... a user account you can assign the user to a local group Therefore you should first create any local groups then user accounts User accounts are added to the STM s local user database Creating and Deleting User Accounts To create an individual user account 1 Select Users Users from the menu The Users screen displays Figure 5 4 contains some examples Note When you delete a group an exception rule t...

Page 162: ...e List of Users table click the delete table button in the Action column for the user that you want to delete Editing User Accounts The only field that you can change for a user account is the password To modify the password for a user 1 Select Users Users from the menu The Users screen displays see Figure 5 4 on page 5 7 Table 5 4 User Settings Setting Description Name A descriptive alphanumeric ...

Page 163: ...n the STM depends on the user type and the authentication method Administrative users Users with administrative and guest privileges on the STM must log in through the NETGEAR Configuration Manager Login screen see Figure 5 6 on page 5 10 where they are authenticated through the STM s local user database These users must provide their user name and password For information about the pre defined ad...

Page 164: ...and Authentication v1 0 September 2009 All users with special access privileges User who have a computer behind the STM and who are assigned an access policies that differs from the STM s default e mail and Web access policies must log in through the User Portal Login screen Figure 5 6 Figure 5 7 D R A F T ...

Page 165: ...al units this information can be queried to provide specific group policies or bookmarks based on Active Directory attributes A Microsoft Active Directory database uses an LDAP organization schema RADIUS A network validated PAP or CHAP password based authentication method that functions with Remote Authentication Dial In User Service RADIUS RADIUS support two types of protocols PAP Password Authen...

Page 166: ...n a lookup result The following is an example of how to set the search base If in a company AD server cn users and ou companyname and both are specified under dc companyname dc com the search base must be set as dc companyname dc com in order to search both users and groups If the size limit is exceeded so that dc companyname dc com misses some entries during the lookup process a user can still be...

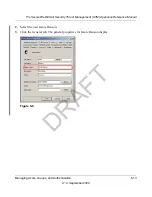
Page 167: ...at Management STM Appliance Reference Manual Managing Users Groups and Authentication 5 13 v1 0 September 2009 2 Select the user Jamie Hanson 3 Click the General tab The general properties for Jamie Hanson display Figure 5 8 D R A F T ...

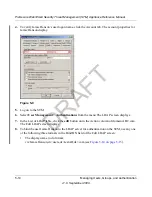
Page 168: ...t User Management Authentications from the menu The LDAP screen displays 7 In the List of LDAP table click the edit button on in the Action column of domain ABC com The Edit LDAP screen displays 8 To bind the user Jamie Hanson to the LDAP server for authentication on the STM use any one of the following three formats in the Bind DN field of the Edit LDAP screen The display name in dn format cn Jam...

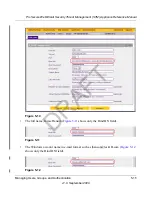
Page 169: ...ing Users Groups and Authentication 5 15 v1 0 September 2009 The full name Jamie Hanson Figure 5 11 shows only the Bind DN field The Windows account name in e mail format such as jhanson testAD com Figure 5 12 shows only the Bind DN field Figure 5 10 Figure 5 11 Figure 5 12 D R A F T ...

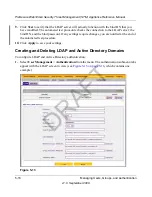
Page 170: ...ction to the LDAP server the bind DN and the bind password If any settings require changes you are notified at the end of the automated test procedure 10 Click Apply to save your settings Creating and Deleting LDAP and Active Directory Domains To configure LDAP and Active Directory authentication 1 Select User Management Authentication from the menu The authentication submenu tabs appear with the ...

Page 171: ...ally the default port for TLS encryption or no encryption When the encryption is SSL the default port is generally 636 Bind DN The LDAP or Active Directory bind distinguished name dn that is required to access the LDAP or Active Directory authentication server This must be a user in the LDAP or Active Directory directory that has read access to all the users that you would like to import into the ...

Page 172: ...or OpenLDAPy you can enter a customized attribute to identify the the groups of an entry Note Do not leave this field blank Reviewers field still states optional on LDAP screen Group Members Attribute The attribute that is used to identify the members of a group For an Active Directory enter member For OpenLDAPy you can enter a customized attribute to identify the members of a group Note Do not le...

Page 173: ...erver that you want to edit The Edit LDAP screen displays This screen contains the same fields as the LDAP screen see Figure 5 13 on page 5 16 3 Modify the fields and make your selections from the pull down menu as explained in Table 5 5 on page 5 17 4 Click Test to verify that the LDAP server will actually function with the LDAP settings that you have modified The automated test procedure checks ...

Page 174: ...en displays Figure 5 14 contains one example The List of RADIUS table displays the following fields Domain Name The name of the STM s domain to which the server has been assigned Server The IP address of the RADIUS server Action The edit table button that provides access to the Edit RADIUS screen and the delete table button that allows you to delete the RADIUS server Figure 5 14 D R A F T ...

Page 175: ...S authentication server The default port for the RADIUS server is 1812 Shared Secret The shared secret password that is required to access the RADIUS authentication server Repeat The maximum number of times that the STM attempts to connect to the RADIUS server The default setting is 3 times Timeout The period after which an unsuccessful connection attempt times out The default setting is 5 seconds...

Page 176: ...agement Authentication from the menu The authentication submenu tabs appear with the LDAP screen in view 2 Click the RADIUS submenu tab The RADIUS screen displays see Figure 5 14 on page 5 20 3 In the Action column of the List of RADIUS table click the edit table button for the domain and server that you want to edit The Edit Radius screen displays see Figure 5 15 on page 5 23 pagination will be a...

Page 177: ...nu as explained in Table 5 6 on page 5 21 5 Click Test to verify that the RADIUS server will actually function with the RADIUS settings that you have modified The automated test procedure checks the connection to the RADIUS server the user name and the password If any settings require changes you are notified at the end of the automated test procedure 6 Click Apply to save your settings Figure 5 1...

Page 178: ...or name for the VLAN Brief Description An optional brief description of the VLAN Action The delete table button that allows you to delete the VLAN To add a VLAN 1 On the Edit Radius screen locate the Add New VLAN ID Name section at the very bottom of the screen 2 Specify the VLAN a In the VLAN ID Name field enter the identifier or the name of the VLAN b In the Brief Description field enter a descr...

Page 179: ...u enter a number that represents the minutes or hours The session expiration length cannot exceed the idle time period Idle Time The period after which an idle connection is terminated and a user musts log in again This setting applies to all users From the pull down menu select either Minutes or Hours Then in the field to the left of the pull down menu enter a number that represents the minutes o...

Page 180: ... Portal Login screen Select the Authenticate User with User Selected Domain checkbox to limit the authentication to the default domain that you select If you do not select this checkbox the STM will attempt to authenticate users through all the domains that are listed in the pull down menu on the User Portal Login screen when authentication through one domain fails the STM will attempt authenticat...

Page 181: ...a so that only selected users are returned after you have clicked the Search button Either use the IP address or User field but not both IP Address Enter an IP address or an IP address and subnet mask in CIDR notation for example 024 User Enter a domain and user name in the domain name format for example proescuredomain JohnP 2 In the Display field enter a number to specify how many entries per pa...

Page 182: ...nd Authentication v1 0 September 2009 Last Seen The most recent time that traffic associated with the user that is IP address passed through the STM To log out selected active users 1 Om the search result screen select the checkboxes to the left of the users that you want to log out 2 Click Logout D R A F T ...

Page 183: ...cified e mail address For example the STM can e mail security related events such as malware incidents infected clients and failed authentications By default the STM logs content filtering events such as attempts to access blocked sites and URLs unwanted e mail content spam attempts and many other types of events To receive the logs in an e mail message the STM s notification server must be config...

Page 184: ... mail address the e mail server user name and password To configure the e mail notification server 1 Select Global Settings Email Notification Server from the menu The Email Notification Server screen displays 2 Complete the fields select the radio button and checkboxes and make your selections from the pull down menus as explained in Table 6 1 Figure 6 1 Table 6 1 E mail Notification Settings Set...

Page 185: ...s To enable and configure logs to be sent to an email address 1 Select Monitoring Logs Reports from the menu The Logs Reports submenu tabs appear with the Email and Syslog screen in view see Figure 6 2 on page 6 4 Figure 6 4 on page 6 8 and Figure 6 4 on page 6 8 2 Locate the Email Logs to Administrator section on the screen SMTP server The IP address and port number or Internet name and port numb...

Page 186: ...ete the fields select the radio button and checkboxes and make your selections from the pull down menus as explained in Table 6 2 Figure 6 2 Table 6 2 E mailing Logs Settings Setting Description or Subfield and Description Send to The e mail address of the recipient of the log file This is normally a user with administrative privileges Click Send Now to immediately send the logs that you first mus...

Page 187: ...l scanned incoming and outgoing traffic Malware logs All intercepted viruses and spyware Spam logs All intercepted spam including spam that was detected through the blacklist real time blacklist and Distributed Spam Analysis Content filter logs All Web sites URLs and FTP sites that are intercepted because of Web category blacklist file type or size limit violations Email filter logs All e mails th...

Page 188: ...he checkboxes to specify which logs will be sent to the syslog server System logs he system event logs that include all system errors informational messages configuration changes and system software updates Traffic logs All scanned incoming and outgoing traffic Malware logs All intercepted viruses and spyware Spam logs All intercepted spam including spam that was detected through the blacklist rea...

Page 189: ...essages mail Mail subsystem log messages news Usenet news subsystem log messages syslog Log messages that are generated internally by the syslog server syslogd user Generic user level log messages uucp Unix Unix copy UUCP subsystem log messages Priority For each log that you have selected to be sent to the syslog server see above select one of the following severities from the pull down menu These...

Page 190: ...r The logs with intercepted e mails will be cleared Application The logs with intercepted applications will be cleared 4 Click Clear Log Information Configuring Alerts You can configure the STM to send an e mail alert when a failure license expiration or malware attack or outbreak occurs Four types of alerts are supported Update Failure Alert Sent when an attempt to update any component such as a ...

Page 191: ... tabs appear with the Email and Syslog screen in view 2 Click the Alerts submenu tab The Alerts screen displays 3 Select the checkboxes and complete the fields as explained in Table 6 4 Figure 6 5 Table 6 4 Alerts Settings Setting Description or Subfield and Description Enable Update Failure Alerts Select this checkbox to enable update failure alerts Enable License Expiration Alerts Select this ch...

Page 192: ...ote In addition to the VIRUSINFO meta word you can insert the following meta words in your customized message TIME PROTOCOL FROM TO SUBJECT FILENAME ACTION VIRUSNAME Enable Malware Outbreak Alerts Select this checkbox to enable malware outbreak alerts and configure the Outbreak Criteria Protocol and Subject fields Outbreak Criteria To define a malware outbreak specify the following fields malware ...

Page 193: ...ed network traffic detected network threats and service statistics for the six supported protocols SMTP IMAP POP3 HTTP HTTPS and FTP Interface statistics To display the Dashboard screen select Monitoring Dashboard from the menu The dashboard submenu tabs appear with the Dashboard screen in view Because of the size of this screen it is divided and presented in this manual in three figures Figure 6 ...

Page 194: ...iance Reference Manual 6 12 Monitoring System Access and Performance v1 0 September 2009 Table 6 5 on page 6 13 explains the fields of the Status Total Threats Threats Last 7 Days sections of the Dashboard screen Figure 6 6 Dashboard screen 1 of 3 D R A F T ...

Page 195: ...2 Quarantined to configure see E mail Content Filtering on page 4 12 Malware detected to configure see Customizing E mail Anti Virus Settings on page 4 5 Spam to configure see Protecting Against E mail Spam on page 4 15 Web Displays the total number of Scanned files Files blocked to configure see Configuring Web Content Filtering on page 4 27 Quarantined to configure see Configuring Web Content Fi...

Page 196: ...ance Reference Manual 6 14 Monitoring System Access and Performance v1 0 September 2009 Table 6 6 explains the fields of the Total Scanned Services Traffic Most Recent 5 and Top 5 sections of the Dashboard screen Figure 6 7 Dashboard screen 2 of 3 D R A F T ...

Page 197: ...e application that was blocked Count The total number of user requests for the blocked application Percentage The percentage that the application represents in relation to the total number of detected application requests Web Category The Web category that was blocked Note For more information about Web categories see Configuring Web Content Filtering on page 4 27 Client IP The client IP address f...

Page 198: ...September 2009 Table 6 7 on page 6 17 explains the fields of the Service Statistics and Interface Statistics sections of the Dashboard screen Figure 6 8 Dashboard screen 3 of 3 Note Figure 6 8 shows the Interface Statistics section of the STM600 The STM300 and STM150 have different interfaces see Table 6 7 on page 6 17 D R A F T ...

Page 199: ... messages that were placed in quarantine Note These statistics are applicable only to SMTP Total URLs Blocked The total number of URL requests that were blocked Note These statistics are applicable only to HTTP and HTTPS Total Spam Emails The total number of spam e mails that were detected Note These statistics are applicable only to SMTP and POP3 Blacklist The total number of e mails that were de...

Page 200: ... The Web Usage screen shows you how the STM s Web resources are being used You can see for example which host on the STM uses most resources To view the STM s Web usage 1 Select Monitoring Dashboard from the menu The dashboard submenu tabs appear with the Dashboard screen in view 2 Click the Web Usage submenu tab The Web Usage screen displays Figure 6 9 D R A F T ...

Page 201: ...ts IPs The number of IP addresses that request the category of IPs The percentage of IP addresses that request the category in relation to the total number of IP addresses Blocked Whether or not the category is blocked by the STM Viewing System Status The System Status screen provides real time information about the following components of the STM Firmware versions and update information of the ST...

Page 202: ...e Reference Manual 6 20 Monitoring System Access and Performance v1 0 September 2009 Table 6 8 on page 6 21 explains the fields of the System Information Management Interface Information and Interfaces sections of the System Status screen Figure 6 10 D R A F T ...

Page 203: ...intenance and support licenses Note When a license has expired the license expiration date is displayed in red font When a license expires a LED see below on the front panel of the STM blinks continuously to remind you to renew the license To stop the blinking of the LED click Stop LED Blinking On the STM150 The Test LED blinks when a license expires On the STM300 and STM600 The Status LED blinks ...

Page 204: ...M provides eight types of logs Traffic All scanned incoming and outgoing traffic Virus All intercepted viruses Spyware All intercepted spyware Spam All intercepted spam including spam that was detected through the blacklist real time blacklist and Distributed Spam Analysis Email filters All e mails that are intercepted because of keyword file type file name password or size limit violations Conten...

Page 205: ...er 2009 User name Client IP address Server IP address Recipient e mail address URL or subject To query and download logs 1 Select Monitoring Logs Reports from the menu The Logs Reports submenu tabs appear with the Email and Syslog screen in view 2 Click the Logs Query submenu tab The Logs Query screen displays see Figure 6 11 D R A F T ...

Page 206: ...ing System Access and Performance v1 0 September 2009 Depending on the selection that you make from the Log Type pull down menu the screen adjusts to display the settings for the selected type of log Figure 6 11 displays the Virus log information settings as an example Figure 6 11 D R A F T ...

Page 207: ...gs that include all system errors informational messages configuration changes and system software updates Application All intercepted application access violations View All Select one of the following radio buttons View All Display or download the entire selected log Search Criteria Query the selected log by configuring the search criteria that are available for the selected log Search Criteria S...

Page 208: ...rus that will be queried This field is available only for the Virus log Spyware Name The name of the spyware that will be queried This field is available only for the Spyware log Action Select one or more checkboxes to specify the malware treatment actions that will be queried The following actions can be selected For the Virus and Spyware logs delete quarantine quarantine email block email or log...

Page 209: ...l be queried This field is available for the following logs Content filters and Application Size The minimum and maximum size in bytes of the file that will be queried This field is available only for the Traffic log Type Select one or more checkboxes to specify the system event type that will be queried error all system errors info all informational messages conf all configuration changes and upd...

Page 210: ...n that client s HTTP traffic activities to get more information Do so by running the same HTTP traffic query and entering the client IP address in the Client IP field Log Management Generated logs take up space and resources on the STM internal disk To ensure that there is always sufficient space to save newer logs the STM automatically deletes older logs whenever the total log size reaches 50 of ...

Page 211: ...s the following information For each protocol HTTP HTTPS and FTP the report shows the following information per day both in tables and graphics Number of connections Traffic amount in MB Number of malware incidents Number of files blocked Number of URLs blocked not applicable to FTP Top 10 blocked Web categories by count System Reports The report shows malware incidents CPU usage and memory usage ...

Page 212: ...number of blocked requests For each of the four Tools applications the number of blocked requests For each of the three Peer to Peer applications the number of blocked requests Top 10 blocked clients by count For each application the number of blocked requests in a graphic The reports that you select are generated as both Microsoft Office Comma Separated Values CSV and MHTML files The CSV files do...

Page 213: ...2 Table 6 10 Generate Report Settings Setting Description Time From From the pull down menus specify the start year month day hour and minutes for the report Time To From the pull down menus specify the end year month day hour and minutes for the report Note The maximum report period is 31 days Reports Select one or more checkboxes to specify the reports that will be generated Email Reports Web Re...

Page 214: ...port click its delete table button 5 Select the new or a previously saved report for downloading by clicking its download table button The reports download as a zipped file that contains both CSV and HTML files Scheduling Reports To schedule automatic generation and e mailing of reports 1 Select Monitoring Logs Reports from the menu The Logs Reports submenu tabs appear with the Email and Syslog sc...

Page 215: ... on page 6 38 You can also specify how many entries will be displayed per page the default setting is 15 entries Table 6 11 Schedule Report Settings Setting Description Report Settings Frequency Select one of the following checkboxes to specify the frequency with which the reports will be generated and e mailed Daily The report is generated daily at 3 00 am Weekly The report is generated weekly on...

Page 216: ... name Source IP address Sender e mail address Recipient e mail address Subject Size of the e mail You can filter the malware quarantine file using the following criteria Start date and time End date and time Protocols SMTP POP3 IMAP HTTP FTP HTTPS User name Malware name Client IP address Recipient e mail address Recipient e mail address URL or subject Size of the file To query the quarantine files...

Page 217: ...the spam quarantine file settings as an example 3 Select the checkboxes and radio buttons make your selections from the pull down menus and complete the fields as explained in Table 6 9 Figure 6 14 Table 6 12 Quarantine File Settings Setting Description or Subfield and Description File Type Select one of the following file types from the pull down menu Spam All quarantined spam including spam that...

Page 218: ...t date and time End Date Time From the pull down menus select the year month day hours and minutes for the end date and time Protocols Select one or more checkboxes to specify the protocols that will be queried malware quarantine file only User The user name that will be queried Malware Name The name of the spyware or virus that will be queried malware quarantine file only Client IP The client IP ...

Page 219: ... the STM Client IP The client IP address from which the spam originated From The e mail address of the sender To The e mail address of the recipient Subject The e mail subject line Size Bytes The size of the e mail in bytes Figure 6 16 show the Quarantined Spam table with data After you have selected one or more table entries take one of the following actions or click the Return hyperlink to retur...

Page 220: ... Quarantined Infected Files table shows the following columns Checkbox Lets you select the table entry Date The date that the file was received Protocol The protocol SMTP POP3 IMAP HTTP FTP HTTPS in which the spyware or virus was found User The user name that was used to log on the STM Malware name The name of the spyware or virus File name The name of the file in which the spyware or virus was fo...

Page 221: ...that you have specified on the Email Notification Server server screen see Configuring the E mail Notification Server on page 6 2 Delete The selected malware files are deleted from the quarantine file User Generated Spam Reports Users logging in through the User Portal Login screen can select to receive a report with intercepted spam e mails that were intended for their e mail address To send a sp...

Page 222: ...he STM provides diagnostic tools that help you analyze traffic conditions and the status of the network Two sets of tools are available Network diagnostic tools These tools include a ping utility traceroute utility and DNS lookup utility Traffic diagnostic tools These tools allow you to perform real time per protocol traffic analysis between specific source and destination addresses and let you ge...

Page 223: ...lity to send a ping packet request in order to check the connection between the STM and a specific IP address If the request times out no reply is received it usually means that the destination is unreachable However some network devices can be configured not to respond to a ping The ping results will be displayed in a new screen click Back on the Windows menu bar to return to the Diagnostics scre...

Page 224: ...e the Perform a DNS Lookup section on the Diagnostics screen 2 In the Domain Name field enter a domain name 3 Click the lookup button The results of the lookup action are displayed are displayed below the Domain Name field Using the Realtime Traffic Diagnostics Tool This section discusses the Realtime Traffic Diagnostics section and the Perform a DNS Lookup section of the Diagnostics screen You ca...

Page 225: ...raffic information file to your computer however do not save the file until you have stopped capturing the traffic flow 6 When you want to stop capturing the traffic flow click Stop 7 Select a location to save the captured traffic flow The default file name is diagnostics result dat The file downloads to the location that you specify 8 When the download is complete browse to the download location ...

Page 226: ...name is importantlog gpg 3 When the download is complete browse to the download location you specified and verify that the file has been downloaded successfully Generating Network Statistics The Network Statistic Report provides a detailed overview of the network utilization in the STM managed network environment The report allows you to see what consumes the most resources on the network To gener...

Page 227: ...the Restart Shutdown section on the Diagnostics screen this section is now shown on any of the Diagnostics screen figures in this manual 2 Click the Shutdown button The STM shuts down Note Restarting will break any existing connections either to the UTM25 such as your management session or through the UTM25 for example LAN users accessing the Internet However connections to the Internet will autom...

Page 228: ...ProSecure Web Email Security Threat Management STM Appliance Reference Manual 6 46 Monitoring System Access and Performance v1 0 September 2009 D R A F T ...

Page 229: ...b Management Interface Go to Troubleshooting the Web Management Interface on page 7 3 A time out occurs Go to When You Enter a URL or IP Address a Time out Error Occurs on page 7 4 I have problems with the LAN connection Go to Troubleshooting a TCP IP Network Using a Ping Utility on page 7 4 I want to clear the configuration and start over again Go to Restoring the Default Configuration and Passwo...

Page 230: ...not occur see the appropriate following section Power LED Not On If the Power and other LEDs are off when your STM is turned on make sure that the power cord is properly connected to your STM and that the power supply adapter is properly connected to a functioning power outlet If the error persists you have a hardware problem and should contact NETGEAR Technical Support Test LED STM150 or Status L...

Page 231: ... Interface If you are unable to access the STM s Web Management Interface from a PC on your local network check the following Check the Ethernet connection between the PC and the STM as described in the previous section LAN or WAN Port LEDs Not On If your STM s IP address has been changed and you do not know the current IP address clear the STM s configuration to factory defaults This will set the...

Page 232: ...r other computers on the LAN work properly If they do ensure that your computer s TCP IP settings are correct If the computer is configured correctly but still not working ensure that the STM is connected and turned on Connect to the Web Management Interface and check the STM s settings If you cannot connect to the STM see the information in the previous section Troubleshooting the Web Management ...

Page 233: ...corresponding Link LEDs are on for your network interface card and for the hub ports if any that are connected to your workstation and STM Wrong network configuration Verify that the Ethernet card driver software and TCP IP software are both installed and configured on your PC or workstation Verify that the IP address for your STM and your workstation are correct and that the addresses are on the ...

Page 234: ...s from the menu see Figure 7 1 2 Next to Revert to factory default settings click the default button The STM restarts During the reboot process the Backup Restore Settings screen remains visible The reboot process is complete after several minutes when the Test LED STM150 or Status LED STM300 and STM600 on the front panel goes off Figure 7 1 Warning When you restore the factory default settings th...

Page 235: ...t or deselect the check box marked Adjust for Daylight Savings Time Using Online Support The STM includes online support tools that allow NETGEAR Technical Support to securely perform diagnostics of the STM and that lets you submit suspicious files for analysis by NETGEAR You can also access the knowledge base and documentation online Enabling Remote Troubleshooting One of the advanced features th...

Page 236: ...us field will display OFF If NETGEAR Technical Support cannot access the STM remotely they might ask you to save a log file to your computer and then e mail it to NETGEAR for analysis see Gathering Important Log Information and Generating a Network Statistics Report on page 6 43 Installing Hot Fixes NETGEAR might release hot fixes or patches if certain problems are found in any software release Wh...

Page 237: ...he hot fix The hot fix cannot be installed on an earlier or later software version but only on the software version for which it is intended Hot Fix Name The name of the hot fix To install a hot fix 1 Obtain the hot fix from NETGEAR or its authorized reseller 2 Save the hot fix file on the computer that you will use to access the STM 3 Log on to the STM 4 Select Support Hot Fixes from the menu The...

Page 238: ... analysis 1 Select Support Malware Analysis from the menu The Online Support screen displays 2 Complete the fields as explained in Table 7 1 Figure 7 4 Table 7 1 Malware Analysis Settings Setting Description Email Address The e mail address to which the file will be submitted File Location Click Browse to navigate to the file that you want to submit to NETGEAR Source Product Model Specify where th...

Page 239: ...Online Support 7 11 v1 0 September 2009 3 Click Submit Accessing the Knowledge Base and Documentation To access NETGEAR s Knowledge Base for the STM select Support Knowledge Base from the menu To access NETGEAR s documentation library for your STM model select Support Documentation from the menu D R A F T ...

Page 240: ...ProSecure Web Email Security Threat Management STM Appliance Reference Manual 7 12 Troubleshooting and Using Online Support v1 0 September 2009 D R A F T ...

Page 241: ...Login User Login URL https 192 168 1 201 Admin User Name case sensitive admin Admin Login Password case sensitive password Guest User Name case sensitive guest Guest Login Password case sensitive guest Management System Configuration Web based configuration and status monitoring Required Minimum Browser versions Microsoft Internet Explorer 5 1 or higher Mozilla Firefox l x or higher Apple Safari 1...

Page 242: ...n Supported Protocols Data Protocols HTTP HTTPS FTP IMAP POP3 SMTP Power Worldwide 100 240V AC 50 60 Hz universal input 1 5 A max Physical Specifications Dimensions H x L x W STM150 43 5 x 258 x 440 mm 1 7 x 10 2 x 17 3 in STM300 44 4 x 500 x 426 mm 1 75 x 19 7 x 16 8 in STM600 44 4 x 500 x 426 mm 1 75 x 19 7 x 16 8 in Weight STM150 3 68 kg 8 1 lb STM300 8 2 kg 18 1 lb STM600 8 2 kg 18 1 lb From F...

Page 243: ...ault Settings and Technical Specifications A 3 v1 0 September 2009 Electromagnetic Emissions Meets requirements of FCC Part 15 Class A VCCI Class A CE mark commercial Safety Meets requirements of UL listed C Tick Table A 2 STM Specifications continued Feature Specification D R A F T ...

Page 244: ...ProSecure Web Email Security Threat Management STM Appliance Reference Manual A 4 Default Settings and Technical Specifications v1 0 September 2009 D R A F T ...

Page 245: ... in your NETGEAR product Document Link TCP IP Networking Basics http documentation netgear com reference enu tcpip index htm Wireless Networking Basics http documentation netgear com reference enu wireless index htm Preparing Your Network http documentation netgear com reference enu wsdhcp index htm Virtual Private Networking Basics http documentation netgear com reference enu vpn index htm Glossa...

Page 246: ...ProSecure Web Email Security Threat Management STM Appliance Reference Manual B 2 Related Documents v1 0 September 2009 D R A F T ...

Page 247: ...toring 7 6 default password 2 6 deployment rack mounting 1 18 testing connectivity 2 27 testing HTTP scanning 2 27 verifying 2 27 deployment scenarios choosing 2 1 gateway 2 1 segmented LAN 2 3 DHCP DNS server address 2 12 3 4 DNS server IP address 2 12 3 4 E EICAR 2 28 e mail logs enabling notification 6 1 F factory default login 1 15 factory default settings revert to 3 16 firewall front panel 1...

Page 248: ...ting TCP IP 7 4 ping 6 41 ports explanation of WAN and LAN 1 8 1 11 1 13 R reducing traffic Block Sites 3 33 remote management 3 11 access 3 11 configuration 3 12 restore saved settings 3 16 S sniffer 7 3 SNMP about 3 13 configuring 3 14 T TCP IP network troubleshooting 7 4 testing connectivity 2 27 HTTP scanning 2 27 Time setting 3 23 troubleshooting 7 7 time daylight savings troubleshooting 7 7 ...

Reviews: