
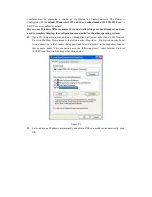


automatically. You should note what this new IP is as you will need it for future access to the
user interface of this router
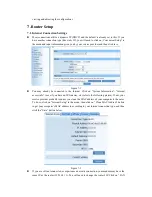
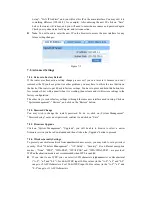
Select “LAN setup”- “DHCP Server”, select disable DHCP server
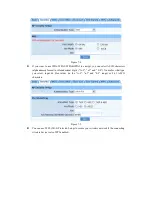
Click on “Wireless Management”- “AP Setup” - “Security” and select and save None as
authentication type
Click on “Wireless Management”- “AP Setup” - “Basic” and select and save radio mode as
WDS or AP + WDS
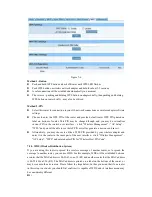
Click on „Wireless Management‟- “AP Setup” - “Security” and select and the same WDS
security settings as for R1
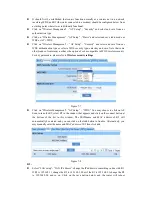
Click on “Wireless Management”- “AP Setup” - “WDS.” You may choose to click on AP
Scan to scan for R1, select R1 in the window that appears and click on the connect button at
the bottom of the list in this window. The SSID/name and MAC address of R1 will
automatically be entered, and you can click on the Add button to finalize. Alternatively, you
may manually enter the name and MAC address of R1 then click add.
Note:
Please make sure the channel matches in both routers. Click on “Wireless management”- “AP
Setup” - “Basic”, check that channels are the same, and change and save if necessary
As there are sometimes compatibility issues between brands, you may need to use Wireless-G
and not Wireless-N. Change settings in both routers. In the netis router click on “Wireless
management”- “AP Setup” - “Basic” and select and save a setting that does not include
Wireless-N
Please make sure that R1 and R2 are in the same IP range, that is if the IP of R1 is
192.168.1.1, then the IP address of R2 should be 192.168.1.x (the range of x runs from 1
through 255 but 1 should not be used as it is already taken by R1, and other equipment in the
network having static/permanent IPs should also be avoided.
Please make sure the WDS authentication type and key in both routers are the same, or
turned off for both and as there are sometimes compatibility issues between brands, you may
need to disable all security.


