background image

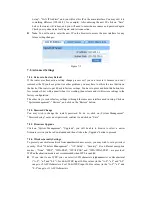
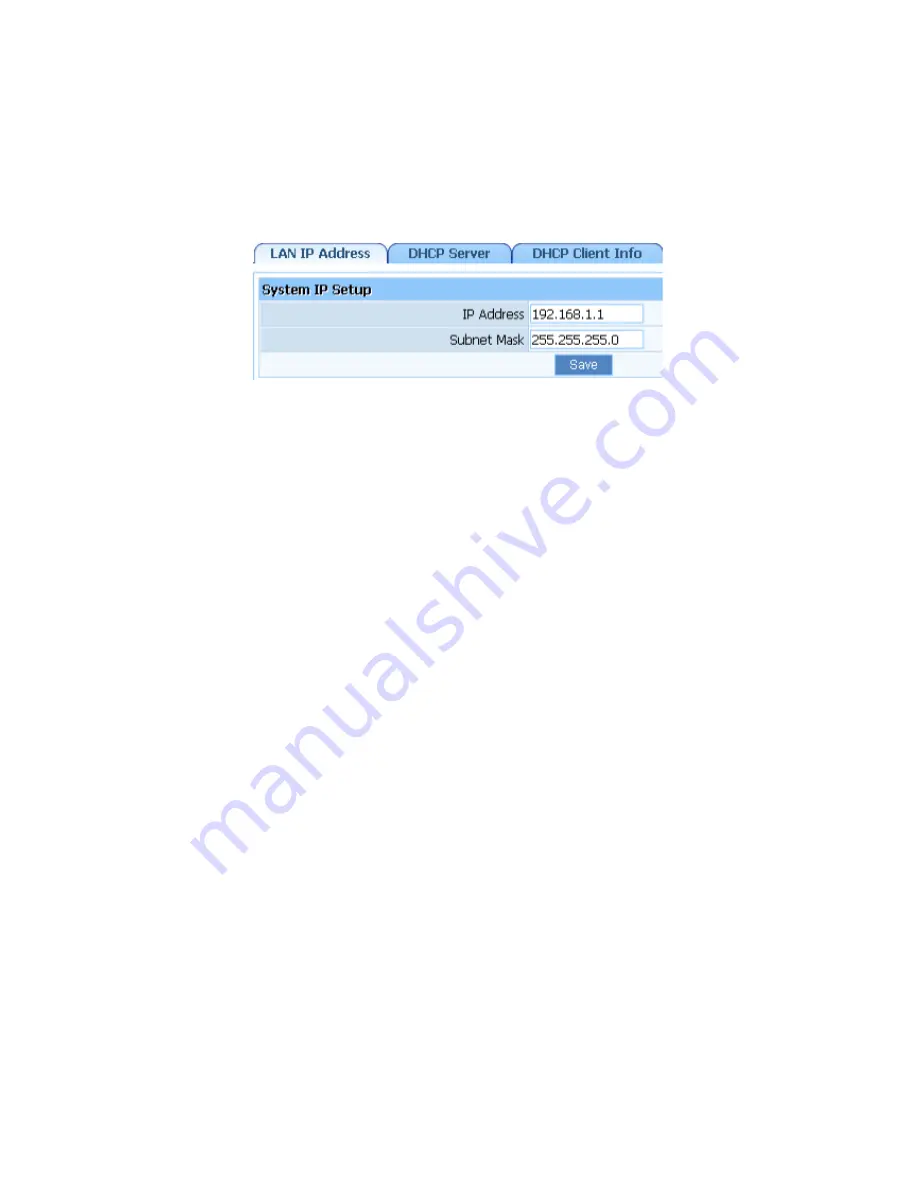
Setup”- “LAN IP Address” and you will see this IP in the main interface. You may edit it to 

something  different  (192.168.2.1  for  example).  After  entering  the  new  IP,  click  on  “Save” 

below, the router will reboot, and you will need to enter the user name and password again. 

Check your system status for IP again, and test connection.   


Note

:  You will need to enter the new IP in  the browser to  access the user interface for any 

future setting changes. 


Figure 7-3 

7.2. Advanced Settings 
 

7.2.1. Restore to Factory Default 

If  the  router  ever  freezes  in  a  setting  change  process  or  if  you  can’t  access  it  because  you  can’t 

remember the IP you have given it or other problem, you may have to utilize the reset button on 

the back of the router to put it back to factory settings. You have to press and hold this button for a 

few seconds (2-6s) with a pencil when it is working, then release and it will restore settings to the 

factory configuration.   

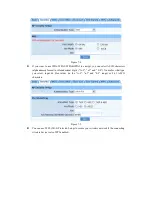
The other way to restore factory settings is through the same user interface used in setup. Click on 
“System management”- “Restore”, and click on the “Restore” button. 


7.2.2. Password Change 

You  may  wish  to  change  the  router's  password.  To  do  so,  click  on  „System  Management”- 
“Password setup”, enter a new password, confirm it, and click on “Save” 


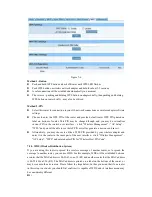
7.2.3. Firmware Upgrade 

Click  on  “System  Management”-  “Upgrade”,  you  will  be  able  to  browse  to  select  a  newer 
firmware version you have downloaded and then click on the „Upgrade‟ button to proceed. 


7.2.4. Wireless Security Settings 

To protect your wireless network from unauthorized user access, you may wish to set up wireless 

security.  Click  “Wireless  Management”  -  “AP  Setup”  –  “Security”.  Five  different  encryption 

modes  -  “None”,  “WEP”,  “WPA-PSK”,  “WPA2-PSK”  and  “WPA/WPA2-PSK”  -  are  provided. 

WEP authentication mode is not recommended when WPS is enabled. 


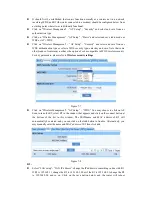
If  you  want  to  use  WEP,  you  can  select  ASCII  characters  (alphanumeric)  or  Hexadecimal 
(“A-F”, “a-f” and “0-9”). For 64-bit WEP, input 10 Hex values (in the “A-F”, “a-f” and “0-9” 

range) or 5 ASCII characters. For 128-bit WEP, input 26 Hex values (in the “A-F”, “a-f” and 
“0-9” range) or 13 ASCII characters 

Summary of Contents for WF2412

Page 1: ...g or damaged please contact the store you bought this product from 2 Before You Begin Minimum Requirements Broadband DSL Cable modem and service with Ethernet port 802 11n b g n wireless adapter or Ethernet adapter and cable for each computer Internet Explorer 5 0 Firefox 2 0 or Safari 1 4 or higher 3 Hardware Installation Attach one end of an Ethernet cable to your computer s Ethernet port and th...

Page 2: ...Power on WPS Flashing slowly WPS is running WAN On WAN Connection normal Flashing Data transmitting 1X 4X On Corresponding LAN port connection normal Flashing Corresponding LAN port data transmitting 5 Configure Your Computer You can manage the 150Mbps Wireless N Broadband Router through the Web browser based configuration utility To configure the device via Web browser at least one properly confi...

Page 3: ... are similar for the other operating systems Open My Computer on your desktop or through the Start menu right click on My Network Places in the Other Places menu to the left and select Properties Right click on your Local Area Connection in the window that appears and select Properties In the properties window that appears under This connection uses the following items select Internet Protocol TCP...

Page 4: ...uter you have just connected to the router type http 192 168 1 1 in the address bar and press enter No username and password required Figure 6 1 After you have logged in the router s user interface will be displayed The left menu shows the main options to configure the system and the right screen is the summary information for ...

Page 5: ... Click on System Information Internet access info to see if you have an IP Gateway etc refer to the following picture If not your service provider probably requires you clone the MAC address of your computer to the outer To do so click on Internet Setup in the menu then click on Clone MAC Address button to get your computer s MAC address in according to your Internet connection type and then click...

Page 6: ...The other way to restore factory settings is through the same user interface used in setup Click on System management Restore and click on the Restore button 7 2 2 Password Change You may wish to change the router s password To do so click on System Management Password setup enter a new password confirm it and click on Save 7 2 3 Firmware Upgrade Click on System Management Upgrade you will be able...

Page 7: ...phanumeric format or Hexadecimal digits A F a f and 0 9 No matter what type you select input 64 Hex values in the A F a f and 0 9 range or 8 63 ASCII characters Figure 7 5 You can use WPS Wi Fi Protected Setup to secure your wireless network if the connecting wireless device is also WPS enabled ...

Page 8: ...ll be able to see the AP PIN as well as generate a new one and save it Alternatively you may choose to utilize a WPS PIN provided by your wireless adapter and enter it in the router in the same part of the user interface click Wireless Management AP Setup WPS and enter adapter PIN for Wireless Host PIN Code 7 2 5 WDS Wireless Distribution System If you are using this router to spread the wireless ...

Page 9: ...not have the option of or be compatible in WDS wireless security For key parameters please refer to Wireless security settings Figure 7 7 Click on Wireless Management AP Setup WDS You may choose to click on AP Scan to scan for R2 select R2 in the window that appears and click on the connect button at the bottom of the list in this window The SSID name and MAC address of R2 will automatically be en...

Page 10: ...y enter the name and MAC address of R1 then click add Note Please make sure the channel matches in both routers Click on Wireless management AP Setup Basic check that channels are the same and change and save if necessary As there are sometimes compatibility issues between brands you may need to use Wireless G and not Wireless N Change settings in both routers In the netis router click on Wireless...

Reviews: