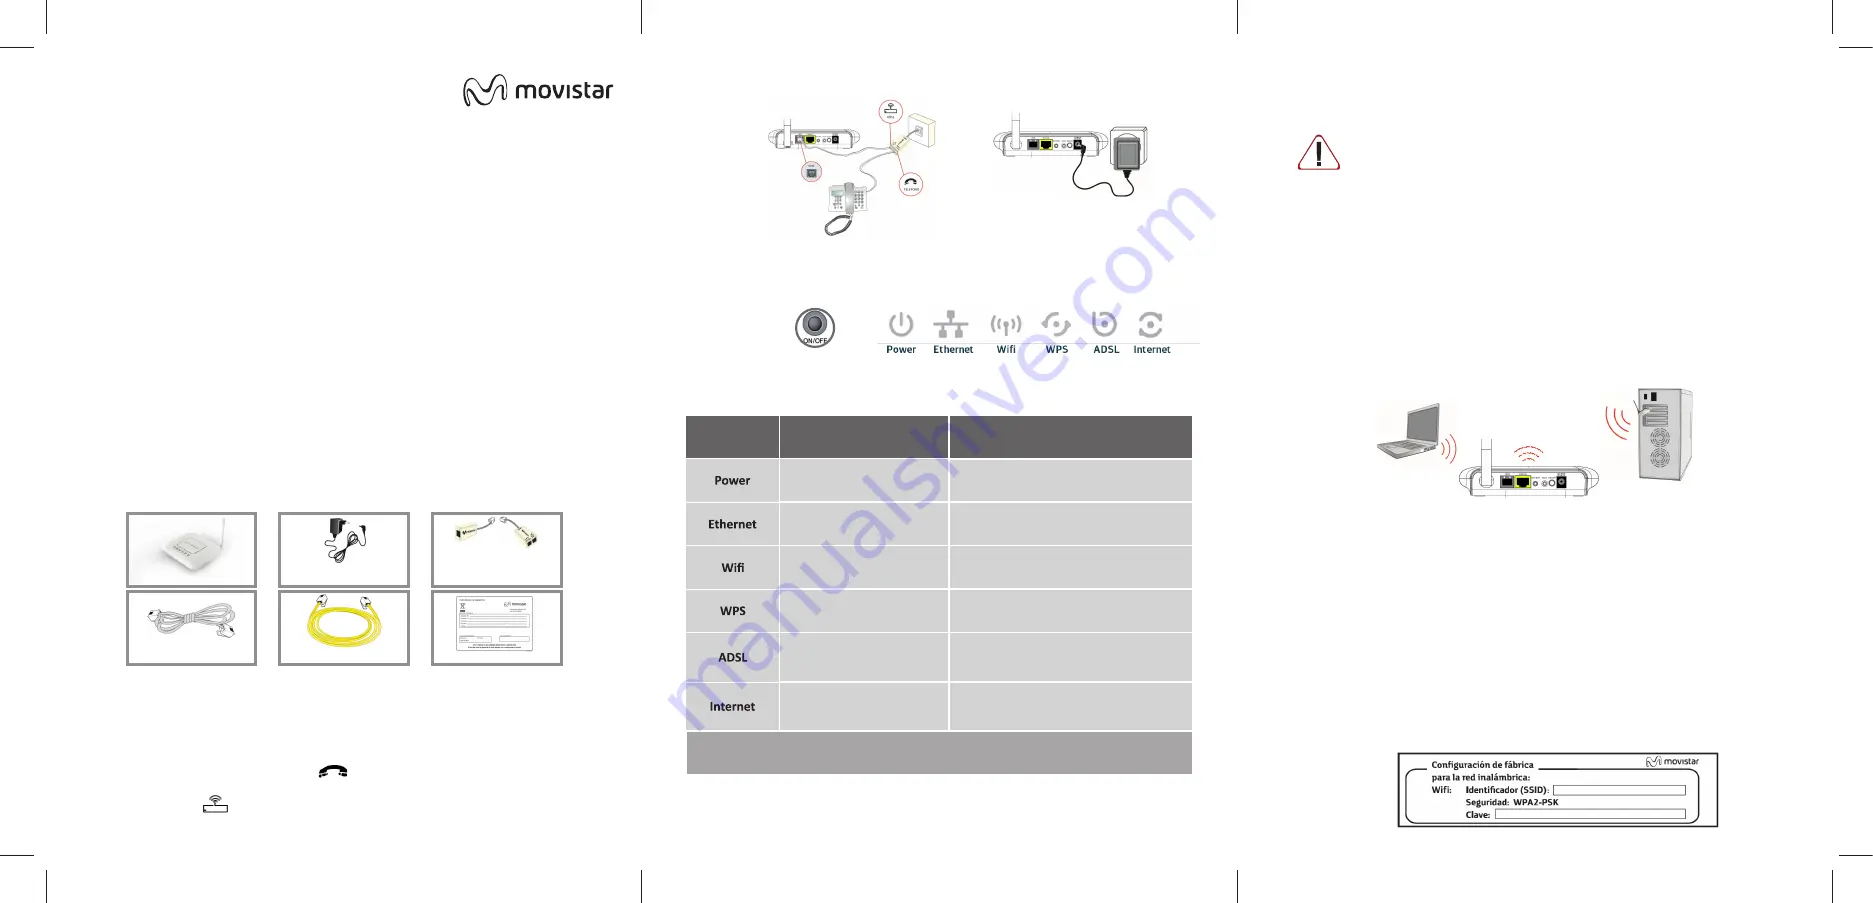
4
3
2
ADSL
R
outer
installation guide
(4)
Telephone line cable
(5) Ethernet
Cable
(6)
Guarantee card
(2)
Direct current adapter
(3)
Simple microfilter and
Microfilter with twin ADSL
and telephone line output
Routers supplied by Movistar are optimised for establishing an internet connection
without the need for installations or configurations.
This guide provides details of how to start your Internet connection. You can connect quickly
and simply. Follow the step-by-step indications.
Contents of the box
Start using your ADSL…
1.
Installation and connection
Connect the simple microfilter between another telephone terminal and another
household telephone line terminal.
.
2.
ON
Turn the ADSL Router on by pressing the switch on the rear panel to the ON position
Wait a few moments until the LEDs coincide with the following:
Movistar can automatically perform a remote update of your equipment’s software at any
time, especially when installing it for the first time, to offer you better
service and operation. During said process, Power, Ethernet, Wifi, WPS, ADSL and Internet
LEDs will cyclically flash green. A few minutes later, the LEDs will reach the status described
in table above, indicating the end of the process.
Warning:
never turn off the equipment or disconnect it from the mains whilst
you are performing said update as it could damage the system.
3.
Connect your computer
You can connect your computer to the router using an Ethernet cable or a wireless
network. You can also have a device connected to the router using an Ethernet cable
and others using a wireless network at the same time.
Wireless network connection
You may use the wireless connection whenever your computer is equipped with a
wireless adapter or has one installed. Your ADSL Router comes from the factory with
the wireless network enabled (Wifi LED on the front panel static green).
WPS quick connection
If you have a wireless client that supports WPS, you can establish the wireless
connection using this simple wireless setup method. Press the Wifi/WPS button on the
rear panel of the router for over five seconds and then press the client WPS button for
another 2 minutes.
Windows wireless client connection
You can search for available wireless networks. Select the network whose ID (SSID)
appears on your label on the underside of your router a and press
Connect
. Enter the
security key located on the router label.
IMPORTANT.
The router’s wireless security
key is WPA2-PSK and is in alphanumeric format. Make sure you enter said security key
as it appears on the label.
Connect the power cable (2) to the mains and the 12 V 1A jack on ADSL Router.
Turning on the router
(1) ADSL
Router
Connect the twin output microfilter (3) to the jack selected for connecting the router and
the phone to the jack with the symbol as shown in the figure.
Connect the grey telephone line cable (4) to the outlet on the twin microfilter (3) marked
with the symbol (or ADSL) and to the ADSL jack on the ADSL Router.
Turned off
Turned on (green)
Power status.
Ethernet connection status.
Wireless network status.
WPS connection status.
Connection established with the central
system. You will see a green flashing light
whilst establishing the connection.
An IP address has been assigned to the
router. You will see a flashing green
light when there is traffic.
Current status
LED
Meaning
Turned on (green)
Turned o
ff
Turned on (green)
Turned on (green)


