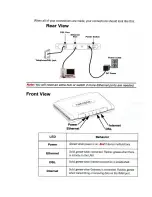
DO NOT LOSE THIS INFORMATION!
MODEM SETUP! The modem should already be configured. Only do this after the reset
button has been pushed or the system has been reset to the factory settings.
Do not push
the reset button or restore the system to the factory settings unless you have been told to
do so by the sisqtel.net help desk.
(Apple only)
When the modem is reset unplug the Ethernet cable from the computer then plug it
back in!
Open your web browser and type
http://192.168.1.254/
hit enter on the keyboard.
A window will pop up asking for a new password. Type in a password with 8 characters
or more (Make it easy and put your Phone number in). Another window pops up asking
for username and password. Username is
admin
and the password is the password that
was entered in the previous window.
Immediately click on home in the upper left corner.
Click on expert mode, Click ok
Click on Configure, Click on WAN, Click on ATM
VPI should be 0, VCI should be 35, Encapsulation should be RFC-1483 Bridged Ethernet
(choose form drop down menu)
Multiplexing should be set to LLC/SNAP
Click Submit
Click on WAN, Click on the box next to Enable Gateway option
Interface should be IP Address, Type in gateway address here
Click on Submit
Click on “RFC-1483 Bridged Ethernet vcc1”
Leave “Enable Interface” checked
Uncheck Obtain IP Address Automatically
Enter Ip Address and IP Netmask (Subnet mask)
Leave Address Mapping (NAT) checked
Leave Admin Disabled in Restrictions
Click on Submit
Click on advanced
Click on DNS
Enter “sisqtel.net” for domain name
Enter 208.19.107.240 for the primary DNS Server Address
Enter 216.163.120.19 for the secondary DNS Server Address
Click on Submit
Click on Triangle with exclamation mark in the upper right hand corner save and restart
the modem
DSL and Internet light should come on in about 2 minutes
(For Apple only) Take the Ethernet Cable out and Put it back in, re-enter the Address!
A login window should pop up.
Sign in user admin as the user and your password
Status of DSL should be up
Click on “Status Details”
Click on Run Diagnostics. Everything should pass except for the 2 that say warning.
This is normal as our equipment does not support these functions.
Summary of Contents for Netopia 2240N-VGx
Page 2: ......


