Chapter 9: Tools
Maintenance Tools
309
3
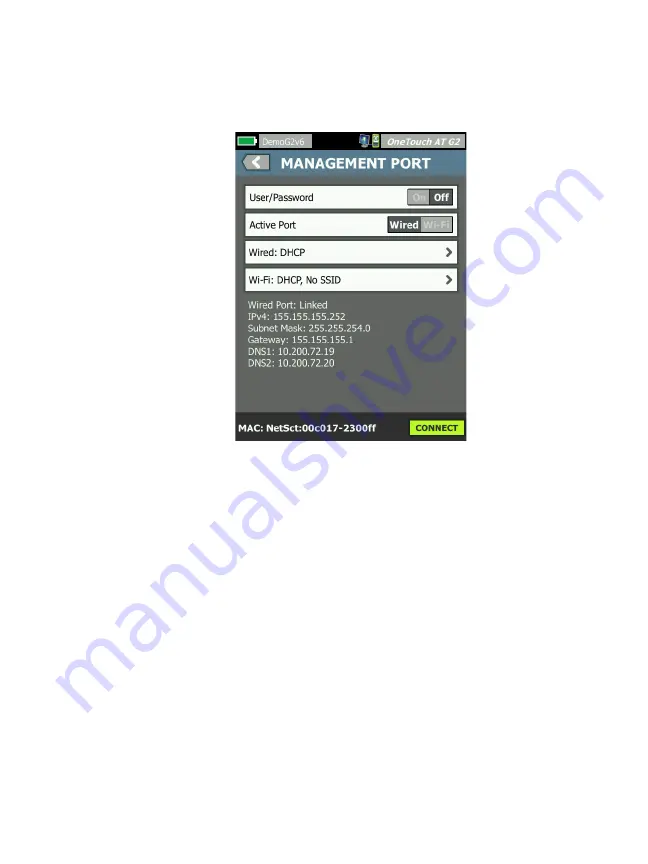
Scroll down to the Maintenance Tools section and tap
Management Port
. The management port screen is displayed.
Figure 135. Management Port Screen Linked Wired
4
On the
Active Port
button
,
tap
Wi-Fi.
5
Tap the
Wi-Fi
button.
6
Tap the
Address
button, then tap
DHCP
or
Static
.
Selecting Static will show additional selections:
IP
, Subnet
Mask
,
Gateway
,
DNS1
, and
DNS2
. You must provide a static IP
address and a Subnet Mask.
7
Tap the
SSID
button.
8
Tap an
SSID
from the list of available SSIDs.
9
Tap the
Security
button. It will take you to the Security screen.
10
Tap the
Type
button if you want to change the current
setting.
If you change the security type, additional selections will be-
come available. These additional selections will vary depend-
Summary of Contents for OneTouch AT G2
Page 48: ...OneTouch AT and OneTouch AT G2 User Manual 32 ...
Page 58: ...OneTouch AT and OneTouch AT G2 User Manual 42 ...
Page 133: ...Chapter 5 User Tests Web HTTP Test 117 Figure 55 Web HTTP Test Results ...
Page 176: ...OneTouch AT and OneTouch AT G2 User Manual 160 ...
Page 182: ...OneTouch AT and OneTouch AT G2 User Manual 166 ...
Page 207: ...Chapter 7 Wired Analysis 191 ...
Page 208: ...OneTouch AT and OneTouch AT G2 User Manual 192 ...
Page 224: ...OneTouch AT and OneTouch AT G2 User Manual 208 Figure 87 AP Details ...
Page 291: ...Chapter 9 Tools Testing Tools 275 Figure 118 Wi Fi Network Validation Results Tab ...
Page 334: ...OneTouch AT and OneTouch AT G2 User Manual 318 ...
Page 356: ...OneTouch AT and OneTouch AT G2 User Manual 340 ...
Page 358: ...OneTouch AT and OneTouch AT G2 User Manual 342 2 Scroll down to the File Tools section ...
Page 370: ...OneTouch AT and OneTouch AT G2 User Manual 354 ...
Page 374: ...OneTouch AT and OneTouch AT G2 User Manual 358 ...
Page 382: ...OneTouch AT and OneTouch AT G2 User Manual 366 ...
Page 395: ...379 Notes ...
Page 396: ...OneTouch AT and OneTouch AT G2 User Manual 380 Notes ...


