,QVWDOOHU·V*XLGH
&KDSWHU
&RQQHFWLQJWKH
1HW6FUHHQ
WRWKH1HWZRUN
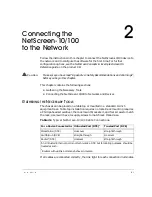
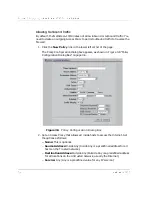
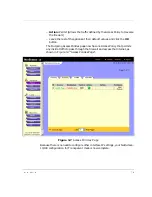
Follow the instructions in this chapter to connect the NetScreen-10/100 device to
the network and to configure the software for the first time. For further
configuration options, see the NetScreen Concepts & Examples ScreenOS
Reference guide, on the product CD.
This chapter contains the following sections:
• Gathering the Necessary Tools
• Connecting the NetScreen-10/100 to Networks and Devices
*
$7+(5,1*
7+(
1
(&(66$5<
7
22/6
The chassis can be placed on a table top or mounted in a standard 19-inch
equipment rack. Table top installation requires no tools. Rack mounting requires
a Phillips-head screwdriver, the rack mount bracket kit, and four screws to match
the rack. Users will have to supply screws to match rack thread size.
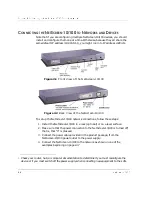
Table 2-1 Typical NetScreen-10/100 Cable Connections.
If all cables are connected correctly, the link light for each connection illuminates.
Caution
Make sure you have read “Appendix A: Safety Recommendations and Warnings”,
before you begin this chapter.
For a Device Connected to: Untrusted Port (DTE)
*
Trusted Port (DCE)
Workstation (DTE)
crossover
straight-through
Switch/Hub (DCE)
straight-through
crossover
Router
§
(DTE)
crossover
straight-through
*
An Untrusted Ethernet port is not technically a DTE but for cabling purposes, should be
treated as such.
§
Routers with uplink ports may behave in reverse.
Summary of Contents for NetScreen-10 Series
Page 1: ...1 76 5 1 QVWDOOHU V XLGH 9HUVLRQ 3 1 5HY...
Page 4: ...LY 1HW6FUHHQ...
Page 14: ...KDSWHU DUGZDUH DQG 6RIWZDUH HVFULSWLRQ 1HW6FUHHQ...
Page 20: ...KDSWHU RQQHFWLQJ WKH 1HW6FUHHQ WR WKH 1HWZRUN 1HW6FUHHQ...
Page 38: ...KDSWHU RQILJXULQJ WKH 1HW6FUHHQ IRU WKH LUVW 7LPH 1HW6FUHHQ...
Page 44: ...SSHQGL 6DIHW 5HFRPPHQGDWLRQV DQG DUQLQJV 1HW6FUHHQ...
Page 48: ...QGH 1HW6FUHHQ...


