&KDSWHU&RQQHFWLQJWKH1HW6FUHHQWRWKH1HWZRUN
1HW6FUHHQ
&
211(&7,1*
7+(
1
(7
6
&5((1
72
1
(7:25.6
$1'
'
(9,&(6
Note that if you are configuring multiple NetScreen-10/100 devices, you should
install and configure them one at a time. Otherwise, because they all share the
same default IP address (192.168.1.1), you might run into IP address conflicts.
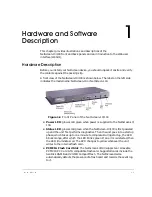
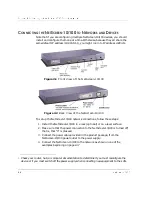
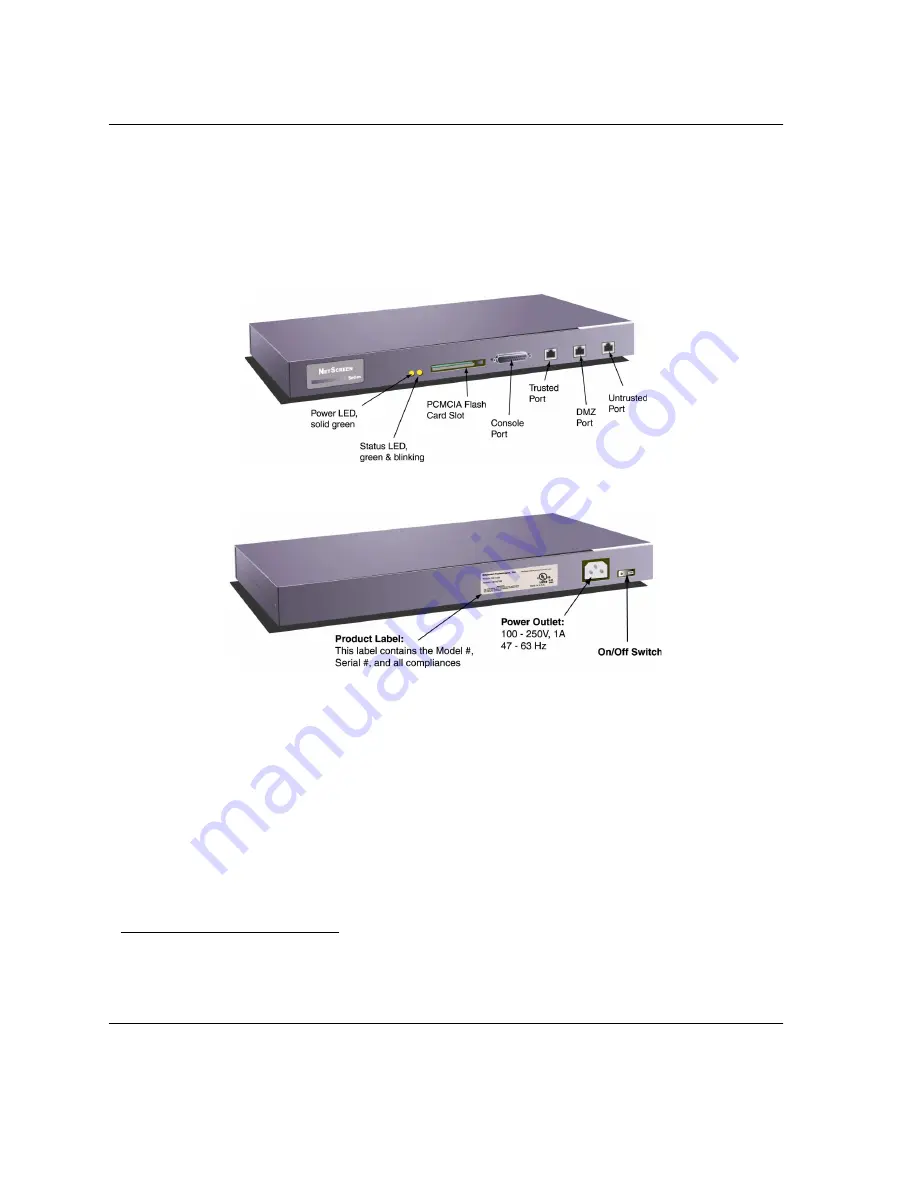
Figure 2-1 Front View of the NetScreen-10/100
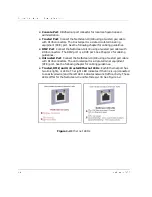
Figure 2-2 Back View of the NetScreen-10/100
To set up the NetScreen-10/100 network connections, follow these steps:
1. Install the NetScreen-10/100 in a rack (optional) or on a level surface.
2. Make sure that the power connection to the NetScreen-10/100 is turned off;
that is, that “0” is pressed.
3. Connect the power cable provided in the product package, from the
NetScreen-10/100 power outlet to the power supply.
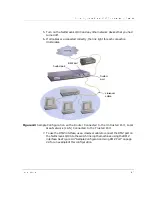
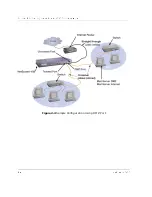
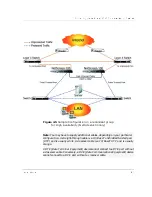
4. Connect the NetScreen-10/100 to the network as shown in one of the
examples beginning on page 2-3.
1
1.
Check your router, hub, or computer documentation to determine if you must reconfigure the
device or if you must switch off the power supply when connecting new equipment to the LAN.
Summary of Contents for NetScreen-10 Series
Page 1: ...1 76 5 1 QVWDOOHU V XLGH 9HUVLRQ 3 1 5HY...
Page 4: ...LY 1HW6FUHHQ...
Page 14: ...KDSWHU DUGZDUH DQG 6RIWZDUH HVFULSWLRQ 1HW6FUHHQ...
Page 20: ...KDSWHU RQQHFWLQJ WKH 1HW6FUHHQ WR WKH 1HWZRUN 1HW6FUHHQ...
Page 38: ...KDSWHU RQILJXULQJ WKH 1HW6FUHHQ IRU WKH LUVW 7LPH 1HW6FUHHQ...
Page 44: ...SSHQGL 6DIHW 5HFRPPHQGDWLRQV DQG DUQLQJV 1HW6FUHHQ...
Page 48: ...QGH 1HW6FUHHQ...

